Offline copy

Lacuna Docs

Last updated November 13, 2026 · For Lacuna 2.9.4

This copy holds every page as it stood on that date. Videos play from the web, so each one has a link. The newest copy is always at docs.lacuna.pub.

Getting Started with Lacuna

docs.lacuna.pub/getting-started/

Lacuna turns your finished manuscript into a book that is ready to publish. Import your Word document, choose one of 32 pre-made styles, and generate an EPUB and a print-ready PDF for Amazon KDP, IngramSpark, Apple Books and other stores. Lacuna runs on your own computer: Windows, Mac or Linux.

Try it with your own book. The trial is unlimited and has every feature, so you can format your whole book before you buy. Paying unlocks generating your final files: $149, once, with every update included.

Download Lacuna for Windows, Mac or Linux · See pricing

Watch the Lacuna masterclass

Watch on YouTube ↗

A tour of the whole app, from importing a manuscript to generating the finished files.

How to format your book in four steps

1. Import your manuscript

Click Import Your Manuscript on the dashboard and choose your Word document (.docx). Every line set to Heading 1 becomes a section, and your text, pictures, footnotes and links come with it.

2. Arrange your sections

Your sections are listed in the sidebar. Drag them into order, rename them, and add front and back matter such as a dedication, a table of contents or an About the Author page.

3. Choose your book’s style

Pick one of 32 pre-made styles, then make it your own: fonts, section titles, drop caps, ornamental breaks, page layout and more. The preview shows your book on e-readers and in print as you work.

4. Generate your EPUB and print-ready PDF

Open Generate and choose Generate E-Book for your EPUB, or Generate Print-Ready PDF for your paperback or hardcover.

What you need

  • A computer running Windows, Mac or Linux.
  • Your manuscript as a Word document (.docx). Google Docs, LibreOffice and Pages can all save one.

Questions

Is Lacuna free?

Lacuna is free to download, and the trial has every feature with no time limit: import your manuscript, style it, and preview it on e-readers and in print. You pay once, $149, when you are ready to generate your final files. See the trial and the full version.

Is Lacuna a subscription?

No. You pay once and keep every update. See pricing and plans.

How does Lacuna format my manuscript?

It reads the headings in your Word document to split it into sections, then sets every section in the style you choose. You change the look in one place and the whole book follows. See best practices for importing.

Can I get my book out of Lacuna?

Yes. Generate an EPUB, a print-ready PDF or a Word document (DOCX) from the Generate menu, as often as you like.

Start formatting your book

Download Lacuna for Windows, Mac or Linux and import your manuscript. Format the whole book in the trial; pay once, $149, when you are ready to publish.

Importing Your Manuscript

docs.lacuna.pub/getting-started/import-word-document/

Import your finished manuscript as a Word document (.docx) and Lacuna turns it into a book: every section in place, your text, pictures and notes carried across, and the whole book set in the style you choose. Lacuna is book formatting software for Windows, Mac and Linux that makes an EPUB and a print-ready PDF from your manuscript.

What it does
Makes a new book from your manuscript, with a section for every Heading 1.
Where to find it
Import Your Manuscript on the dashboard, the screen Lacuna opens on.
Works with
Word documents (.docx), from Microsoft Word, Google Docs, LibreOffice and other word processors.
Before you start
Set your section titles to Heading 1 in your Word document. Best Practices for Importing Your Manuscript shows how.

How to import your manuscript

  1. Click Import Your Manuscript on the dashboard.
  2. Click the box under Manuscript File and choose your Word document (.docx), or drop it on the box.
  3. Type your book’s title in Book Title, and your name under Author Information. Subtitle, Middle Name and Last Name are optional.
  4. Check the Language: it is the language your book is written in.
  5. Choose a Chapter Section Type. Numbered counts your chapters for you (Chapter 1, Chapter 2) and keeps their subtitles. Unnumbered keeps your chapter titles exactly as you wrote them. See chapter types.
  6. Click Import Manuscript.

Your book opens in the editor, with its sections in the sidebar on the left and a preview on the right.

What gets imported

Here is what Lacuna takes from your manuscript, and what you set in Lacuna instead.

Lacuna imports from your Word document

Your words and your book’s structure

  • A section for every Heading 1, with its subtitle
  • Front and back matter, typed by their titles (Copyright, Dedication, Prologue, Epilogue, About the Author and more)
  • Subheadings (Heading 3 and below)
  • Bold, italic, underline, strikethrough, small caps, superscript and subscript
  • Centered, right-aligned and justified paragraphs
  • Bulleted and numbered lists, nested levels included
  • Tables, with their header row
  • Footnotes and endnotes
  • Pictures, with their alt text, in the book’s image library
  • *, ~ ~ ~, ### and --- as ornamental breaks
  • Page breaks
  • Links (in Microsoft Word, made with Insert, then Link)
  • Paragraphs set to Quote or Intense Quote, as blockquotes
  • Drop caps, on the paragraphs you gave them (in Microsoft Word, made with Insert, then Drop Cap)

You style in Lacuna

Your book’s style sets these, so every section matches

  • Fonts and font sizes
  • Line spacing and first-line indents
  • Headers, footers and page numbers
  • The table of contents (Lacuna makes its own)
  • How drop caps look

Section breaks in your Word document are ignored.

Lacuna also adds a Title Page, a Copyright page and a Contents page, unless your Word document already has them. Its title page uses the title and name you typed.

To see every item above in a real manuscript, download the Lacuna Import Example and import it.

Drop caps from your Word document

Lacuna puts a drop cap on every paragraph you gave one in Microsoft Word. In each section, the first is that section’s drop cap, and every one after it is another drop cap. Lacuna styles them all the same way, in your book’s style.

To put them in your Word document, see how to add drop caps in your Word document. To style or move them, see drop caps.

How to check your import

Read down the sections in the sidebar:

  • Every section title is there. With Numbered chapters, each chapter shows its number and subtitle, such as 1. The Bilberry Weeks.
  • Nothing extra. A section named after a line of your text means that line was set to Heading 1. A section called Untitled at the top is usually a title page from your Word document: Lacuna made its own, so you can delete it.
  • Nothing missing. A missing section means its title was not set to Heading 1, so its text joined the section before it.

How to fix sections after importing

You can fix everything in Lacuna, without going back to your Word document:

  • Rename, move or delete a section from the sidebar. See manage book sections.
  • Join two sections: select both in the sidebar, right-click, and choose Merge 2 Sections.
  • Split a section: click in the text where the new section should start, open Breaks in the editor toolbar, and choose Split Section.
  • Add a section the import missed. See how to add a section.

If many sections are wrong, fix the headings in your Word document and import it again. To add another Word document to a book you already have, open Add New Section(s) at the foot of the sidebar and choose Import From Manuscripts (*.docx).

Questions

Where do I find Import Your Manuscript?

On the dashboard, the screen Lacuna opens on. If a book is open, open the File menu and choose Close Project to get back to it. To add a Word document to the book that is open, use Add New Section(s), then Import From Manuscripts (*.docx).

My import is taking a long time

Pictures take the longest: each one is prepared for your book on the way in, so a manuscript with many large pictures takes longer than one that is mostly text. Pictures several megabytes each import faster if you shrink them first.

My sections aren’t right

Lacuna makes a section for every line in Heading 1. If a title is missing, set it to Heading 1; if there is an extra section, the line it is named after is set to Heading 1 by mistake. See common import mistakes.

How do I delete pages from a manuscript I imported?

Pages in Lacuna come from sections. Right-click a section in the sidebar and choose Delete, or select text in the editor and delete it.

Can I import a .doc, .odt or Pages file?

Save it as a Word document (.docx) first. Lacuna imports .docx files only.

Format your book with Lacuna

Download Lacuna for Windows, Mac or Linux and import your manuscript today. The trial is unlimited and has every feature, including all 32 pre-made styles, so you can format your whole book before you buy. Paying unlocks generating your final EPUB and print-ready PDF files: $149, once, with every update included.

Best Practices for Importing Your Manuscript

docs.lacuna.pub/getting-started/importing-best-practices/

Here is how to set up your Word document (.docx) so Lacuna imports it right every time, with every section in place: front matter, chapters and back matter. Lacuna finds each section by its heading, so it comes down to one rule: set every section title to Heading 1. Doing it now, in Microsoft Word, Google Docs or LibreOffice, saves you fixing sections later.

What it does
Every line in Heading 1 becomes a new section in Lacuna. A Heading 2 right under it becomes that section’s subtitle.
Where to set it
In Microsoft Word, the headings on the Home tab (Word calls them Styles). Check them in the Navigation Pane, on the View tab.
Works with
Word documents (.docx), saved from Microsoft Word, Google Docs, LibreOffice or any other word processor.
Before you start
Download the example manuscripts at the end of this page to see a Word document set up the way Lacuna reads it.

How Lacuna reads your Word document

Lacuna goes by the heading you give each line, never by how it looks. A line set to Heading 1 starts a new section even if it is small and plain. A line typed in big, bold letters stays text if it is set to Normal.

Heading 1
Chapter 3
→
A new section titled with that line
Heading 1 with a colon
Chapter 1: The Bilberry Weeks
→
A section with a subtitle Chapter 1, subtitled The Bilberry Weeks
Heading 1Heading 2
Chapter 2, then The Llama and Beaver on the next line
→
A section with a subtitle The same result as the colon: Chapter 2, subtitled The Llama and Beaver
Heading 3
and smaller, anywhere in a section
→
A subheading never a new section
Heading 1
Copyright, Dedication, Prologue, Epilogue, About the Author
→
***
or ~ ~ ~, ###, --- on a line of its own
→
An ornamental break
Page break
→
A page break inside the section
¶ Normal
→
Your text

Page breaks and section breaks in your Word document never start a section. Only your headings do.

How to set up section titles in your Word document

The clip and steps show Microsoft Word. Google Docs and LibreOffice have the same headings: see Google Docs and LibreOffice.

  1. Click anywhere in a section title.
  2. Choose Heading 1 on the Home tab, in the row Microsoft Word calls Styles.
  3. Repeat for every section title: chapters, and front and back matter such as the dedication, prologue, epilogue and acknowledgments.

The Home tab highlights the heading of the line your cursor is in, so it always tells you what Lacuna will see. How Heading 1 looks in your document does not matter: Lacuna sets your titles in your book’s style when you import.

How to add a section subtitle

There are two ways, and Lacuna gives the same result for both.

  • On one line, with a colon. Type the title and subtitle on one Heading 1 line, such as Chapter 1: The Bilberry Weeks. Lacuna splits it at the colon.
  • On a line of its own. Put the title alone in Heading 1, such as Chapter 2, and the subtitle on the next line in Heading 2, such as The Llama and Beaver.

Lacuna's e-reader preview of Chapter 2 with its subtitle The Llama and Beaver

After importing, style subtitles on the section subtitles page.

How to add subheadings

Inside a section, set subheadings to Heading 3, and smaller ones to Heading 4 and below. Heading 3 and below are the only headings that never start a new section. See add subheadings to your book to style them after importing.

How to check your headings before you import

Microsoft Word’s Navigation Pane lists every heading in your document, in order. It is the quickest way to see your book the way Lacuna will. In Google Docs, open View, then Show outline; in LibreOffice, open the Navigator.

  1. Click the View tab in Microsoft Word.
  2. Tick Navigation Pane.
  3. Read down the list. Every section title should be there, at the left edge, and nothing else at that level.

Anything at the left edge that is not a section title will become a section of its own. A section title missing from the list will join the section before it.

Common import mistakes

Heading 1 on a line that is not a title

This is the most common mistake. A line of ordinary text is set to Heading 1, often because it was pasted from somewhere else or Heading 1 carried on from the title above. It can look exactly like the text around it, so you only find it on the Home tab or in the Navigation Pane.

Lacuna's section list after importing: They fell silent again. is a section of its own between Chapters 5 and 6

To fix it: click the line in your Word document, choose Normal on the Home tab, and import again. Or fix it in Lacuna: select the extra section and the one before it, right-click, and choose Merge 2 Sections.

A title that looks like Heading 2 but is Heading 1

A title made to look smaller is still set to Heading 1, so Lacuna makes it a section. That is right for a section title. If the line is really a subtitle or a subheading, set it to Heading 2 or Heading 3 instead of changing its size.

A table of contents in your Word document

Leave the table of contents out of your Word document, whether you typed it or Microsoft Word made it. Lacuna makes one for you, with page numbers in your print book and links readers can tap in your e-book. It updates itself as you add, move and rename sections, and you choose how it looks: leader dots, subheadings, chapter numbers and more. A table of contents from your document can do none of that.

To fix it: delete the table of contents from your Word document before you import. Then set up Lacuna’s on the table of contents page.

A title typed as bold or large text

A title set to Normal and made bold or large looks like a heading, but Lacuna reads it as text, so the section joins the one before it.

To fix it: set the line to Heading 1.

A title page before your first heading

Lacuna makes your title page from the title and author you type when you import. A title page in your manuscript, before the first Heading 1, arrives as an extra section called Untitled. Leave the title page out of your Word document. If it is already there, delete the Untitled section after importing. The Pawsitively Sabotaged example below has one, so you can see it happen.

To design your title page, use Lacuna’s Title Page Designer: place your title, name and artwork exactly where you want them, and the page looks the same on every e-reader and in print.

Eight or more empty lines in a row

Eight or more empty paragraphs in a row start a new section. If you only meant to leave space, delete the empty lines.

Ornamental breaks and page breaks

Type ***, ~ ~ ~, ### or --- on a line of its own, and Lacuna turns it into an ornamental break. Every ornamental break in your book then takes the same look, which you change in one place.

A page break stays a page break in your book. It never starts a new section, so you do not need one before each title: every section already starts on a new page.

How to add drop caps in your Word document

The clip and steps show Microsoft Word.

  1. Click in a paragraph that should open with a drop cap.
  2. Choose Insert, then Drop Cap, then Dropped.
  3. Repeat for every paragraph that should open with one, each chapter’s first paragraph included.

In each section, the first drop cap is where that section’s drop cap goes, and every one after it is another drop cap. How they look in your document does not matter: Lacuna sets them in your book’s style when you import. See drop caps.

Google Docs and LibreOffice don’t keep drop caps in a Word document. Add those in Lacuna after you import, from each paragraph’s paragraph menu.

Download the example manuscripts

Two Word documents set up the way Lacuna reads them. Open one in Microsoft Word with the Navigation Pane showing (or in Google Docs or LibreOffice), then import it and compare.

  • Pawsitively Sabotaged (example): a short mystery by Melissa Erin Jackson, shared with her permission. Titles in Heading 1, subtitles both ways, a few Heading 3 subheadings and her ~ ~ ~ ornamental breaks.
  • Lacuna Import Example: a short nonfiction manuscript. Each section explains one thing Lacuna imports and contains it: front matter, subtitles, subheadings, bold and italic, lists, a table, a footnote, a picture, ornamental breaks and page breaks, a link and a blockquote.

Google Docs and LibreOffice

Lacuna imports Word documents (.docx). Both programs save one, and their headings carry across.

  • Google Docs: set titles to Heading 1 in the menu on the toolbar that shows Normal text, and check them with View, then Show outline. Save with File, then Download, then Microsoft Word (.docx).
  • LibreOffice: set titles to Heading 1 in the box at the left of the toolbar, and check them in the Navigator. Save with File, then Save As, choosing the Word (.docx) format.

Questions

Do I need to use styles in Microsoft Word?

Only for your headings. Set every section title to Heading 1, and subtitles and subheadings to Heading 2 or Heading 3. Your text can stay in Normal: Lacuna sets its look from your book’s style.

How do I add a chapter subtitle?

Put it after a colon on the title’s Heading 1 line, or on the next line in Heading 2. See how to add a section subtitle.

How does Lacuna split my manuscript into sections?

Each Heading 1 starts a new section, and so does a Heading 2 that begins with a section word such as Chapter, and eight or more empty lines in a row. Page breaks and section breaks do not. To change sections after importing, see manage book sections.

Will Lacuna import the links in my document?

Yes. Links made in Microsoft Word with Insert, then Link, come across as links. A few older documents keep links as field codes, which arrive as plain text; add those again in Lacuna with the link button.

Does Lacuna import OpenOffice or LibreOffice files?

Save the file as a Word document (.docx) first, with File, then Save As. Lacuna does not open .odt or .doc files.

Why won’t Lacuna recognize my Word document?

Lacuna opens only .docx files, so a .doc, .odt or .pages file is greyed out when you choose a file. Open it in Microsoft Word, Pages, Google Docs or LibreOffice and save it as a Word document (.docx).

Is there a manuscript template?

Yes: download the example manuscripts. Type over one, keeping its headings, or use them as a guide for your own.

How many words can Lacuna handle?

There is no limit on words or sections. Lacuna imports a whole novel in one go.

Try it with your manuscript

Download Lacuna for Windows, Mac or Linux and import your manuscript today. The trial is unlimited and has every feature, including all 32 pre-made styles, so you can format your whole book before you buy. Paying unlocks generating your final EPUB and print-ready PDF files: $149, once, with every update included.

Pricing and Plans

docs.lacuna.pub/getting-started/pricing/

One payment, no subscription. Try every feature free first: you only buy when you are ready to generate your final files. See the trial and the full version.

1 computer

$149 once

$149 per computer

For an author on one computer.

Best value

2 computers

$239 once

$119.50 per computer

Save $59

Your desktop and your laptop.

3 computers

$339 once

$113 per computer

Save $108

Every computer you write on.

Buy a license at lacuna.pub Try it free first

Every license includes

  • Every update, for good
  • Unlimited books, under any pen name
  • EPUB, PDF and DOCX for every store
  • Windows, Mac or Linux
  • Client work: format books for other authors
  • A new computer: move your license when you replace one

After you buy, see manage your Lacuna license to activate it, and Lacuna software updates to keep it current.

Questions

Is this a subscription?

No. Lacuna is a one-time purchase. No monthly fees, no yearly renewals, no surprise charges.

What’s your refund policy?

All sales are final. The trial has every feature and no time limit, so you can try Lacuna on your own book before you buy.

What if I get a new computer or reformat my computer?

Deactivate Lacuna on your old computer, then activate it on the new one with the same license. If you can no longer reach the old computer, email support@lacuna.pub and we’ll help you move your license.

Can I format books for other authors?

Yes. You can use your license to format books for clients. We can only give technical support to the license owner, not to the authors you format for.

How do I activate my license?

After you buy at lacuna.pub/pricing, you get your license key by email. In Lacuna, open Help, choose Activate License, and paste it in. There is nothing else to download.

Still have questions?

Email us at support@lacuna.pub and we’ll get back to you promptly.

Ask ChatGPT How to Use Lacuna

docs.lacuna.pub/getting-started/ask-chatgpt/

ChatGPT can and still will get things wrong. If a step doesn’t match what you see in Lacuna, open the docs page it links.

Lacuna’s docs are also published as AI-friendly files, so ChatGPT can answer any question you have about the app.

How to ask ChatGPT about Lacuna

  1. Open ChatGPT or Claude. Gemini, Grok and others work too.

  2. Copy the prompt below into the chat box and send it.

  3. Ask your question, such as “How do I add a drop cap to one section only?”

  4. Ask “Is there a video of that?” when you want to watch the steps. ChatGPT gives you a link to the video.

Copy the prompt

You are helping me use Lacuna, a desktop app for Windows, Mac and Linux that formats a finished manuscript into an EPUB and a print-ready PDF. I will ask you how to do things in it.

Lacuna's docs are at https://docs.lacuna.pub/ and are published for you to read. https://docs.lacuna.pub/llms.txt describes every docs page in a line. Each page is also a file, and the list of those files' addresses is at the end of this message.

Before you answer each question, even the first one, open https://docs.lacuna.pub/llms.txt with your web tool and choose the page that covers my question from its description. Then open that page's file, at its address in the list at the end of this message. Do this every time. Do not answer from memory or from search results: the docs change often and older copies are wrong. Only if you can't open a page's file, search the web for my question with site:docs.lacuna.pub and open the page you find. Answer from what the page says. If the page links to another page for what I asked, open that page's file too, from the list, and answer from it. Do not guess where a button or a setting is.

If more than one page covers my question, use the one whose heading matches my words most closely. When I say "every", "all" or "the whole book", I want the setting for the whole book, not one section's setting repeated.

If you cannot read any docs page at all, say so in one line first. Then tell me which menu below to look in and which docs page to check. Do not write steps you have not read.

Where things are in Lacuna. This is only to help you find the right docs page. The steps in your answer must come from the page itself, not from this list:
- Things you add to the text (images, tables, columns, grids, callout boxes, blockquotes, footnotes, links, breaks) are in the editor toolbar, above the text.
- The look of the whole book (every section title, every drop cap, indents, chapter numbers) is in the Edit Styles menu, in the header bar.
- The settings of one section only (its drop cap, indents, heading, print settings, section type) are in that section's Options menu: open the section and click Options at its top right.
- The setup of the printed book (trim size, margins, page numbers, headers and footers) is in the Print Settings menu, in the header bar.
- A book is made of sections, and each section has a type (title page, chapter, index). The type decides how the section behaves.

How to answer, in this order:
1. Start with the heading from the page's file that answers my question. In the file every heading is a link to itself: copy it as it is, text and link. If no one heading fits, give the page's title, linked to the address on the file's "source" line.
2. If a line that starts "▶ Video:" sits under that heading, copy it next, with its first link. Never write a video line without a link you copied from the page.
3. Then the steps: short, numbered, copied closely from the page, with the exact names of buttons and menus as the page writes them.

- Only give links you copied from the docs. Never build a link or a #heading yourself, and never link a .md or .txt file.
- If the docs don't cover my question, say so. Do not make up an answer.
- Lacuna has no AI features. Never tell me to use one.

The docs pages and their files:

Quick Start:
Getting Started: https://docs.lacuna.pub/getting-started.md
Import Your Manuscript: https://docs.lacuna.pub/getting-started/import-word-document.md
Import Best Practices: https://docs.lacuna.pub/getting-started/importing-best-practices.md
Pricing & Plans: https://docs.lacuna.pub/getting-started/pricing.md

Learn the Basics:
Ask ChatGPT: https://docs.lacuna.pub/getting-started/ask-chatgpt.md
Edit Book Metadata: https://docs.lacuna.pub/book-navigation/edit-book-metadata.md
Find & Replace: https://docs.lacuna.pub/book-navigation/find-replace-text.md
Search Elements: https://docs.lacuna.pub/book-navigation/search-elements.md
Manage Sections: https://docs.lacuna.pub/book-navigation/manage-book-sections.md
Choose New Style: https://docs.lacuna.pub/book-design/choose-book-themes-templates.md
Edit Styles Menu: https://docs.lacuna.pub/book-design/edit-styles-menu.md
Print Settings Menu: https://docs.lacuna.pub/book-design/print-settings-menu.md
Image Gallery: https://docs.lacuna.pub/use-the-editor/image-gallery.md
Save and Back Up: https://docs.lacuna.pub/book-navigation/save-and-back-up.md
Preview Your E-Book: https://docs.lacuna.pub/book-navigation/preview-ebook.md
Preview Print: https://docs.lacuna.pub/book-navigation/preview-print.md

Using the Editor:
Editor Toolbar: https://docs.lacuna.pub/use-the-editor/editor-toolbar.md
Keyboard Shortcuts: https://docs.lacuna.pub/use-the-editor/keyboard-shortcuts.md
Customize the Editor: https://docs.lacuna.pub/use-the-editor/customize-the-editor.md
Paragraph Menu: https://docs.lacuna.pub/use-the-editor/paragraph-menu.md
Color & Highlight Text: https://docs.lacuna.pub/use-the-editor/color-highlight-text.md

Book Structure:
Section Types: https://docs.lacuna.pub/book-structure/section-types.md
Chapter Types: https://docs.lacuna.pub/book-structure/chapter-types.md
Book Parts: https://docs.lacuna.pub/book-structure/book-parts.md
Book Volumes / Box Sets: https://docs.lacuna.pub/book-structure/book-volumes.md
Device-Specific Sections: https://docs.lacuna.pub/book-structure/device-specific-sections.md
Design Your Title Page: https://docs.lacuna.pub/book-structure/title-page-designer.md
Copyright Page: https://docs.lacuna.pub/book-structure/copyright-page.md
Dedication Page: https://docs.lacuna.pub/book-structure/dedication-page.md
Full-Page Images: https://docs.lacuna.pub/book-structure/full-page-images.md
Table of Contents: https://docs.lacuna.pub/book-structure/table-of-contents.md

Book Elements:
Images: https://docs.lacuna.pub/use-the-editor/add-images-to-book.md
Subheadings: https://docs.lacuna.pub/use-the-editor/add-subheadings-to-book.md
Links: https://docs.lacuna.pub/use-the-editor/add-links-to-book.md
Emojis: https://docs.lacuna.pub/use-the-editor/add-emojis-to-book.md
Text Conversations: https://docs.lacuna.pub/use-the-editor/add-text-conversations-to-book.md
Blockquotes: https://docs.lacuna.pub/use-the-editor/add-blockquotes-to-book.md
Handwriting: https://docs.lacuna.pub/use-the-editor/add-handwriting-to-book.md
Ornamental Breaks: https://docs.lacuna.pub/use-the-editor/add-ornamental-breaks-to-book.md
Page Breaks: https://docs.lacuna.pub/use-the-editor/add-page-breaks-to-book.md
Callout Boxes: https://docs.lacuna.pub/use-the-editor/add-callout-boxes-to-book.md
Grids: https://docs.lacuna.pub/book-design/grids.md
Columns: https://docs.lacuna.pub/book-design/columns.md
Lists: https://docs.lacuna.pub/use-the-editor/add-lists-to-book.md
Tables: https://docs.lacuna.pub/use-the-editor/add-tables-to-book.md
Line Rows: https://docs.lacuna.pub/use-the-editor/add-line-rows-to-book.md
Footnotes: https://docs.lacuna.pub/use-the-editor/add-footnotes-to-book.md
Endnotes: https://docs.lacuna.pub/use-the-editor/add-endnotes-to-book.md
Device-Specific Blocks: https://docs.lacuna.pub/use-the-editor/device-specific-blocks.md

Book Index:
Add an Index: https://docs.lacuna.pub/book-index/add-index-to-book.md
Manage Topics: https://docs.lacuna.pub/book-index/manage-index-topics.md
Add Topics in Bulk: https://docs.lacuna.pub/book-index/add-index-topics-in-bulk.md
Style Your Index: https://docs.lacuna.pub/book-index/style-your-index.md

Section Styling:
Section Options Menu: https://docs.lacuna.pub/book-design/section-options-menu.md
Section Style Settings: https://docs.lacuna.pub/book-design/section-style-settings.md
Section Print Settings: https://docs.lacuna.pub/book-design/section-print-settings.md

Editing Book Styles:
Presets: https://docs.lacuna.pub/book-design/presets.md
My Styles: https://docs.lacuna.pub/book-design/my-styles.md
Fonts: https://docs.lacuna.pub/book-design/fonts.md
Section Headings: https://docs.lacuna.pub/book-design/section-headings.md
Section Titles: https://docs.lacuna.pub/book-design/style-section-titles.md
Section Subtitles: https://docs.lacuna.pub/book-design/style-section-subtitles.md
Numbered Chapter Settings: https://docs.lacuna.pub/book-design/style-chapter-numbering.md
Chapter Heading Images: https://docs.lacuna.pub/book-design/chapter-heading-images.md
Drop Caps: https://docs.lacuna.pub/book-design/style-drop-caps.md
First Paragraph Styling: https://docs.lacuna.pub/book-design/style-first-paragraph.md
Justification & Hyphenation: https://docs.lacuna.pub/book-design/justification-and-hyphenation.md
Indentation: https://docs.lacuna.pub/book-design/style-indentation.md
Paragraph Spacing: https://docs.lacuna.pub/book-design/paragraph-spacing.md

Print Settings:
Body Text: https://docs.lacuna.pub/print-ready/body-text-typography.md
Page Numbering: https://docs.lacuna.pub/print-ready/page-numbering.md
Trim Sizes: https://docs.lacuna.pub/print-ready/trim-sizes.md
Page Margins: https://docs.lacuna.pub/print-ready/page-margins.md
Headers & Footers: https://docs.lacuna.pub/print-ready/headers-footers.md
Spread Alignment: https://docs.lacuna.pub/print-ready/spread-alignment.md
Background Images: https://docs.lacuna.pub/print-ready/background-images.md
Page Colors: https://docs.lacuna.pub/print-ready/print-page-colors.md
PrintedEdges.com Integration: https://docs.lacuna.pub/print-ready/printed-edges.md

Exporting Your Book:
Export EPUB: https://docs.lacuna.pub/publish-book/export-book-epub-file.md
Export Print-Ready PDF: https://docs.lacuna.pub/publish-book/export-print-ready-pdf.md
Export DOCX: https://docs.lacuna.pub/publish-book/export-docx-file.md

Managing Your License:
Trial vs Full: https://docs.lacuna.pub/account-licensing/lacuna-trial-vs-full-version.md
Manage License: https://docs.lacuna.pub/account-licensing/manage-lacuna-license.md
Updates: https://docs.lacuna.pub/account-licensing/lacuna-software-updates.md

Now reply only "Ready. What would you like to do in Lacuna?" and wait for my question.

How to Edit Your Book's Metadata

docs.lacuna.pub/book-navigation/edit-book-metadata/

Your book’s metadata is its title, authors, language, description and cover. Stores and e-readers read it to list your book, and Lacuna uses it on your Title Page and in your running heads.

How to open your book’s metadata

  1. Click your book’s title at the top of the sidebar.

  2. Choose a tab: Author & Title, Book Details or Cover Image.

You can also click Edit on your Title Page.

There’s no Save button: a change saves when you leave the field or pick from a list. To take one back, choose Edit › Undo, or press Ctrl/Cmd+Shift+Z.

How to add your book’s cover

  1. Open Cover Image.

  2. Drag your image onto Upload Cover Image, or click it to choose a file. To use an image already in your book, click Browse Existing Images.

  3. Describe your cover under Accessibility, for readers who use a screen reader.

Your cover is the first page of your e-book. Your e-book needs one before it will generate.

To change your cover, click Remove Cover, then add the new one.

How to set your language, description and categories

The Book Details tab.

Field What it's for
LanguageYour hyphenation, spellcheck and your e-book's language (below).
eBook ISBNYour e-book's metadata only. To show an ISBN in your book, type it on your Copyright page.
DescriptionYour e-book's description, so stores and e-readers describe your book correctly. Up to 2,000 characters.
CategoriesYour e-book's subjects, so stores and e-readers file your book correctly. Press Enter after each one.

What your book’s language changes

Language sets What happens
HyphenationYour print-ready PDF breaks words by your language's rules. English (U.S.) and English (GB) break words differently. See justification and hyphenation.
Your e-book's languageStores read it, and e-readers hyphenate your e-book by it.
SpellcheckThe editor checks your spelling in this language.
Spelled-out chapter numbers"One" and "Forty-Two" are written in your language.

Words you teach the Hyphenation Dictionary apply by language too: a word you fix for English (U.S.) applies to every book in English (U.S.).

English (U.S.) is the default. You can also choose English (GB), English (Canada), Spanish, French, Portuguese, Russian, German, Italian, Turkish, Polish, Dutch, Swedish or Danish.

How to set your title and author, and add contributors

The Author & Title tab.

Field What it's for
Book Title, SubtitleYour Title Page, your e-book's title and the Book Title in your running heads. The title is required.
Primary AuthorYour Title Page, your e-book's author and the Author Name in your running heads. The first name is required.
ContributorsUp to five more people (an editor, an illustrator, a translator), each with a role.
Series Name, Book Prefix, Book NumberYour series, shown on your Title Page ("Book 2") and in your e-book's metadata.

To add a contributor, click Add Contributor and type their name. Each one has a Role you can change, so stores and e-readers know who did what. Your Title Page lists their names after yours.

Questions

Where do I edit my book’s details?

Click your book’s title at the top of the sidebar.

How do I make a cover page?

Add your cover image on the Cover Image tab: it becomes the first page of your e-book. The page inside your book with its title and author is your Title Page.

Can Lacuna design my cover?

No. Lacuna formats the inside of your book. Make your cover in a design tool, then add it as an image.

Does Lacuna make a back cover?

No. Your print-ready PDF is the inside of your book. The printed cover (front, spine and back) is a separate file you make for your printer.

What are e-book categories for?

They go into your e-book’s metadata as subjects, so stores and e-readers file your book correctly. Type any you like and press Enter after each.

How to Find and Replace Text

docs.lacuna.pub/book-navigation/find-replace-text/

Search your whole book from the Search tab in the sidebar, or just the section you’re in with the editor’s find bar. Change a word everywhere at once, or one match at a time.

How to find text in your whole book

  1. Click Search at the top of the sidebar, or press Ctrl/Cmd+Shift+F.

  2. Type a word in the Search box. Every paragraph that holds it is listed under its section.

  3. Click a result to go to it.

The section opens at the match, and your open preview moves there too (the same editor and previewer sync as the sync shortcuts). Matches are highlighted in purple while the Search tab is open.

Search also looks in footnotes, endnotes, image captions and alt text, and tags those results [FOOTNOTE], [ENDNOTE], [IMAGE CAPTION] or [ALT TEXT]. Click Collapse All or Expand All to fold the list.

How to match case or whole words

Two buttons under the Search box narrow what counts as a match. Click one to turn it on and again to turn it off.

Choose To
Match CaseFind the same capitals only: "treat" no longer finds "Treat".
Match Whole WordFind the word on its own: "treat" no longer finds "treats".

Both also decide what Replace All changes.

How to replace text in your whole book

  1. Click the arrow beside the Search box (Show Replace).

  2. Type what to find in Search and the new words in Replace.

  3. Click the Replace All button beside it.

Every match in your book changes at once, in body text, footnotes, endnotes and captions. To remove a word everywhere, leave Replace empty.

Changed your mind? Choose Edit › Undo, or press Ctrl/Cmd+Shift+Z: the whole replace comes back in one step.

How to find and replace in one section

  1. Click Search in the editor toolbar, or press Ctrl/Cmd+F.

  2. Type a word. The bar counts the matches (“1 of 2”); press Enter or click the arrows to step through them.

  3. To replace, click the arrow at the left (Show Replace) and type the new words.

  4. Click Replace current to change this match and move to the next, or Replace All to change every match in this section.

The find bar finds a word whatever its capitals. To undo a replace here, click in your text and press Ctrl/Cmd+Z. Press Esc to close the bar.

Keyboard shortcuts

Press To
Ctrl/Cmd+Shift+FOpen the Search tab (Find in Project).
Ctrl/Cmd+Shift+HOpen the Search tab with Replace showing (Replace in Project).
Ctrl/Cmd+FOpen the find bar in this section (Find in Section).
Ctrl+H on Windows and Linux, ⌘ Cmd+⌥ Option+F on a MacOpen the find bar with Replace showing (Replace in Section).
EnterIn the find bar, go to the next match. In its Replace box, replace the current match.
EscClose the find bar, or clear the Search tab’s box.

The same commands are in the Edit menu: Find, Replace, Find in Project and Replace in Project. You can change any of these keys in keyboard shortcuts.

Questions

Can I replace one match at a time?

Yes, in a section’s find bar: Replace current changes the match you’re on and moves to the next. The Search tab only replaces every match at once, so click a result there to open its section first.

Can I search by preset?

Not with Search, which finds words. In the Elements tab, choose Custom Presets to list everything that uses a preset other than Default (see search elements).

Why didn’t Replace All change a section title?

Search lists section titles and alt text, but Replace All doesn’t change them. Right-click the section and choose Rename to change its title.

Why does the Search tab show fewer results than the find bar?

The Search tab counts paragraphs: a paragraph with the word in it twice is one result. The find bar counts every match.

How to Find Elements in Your Book

docs.lacuna.pub/book-navigation/search-elements/

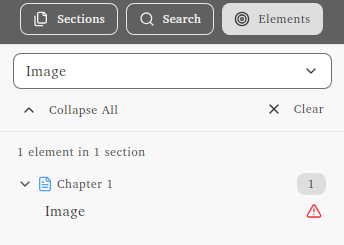
The Elements tab in the sidebar lists every element of a kind in your book: every image, subheading, footnote or ornamental break, section by section. Click one to go straight to it.

How to find elements

  1. Click Elements at the top of the sidebar, or press Ctrl/Cmd+Shift+L.

  2. Click Select Element Types and tick the kinds you want.

  3. Click a result. The editor and your preview go straight to that element.

Results are grouped by section, in book order, and each section shows its count. Tick as many kinds as you like; Clear starts over.

What you can find

Choose Each result reads
SubheadingsSubheading H2, with its level.
Header ImagesHeader Image: a section with its own heading image.
Background ImagesBackground Image: a section with a picture behind its printed pages.
TablesTable
BlockquotesBlockquote, or Handwriting.
Text ConversationsText Conversation
Callout BoxesCallout Box
GridsGrid
ColumnsColumns
Bullet ListsBullet List
Ordered ListsOrdered List
Footnotes/EndnotesFootnote or Endnote, one for each note number in your text.
ImagesImage
Ornamental BreaksOrnamental Break
Line RowsLine Rows
Page BreaksPage Break
LinksText Link or Image Link.
Device Specific BlocksEbook-Only Block or Print-Only Block.
Custom PresetsThe element’s name (Paragraph, Subheading H2, or Section for a section’s own presets), marked PRESET.
Letter SpacingParagraph, marked LETTER SPACING: paragraphs with their own letter spacing.

How to find pictures missing alt text

  1. Choose Images. A red warning marks each picture without alt text.

  2. Click one to go to it, and add its alt text.

The image gallery lists them too, under Missing alt text.

How to spot elements that use a preset

A result marked PRESET uses a preset other than the Default one. The mark shows whatever kind you searched for.

To list only those, choose Custom Presets.

What the marks on a result mean

Mark Means
Red warningThe picture has no alt text.
PhoneIt is inside an e-book only device-specific block.
Open bookIt is inside a print only device-specific block.
PRESETIt uses a preset other than the Default one. Shows whatever you searched for.
LETTER SPACINGIt has its own letter spacing. Shows while Letter Spacing is ticked.

Hover a mark to see what it means.

Questions

Can I search by presets?

Yes. Choose Custom Presets: it lists every element and section using a preset other than the Default one, each marked PRESET.

How do I find handwriting?

Choose Blockquotes. Handwriting results read Handwriting.

How to Manage Your Book's Sections

docs.lacuna.pub/book-navigation/manage-book-sections/

Every section of your book is in the sidebar on the left. Click a section to open it, drag it to move it, and right-click it for everything else.

How to select several sections

Select several sections, then right-click one of them: whatever you choose happens to all of them.

Hold And click
Ctrl/CmdEach section you want, one at a time. Click one again to leave it out.
ShiftThe last section of a run: everything from the one you clicked first to this one.

With several selected, the menu can delete, move, convert or set the device type of them all at once, merge them into one section, or put them in a new book part or volume (Create Part from Selected Sections).

Selecting doesn’t open a section. Click one without holding a key to open it.

Drag and drop

Everything in the sidebar can be dragged: a section, several selected sections, a book part or a whole volume.

  • A blue line shows where it will land.
  • A blue ring around a book part or volume puts it inside.
  • Red means it can’t go there.

Numbered chapters renumber themselves to match their new place.

Everything in the right-click menu

Right-click any section for everything you can do to it.

Choose To
RenameChange its title and subtitle.
Begin body matter hereStart your body matter at this section.
CloneCopy it, right below. Or copy it for the e-book only or print only.
Move to Top / Move to BottomMove it to the start or end of your book.
Convert ToChange its section type.
Set Device TypePut it in the e-book only, print only, or neither (Hidden).
Set Heading ImagePut a picture with its title.
Add New Section AfterAdd a new section right below it.
DeleteRemove it from your book.

Book parts and volumes have a shorter menu: Rename, Begin body matter here, Add New Section and Delete. A volume’s also has Add New Book Part, Import from Manuscript and Import from Other Lacuna Project (box sets).

Where your body matter begins

The bookmark in your sections marks where your book really begins: everything above it is front matter. Lacuna puts it at your first chapter, and it stays there until you move it.

  1. Right-click the section where your book really begins.

  2. Choose Begin body matter here. The bookmark moves beside it.

Where What the bookmark changes
PrintPage 1 starts here, when your page numbering uses Roman numerals for front matter.
E-bookE-readers open your book here.

Hover the bookmark to see what it means. When print and the e-book begin in different places, a purple bookmark marks where print begins and a green one where the e-book begins.

How to add a section

  1. Click Add New Section(s) at the bottom of the sidebar.

  2. Choose its type under Front Matter, Chapters or Back Matter, or choose Default Section.

Front matter goes in its usual place (a Dedication after your Copyright page, for example). In a book with volumes, or one that already has that section, it goes at the end of your book instead: drag it up to where you want it. Everything else goes at the end of your book. To put a section right where you want it, right-click the section above and choose Add New Section After.

The same menu imports more chapters from a Word document (Import From Manuscripts), copies sections from another book, and makes a book part or volume.

How to delete a section

  1. Right-click the section and choose Delete.

  2. Click Delete.

Changed your mind? Choose Edit › Undo, or press Ctrl/Cmd+Shift+Z.

Book parts and volumes

Book parts (purple) and volumes (blue) hold sections. Click the arrow beside one to fold it up.

  • To make one, choose Create New Book Part or Create New Volume in Add New Section(s), or select sections, right-click and choose Create Part from Selected Sections.
  • A part can go inside a volume, but not inside another part. A volume can’t go inside anything.
  • Deleting a part or volume keeps its sections.

Questions

How do I delete a section?

Right-click it and choose Delete.

Can I get a deleted section back?

Yes. Choose Edit › Undo, or press Ctrl/Cmd+Shift+Z.

Why did my new chapter go to the end?

New chapters go at the end of your book. Drag it where you want it, or right-click the section above and choose Add New Section After.

How do I rename a section?

Right-click it and choose Rename.

Why did my chapter numbers change?

Numbered chapters number themselves by their place in your book, so moving one renumbers the rest.

How to Choose a Style for Your Book

docs.lacuna.pub/book-design/choose-book-themes-templates/

A style sets your whole book’s look at once. Start from one of Lacuna’s premade styles, or use a style you saved from one of your own books. Try any of them on your book first: nothing changes until you apply.

What it does
Restyles your whole book in one click.
Where you find it
New Style in the header bar.
Two kinds
Premade Styles from Lacuna, and My Styles you save yourself.
Works in
EPUB, print-ready PDF and DOCX.

Premade styles or your own styles

Premade Styles My Styles
Who makes itLacuna: 31 ready-made looksYou, from a book you’ve already formatted
Best forStarting a new look fastGiving every book in a series the same look
What it setsHow every element and your body text lookWhatever you choose to save, even trim size and margins
Share itEvery Lacuna user has themExport it as a file and send it to another author

How to try and apply a premade style

  1. Click New Style in the header bar.

  2. Click a style. Your preview shows your book in it; nothing is saved yet.

  3. Click Apply Style to Book.

Changed your mind before applying? Click Cancel & revert or press Escape. After applying, choose Edit › Undo (Ctrl/Cmd+Shift+Z).

What a premade style changes, and what it keeps

It changes

  • Chapter titles, subtitles and numbers
  • Drop caps, first paragraphs and indents
  • Subheadings, blockquotes, breaks and other elements
  • Body text and running heads, in print

It keeps

  • Your text and images
  • Trim size, margins and page numbering
  • Your own preset groups
  • Each section’s own settings

To go back to Lacuna’s original look, choose Default under Starting points.

How to save and use your own style

  1. Format a book the way you like it.

  2. Click New Style, open My Styles, and click Save Current Book as Style. The first time, choose a folder for your styles with Set Folder…. Once you have saved styles, it’s under New.

  3. Name it and click Save Style.

To use it in another book, open My Styles, click it and click Apply Style to Book. See My Styles for choosing what a style carries, updating it and sharing it.

Questions

Which style should I choose?

Try a few on your own book. Your preview shows each one, and nothing changes until you click Apply Style to Book.

Can I save a style in Lacuna as a new style?

Yes. Save your book’s look in My Styles, as above.

How do I add a style to only one page?

A style is for the whole book. To give some sections a different look, use preset groups.

Do I need to apply styles in Word?

No. In your Word document, set each section title to Heading 1. Lacuna’s style does the rest. See Import Best Practices.

How to Use the Edit Styles Menu

docs.lacuna.pub/book-design/edit-styles-menu/

Edit Styles is where you change how your whole book looks: drop caps, indents, section titles, chapter numbers and more. Each item opens a panel, and the preview shows your changes as you make them.

Where to find the Edit Styles menu

Edit Styles is in the header bar, between New Style and Print Settings. The palette button in the strip down the right side opens the same menu.

When to use the Edit Styles menu

Use it for a change you want in every section: every drop cap, every chapter number, every section title. To change one section only, use that section’s Options menu.

What’s in the Edit Styles menu

The left column holds Paragraph Styling, Spacing, Notes and Manage. The right column holds Section Heading Settings, Chapter Type Settings and Parts & Volumes.

Choose To
Drop CapsStyle the large first letter of your sections.
First Line StylingStyle the first line of your chapter types, and of the text after a break or subheading.
Justification & HyphenationJustify your text and choose how words break, in the e-book and in print.
IndentationSet how far paragraphs indent, and whether the first one does.
Paragraph SpacingSet the space between paragraphs.
Endnote SettingsStyle your endnotes and choose where they print.
Preset ManagerSee every preset group and where each preset is used.
Copy Styles from Another BookBring styles, and sections if you like, from another Lacuna book.
Heading TitleStyle section titles.
Heading SubtitleStyle section subtitles.
Heading SpacingSet the space above and below section headings.
Chapter Heading ImagesPut a picture with every chapter type’s title.
Numbered Chapter SettingsChoose how chapter numbers read and look.
Book Part SettingsNumber your book parts and choose their prefix (“Part”).
Volume SettingsNumber your volumes and choose their prefix.

The three Section Heading Settings are a quick way to edit the presets for your section titles, subtitles and the space around them.

Questions

Where do I change my book’s font?

Your body text’s font is in Print Settings › Body Text. Each heading panel, such as Heading Title, has its own Font row. See fonts.

How do I change the line spacing?

Set Line Spacing in Print Settings › Body Text. Edit Styles sets the space between paragraphs (Paragraph Spacing) and around section titles (Heading Spacing).

Where do I style blockquotes, tables and lists?

Not in Edit Styles. Click the pencil on one in your text and its own panel opens.

How do I add an index?

Not here. Click Open Index in the strip down the right side to open the Index panel and mark your topics, and add an Index section (Add New Section(s) › Back Matter › Index) where the index should print. See how to add an index.

How to Use the Print Settings Menu

docs.lacuna.pub/book-design/print-settings-menu/

Print Settings is where you set up your printed book: trim size, margins, page numbers, headers and footers, body text and more. Each item opens a panel beside your text, and the print preview shows your changes as you make them.

Where to find the Print Settings menu

Print Settings is in the header bar, between Edit Styles and Generate. The open-book button in the strip down the right side opens the same menu.

When to use the Print Settings menu

Use it for a print setting you want in your whole book: every page’s margins, every chapter type’s starting side, every footnote. To change one section only, use that section’s Options menu and choose Customize Print Settings. See section print settings.

Everything here shapes your print-ready PDF. Your EPUB is not affected, except by Justification & Hyphenation, which sets both.

What’s in the Print Settings menu

The left column holds Headers & Footers, Notes and Page Colors & Backgrounds. The right column holds Page Setup and Typography & Layout.

Choose To
Page LayoutsChoose what each header and footer shows, and make header and footer presets.
TypographySet the font, size, letter spacing, weight and transform of your header and footer text.
SpacingSet the space for the header and the footer.
BordersAdd a line under the header or above the footer.
Section Type OptionsHide or show headers and footers on chapter openings and on front matter.
FootnotesStyle how your footnotes print, and restart their numbers in each section.
Page ColorsSet the page background, text and border colors.
PrintedEdgesImport a PrintedEdges template, so your print-ready PDF carries your edge art.
Trim SizeChoose your book’s page size, or set your own.
MarginsSet the safe zone, the content zone, the header and footer bands, and bleed.
Page NumberingChoose where page 1 starts, and number your front matter in Roman numerals.
Chapter Type OptionsStart your chapter types on a right-hand page, and show or hide headers and footers on their first page.
Spread AlignmentKeep the lines on facing pages in step, and make facing pages end at the same height.
Body TextSet your body font, size and line spacing, and how printed lines break.
Widows & OrphansSet the fewest lines of a paragraph that may sit alone at the top or bottom of a page.
Justification & HyphenationJustify your text and choose how words break, in print and in the e-book.
WatermarkPaint a word such as DRAFT or CONFIDENTIAL behind every page, the first page of each section, or the first page only.

An item that reads Needs a fix has a problem the print preview found. Choose it and the panel opens on the fix.

Questions

How do I change the margins in Lacuna?

Click Print Settings, then Margins under Page Setup. See how to set your page margins.

Does Lacuna add page numbers?

Yes. Your print-ready PDF numbers every page. Page Numbering, under Page Setup, chooses where page 1 starts; Page Layouts, under Headers & Footers, chooses where the number prints. See how to number your book’s pages.

Where do I change my book’s font and line spacing?

In Body Text, under Typography & Layout: set Font, Size and Line Spacing and click Apply. See Body Text. Headings, headers and footers have their own fonts in their own panels.

Can I add a watermark?

Yes. Click Print Settings, then Watermark under Typography & Layout. Turn on Show watermark, type a word or pick one (DRAFT, CONFIDENTIAL, DO NOT COPY, SAMPLE), and choose where it shows. It prints only in your print-ready PDF. For a picture behind your pages, use a background image.

How to Save and Back Up Your Book

docs.lacuna.pub/book-navigation/save-and-back-up/

Your book is one Lacuna project file (.lacuna) that holds its text, images and styles. Save it with the Save button, let Auto Save save it for you, and turn on backups to keep dated copies in another folder.

How to save your book

  1. Click Save at the top right, or press Ctrl/Cmd+S.

  2. The first time, choose a folder and a name for your book.

You see It means
Save *You have changes that aren't saved yet (the icon turns amber).
SaveEverything is saved.
Last Saved at 2:41 PMThe end of the window's title: when you last saved.

If you close Lacuna or open another book before saving, Lacuna asks Save Changes? first.

How to turn on Auto Save

Auto Save saves your book for you every few minutes, whenever it has changes. New books start with it on, every 5 minutes.

  1. Turn on the Auto Save switch beside Save.

  2. Click the arrow beside the switch and choose how often, from 1 min to 1 hr.

Each book keeps its own Auto Save setting. The switch appears once you have saved a book for the first time.

How to save a copy under a new name

  1. Choose File › Save as, or press Ctrl/Cmd+Shift+S.

  2. Choose a folder and a new name.

You keep working in the new copy. The old file stays as it was when you last saved it.

How to turn on backups

Backups are dated copies of your book, kept in a folder you choose, so your book file is never your only copy.

  1. Click the cogwheel (Lacuna Settings) on the right of the editor.

  2. Under Project Backups, click Choose Folder… and pick a folder.

  3. Turn on the switch beside Backups are off.

Choose To
KeepSet how many copies of each book to keep: 1, 2, 3, 5, 10 or 25. The oldest is removed when a new one goes past it.
FrequencySet how often saving adds a copy: Every Save, or at most every 15 Minutes, 30 Minutes or 60 Minutes.

Backups work for every book you open. Lacuna also makes one when you open a book, and a save that changes nothing never adds one.

Pick a folder on another drive, so your copies survive if your main drive fails. Don’t pick a cloud-synced folder: two computers can overwrite each other’s copies.

How to restore a backup

  1. In Lacuna Settings, click Open next to Backup folder. Each book has its own folder there, named after its file.

  2. Find the copy you want. Its name ends in the date and time it was made: Pawsitively Sabotaged 2026-10-18 14-30-05.lacuna.

  3. Choose File › Open Project and open that copy.

  4. Choose File › Save as and save it with your books.

Lacuna won’t save over a copy inside the backup folder, where old copies are cleaned up. If you try, it says This is a backup copy and offers Save to Another Folder….

How to open your book again

Lacuna’s first screen lists your recent books under Projects. Double-click one, or hover it and click Open. For a book that isn’t listed, click Open Lacuna Project File.

With a book open, choose File › Open Recent Project or File › Open Project.

Questions

Does Lacuna save my book?

Yes, to your computer. Lacuna saves your book as a .lacuna file in the folder you choose, and Auto Save keeps saving it while you work.

Does Lacuna keep copies of my book on its site?

No. Your book is never uploaded: it stays in its file on your computer, and backups go to a folder on your computer that you choose.

Does Auto Save make backups?

Yes, when backups are on. Every save counts, whether you click Save or Auto Save does it, and Frequency decides how often one becomes a backup.

Why don’t I see the Auto Save switch?

It appears after you save a new book for the first time.

Why does my book say “Project no longer found”?

Its file was moved, renamed or deleted, or is on a drive that isn’t plugged in. Click Locate File and pick it where it is now.

Does removing a book from the list delete it?

No. The X on a recent book only takes it off the list; the file stays where it is.

How to Preview Your E-Book

docs.lacuna.pub/book-navigation/preview-ebook/

The preview on the right of the editor shows your book on a real e-reader. Pick a device, turn its pages, and see every change you make a few seconds later.

How to choose a device

  1. Click the device list at the top of the preview.

  2. Choose a device. Your book redraws in its frame.

Choose To see your book
Kindle TabletOn a Kindle tablet, in color.
Kindle E-reader B&WOn a black-and-white Kindle.
Apple iPhoneIn Apple Books on a phone.
Apple iPad 11-inchIn Apple Books on a tablet.
Kobo Clara BW B&WOn a black-and-white Kobo.
Kobo Clara ColourOn a color Kobo.
Nook Simple Touch B&WOn a black-and-white NOOK.
Android TabletIn Google Play Books on a tablet.
eBook PDF PreviewAs an e-book PDF: no page numbers, the same margins on every page, and links you can click.

Each device lays your book out the way that reader does, and black-and-white screens show it in gray. The print modes are at the bottom of the same list: see How to Preview Print.

Lacuna remembers the last device you used for each book.

How to turn pages

Hover the preview and click the Previous page or Next page arrow at its edge, or turn pages with your mouse’s scroll wheel.

Do this To
Click a section in the sidebarOpen its first page in the preview.
Click the open section againGo back to its first page.
Click the list button at the top right of the previewChoose any section. It opens in the editor too.
Go to previous Section / Go to next SectionJump to the section before or after (the arrows on each side of the list button).

How to change the reader settings

Readers choose their own font size, font and page color on their devices. Try their choices here: they change only the preview, never your e-book.

Click Font settings (Aa):

Choose To
Font SizeMake the text bigger or smaller: four sizes, from small to extra large.
Font FamilyRead in Charis SIL, Baskerville, EB Garamond, OpenDyslexic, TeX Gyre Pagella or Tinos.

Click Preview settings:

  • Page Color: Light, Dark or Sepia changes the color of the page in the preview. Choose Dark to check your book in dark mode. Your e-book is unchanged.
  • Show Edit Buttons: turn the edit buttons on or off.
  • Follow Along: turn the preview to the paragraph you click in the editor. See how to make the preview follow you.

How to use the edit buttons

Hover part of your book in the e-reader preview, such as a section title or a blockquote, and edit buttons appear on it. Click one to open that part’s style settings: the quickest way to restyle what you’re looking at.

  1. Hover the part you want to change in the preview.

  2. Click its button. Its settings open, and the preview shows your changes before you click Apply.

A section title has a button for each part of it:

Click To open
SpacingHeading Spacing: the space around the title.
ImageHeading Image: a picture above the title.
BackgroundHeading Background Image: a picture behind the title.
TitleHeading Title: the title’s font, size and look.
NumberNumbered Chapter Settings: the chapter number (numbered chapters only).
SubtitleHeading Subtitle: the subtitle’s font, size and look.

Other parts, such as blockquotes, lists and tables, show one Edit button. To hide the buttons, turn off Show Edit Buttons in Preview settings.

When the preview updates

The preview redraws about three seconds after you stop typing. Formatting, adding or moving something shows sooner. The spinner beside the device list turns while it redraws.

While a style panel is open, the preview shows your changes before you click Apply.

Preview looks stuck? Click the spinner (Force refresh device preview) to redraw it now.

How to make the preview follow you in the editor

Turn on Follow Along and the preview turns to the paragraph you click or move to in the editor, on an e-reader, in print or in the eBook PDF.

  1. Click Preview settings. On a print mode or the eBook PDF, it’s the gear beside the device list.

  2. Turn on Follow Along.

Typing never moves the preview: it follows when you click or move to another paragraph. Page through the preview freely; it follows you again at your next click in the editor. Follow Along is off each time you open Lacuna, and the whole-book spread view has no Follow Along, since the editor isn’t on screen there.

How to jump between the editor and the preview

Choose (Preview menu) Or press To
Show Editor Content in PreviewCtrl/Cmd+]Turn the preview to the paragraph your cursor is in. It flashes so you can spot it.
Show Preview Content in EditorCtrl/Cmd+[Move the editor to the first paragraph on the page the preview shows.

Clicking a search result moves both the editor and the preview to it. You can change these keys in keyboard shortcuts.

Questions

How do I sync the editor and the preview on Windows?

Turn on Follow Along in Preview settings and the preview follows the paragraph you click. For one jump, press Ctrl/Cmd+] to turn the preview to the paragraph your cursor is in, or Ctrl/Cmd+[ to move the editor to the page the preview shows. Both are in the Preview menu.

Why won’t my preview show next to the editor?

It’s hidden: click Toggle Preview Panel at the top of the menu on the right, or press Ctrl/Cmd+Shift+P. If it shows Device Incompatibility or Section Hidden, the section is set to print only or hidden: right-click it and change Set Device Type.

How do I make the Kindle preview bigger on the screen?

Make the Lacuna window bigger, or full screen: the device fills the preview’s height, up to 40% of the window’s width. The preview can’t be dragged wider. To make the text bigger, choose a larger Font Size in Font settings.

Why does my book look off-center in the preview?

Kindle, Kobo and NOOK don’t center a page top to bottom, so a title page sits near the top there; Apple Books and Google Play center it. The preview shows what each reader really does. In print, see How to Preview Print.

How to Preview Print

docs.lacuna.pub/book-navigation/preview-print/

Choose a print mode in the preview to see the pages of your print-ready PDF: your trim size, margins, headers and page numbers. Turn its pages, check its spreads, and draw guides on them.

How to choose a print mode

  1. Click the device list at the top of the preview.

  2. Choose a print mode, at the bottom of the list.

Choose It builds
Print - Single Section (Fast)One section at a time, quickly. Every section starts at page 1, sections don’t start on a right-hand page, and the contents page and index show no page numbers.
Print - Whole Book (Slower)Your whole book, so every page number is right, and so are the contents page, the index and right-hand starts. It takes longer on a long book.

Use the fast mode while you adjust settings, and the whole book to check before you export your print-ready PDF. The first time you choose the fast mode, a note lists what it leaves out: click Got it.

How to turn pages

Hover the page and click the Previous page or Next page arrow, or use your mouse’s scroll wheel. Click a section in the sidebar to open its first page.

Under the page Shows
Trim: 5" × 8"Your trim size. Click it to change it.
Page 4 of 5Where you are: in the section (fast mode) or in your book (whole book).

How to see your book as spreads

See your book the way a reader holds it: two facing pages at a time.

  1. In Print - Whole Book (Slower), click Open whole-book preview (the book button beside the page count).

  2. Turn spreads with the arrows, your scroll wheel, or the ← → keys. Close it with the X or Esc.

Spreads are the place to check spread alignment, running heads, and where your sections open.

How to use the print preview settings

Click Print preview settings (the gear beside the device list) and turn on a switch to check your pages. None of them reach your exported PDF. The gear turns blue while one is on.

Turn on To
Uniform MarginsGive every page the same left and right margin.
Page Side LabelsLabel each page Verso (Left) or Recto (Right).
Grayscale ModeSee colored text and images in gray, as a black-and-white printer prints them.

Follow Along, at the foot of the same menu, turns the preview to the paragraph you click in the editor: see how to make the preview follow you.

How to use margin guidelines

Margin guidelines draw your page’s zones on every preview page, so you can see where your margins land. They never print.

  1. Click Print preview settings (the gear beside the device list).

  2. Turn on a guide under Margin Guidelines.

Turn on To draw
Safe ZoneYour printer’s safe area (dark gray). Keep everything inside it.
Content ZoneYour margins: the box your text sits in (magenta).
Header & FooterThe bands your page numbers and running heads sit in (blue).

The Margin Guidelines button in the Print Page Margins panel turns on all three at once.

Questions

Why do my page numbers start over at every section?

You’re in Print - Single Section (Fast), which lays out one section at a time. Choose Print - Whole Book (Slower) to see your real page numbers; your exported PDF always has them.

Does the table of contents show page numbers?

Yes, in Print - Whole Book (Slower) and in your print-ready PDF. The fast mode can’t know where other sections land, so it shows none.

Why does my book look off-center on the page?

Print pages mirror their margins: the inside margin, by the spine, differs from the outside one, so the text sits to one side. Turn on Uniform Margins in Print preview settings to see every page with the same left and right margin.

How to Use the Editor Toolbar

docs.lacuna.pub/use-the-editor/editor-toolbar/

The editor toolbar sits above your text. Use it to format words, turn lines into headings and lists, add elements like images, callout boxes and tables, and search the section you’re in.

Where you find it
Above your text, in every section you type in.
Menus
A small arrow on a button means it opens a menu.
Shortcuts
Point at a button, or open a menu, to see its keyboard shortcut.
Select text for more
Text color and highlight appear when you select words.

The parts of the toolbar

The editor toolbar: Bold, Italic, Underline, Text Formatting, Paragraph & Headings and Insert Emoji; Lists; Add Image, Blockquote, Handwriting, Text Conversation, notes, Containers, Insert Table and Breaks; Insert Link; the three alignment buttons; Search, Undo and Redo

Format text

Button What it does
Bold, Italic, UnderlineEmphasis for the words you select.
Text FormattingA menu: Strikethrough, Subscript, Superscript and Small Caps.
Paragraph & HeadingsMakes a line body text (Paragraph) or a subheading (Heading 1 to Heading 6). See subheadings.
Insert EmojiOpens the emoji picker. It stays open so you can add several. See emojis.

Lists

Button What it does
ListsA menu: Bullet List and Ordered List. See lists.

Add elements

Button What it does
Add ImageUpload a picture, or choose one already in your book. See images.
BlockquoteSets a passage apart as a quote. See blockquotes.
HandwritingA handwritten look, for letters and notes. See handwriting.
Text ConversationTurns lines like “Name: message” into a text message conversation. See text conversations.
Insert footnote or endnoteA menu: Footnote and Endnote. See footnotes and endnotes.
ContainersA menu: Callout Box, Grid (2 to 4 cells side by side), Columns (2 or 3), Line Rows (blank lines to write on) and Device-Specific Block (e-book only or print only).
Insert TablePoint at the grid to choose rows and columns, then click. See tables.
BreaksA menu: Ornamental Break, Page Break and Split Section (everything after the cursor becomes a new section).
Button What it does
Insert LinkA menu: Insert Link (a web address), Insert Internal Link (another section of your book) and Insert Store Link (one link to your book in several stores). See links.

Alignment

Button What it does
Align Left, Align Center, Align RightAligns the line. Click the blue one again to go back to your book’s normal alignment.

Search, Undo and Redo

Button What it does
SearchFinds and replaces text in this section. See find and replace.
Undo, RedoShown only in very wide windows. Otherwise press Ctrl/Cmd+Z and Ctrl/Cmd+Y.

How to format text

  1. Select the words.

  2. Click a button, or open Text Formatting and choose one.

How to add an element from a menu

  1. Click where the element should go.

  2. Click the button, then choose from its menu. Grid and Columns open a picker when you point at them: choose how many. A new grid or set of columns starts with the paragraph you clicked in.

How to color or highlight text

Select words and a small menu appears above them, with more than the toolbar has: Text color, Highlight color, and under More actions, Add to Index and Remove Double Spacing. See color and highlight text and mark words for your index.

Questions

Can I use small caps for headings?

Yes. Select the words and choose Text Formatting › Small Caps. For every section title at once, open Edit Styles › Heading Title and choose Small Caps under Transform (shown when your font has small caps).

Where is text color?

Select the words. Text color and Highlight color are in the menu that appears above them.

Why can’t I see Undo and Redo?

They show only in very wide windows. Press Ctrl/Cmd+Z to undo and Ctrl/Cmd+Y to redo.

How do I justify text?

Justified text is set for the whole book. See justification and hyphenation.

Why is Device-Specific Block grayed out?

The section is already set to e-book only, print only or hidden, so a block inside it would change nothing.

Why is there no toolbar on my title page or table of contents?

Lacuna builds those sections for you, so they have their own settings instead. The same goes for full-page images, endnotes and the index.

How to Use Keyboard Shortcuts

docs.lacuna.pub/use-the-editor/keyboard-shortcuts/

Keyboard shortcuts run Lacuna’s commands without the mouse, from saving your book to adding a chapter or a blockquote. You can see every one, and change most of them, on the Hotkeys tab of Lacuna Settings.

How to see every keyboard shortcut

  1. Click Open Keyboard Shortcuts (the keyboard button in the side menu on the right), press F1, or choose Help › Keyboard Shortcuts.

  2. Lacuna Settings opens on Hotkeys, with every shortcut you can change, in groups. Click Editor at the top left to go back.

You also see a command’s shortcut beside it in the menus, in the Command Palette (Ctrl/Cmd+P), and when you point at a button in the editor toolbar.

How to change a keyboard shortcut

  1. Click the shortcut beside a command. It says Press shortcut…

  2. Press the keys you want. Lacuna keeps them right away and marks the row Custom.

Choose To
Reset to defaultGo back to Lacuna’s shortcut for that command (the arrow on a changed row).
Unbind shortcutLeave the command with no shortcut (the bin).
Restore defaultsPut every shortcut back. It shows once you’ve changed one.

Press Esc to stop without a change. If another command already uses those keys, Lacuna asks first: Reassign moves them to this command, Cancel leaves both as they were.

Every keyboard shortcut

The groups match the Hotkeys tab, so you can find any of these there to change it.

On a Mac, the Lacuna menu keeps Settings… on Cmd+, and Hide Lacuna on Cmd+H, so Replace in Section is Cmd+Option+F and Subscript is Cmd+Shift+, there. Cmd+Q quits, with the usual save prompt.

File

Press To
Ctrl/Cmd+NCreate Book from Scratch
Ctrl/Cmd+OOpen Project
Ctrl/Cmd+SSave
Ctrl/Cmd+Shift+SSave As

Edit

Press To
Ctrl/Cmd+Shift+ZUndo Project Change: a change to your book, such as a deleted section
Ctrl/Cmd+Shift+YRedo Project Change
Ctrl/Cmd+Shift+UShow History
Ctrl/Cmd+FFind in Section
Ctrl+H on Windows and Linux, ⌘ Cmd+⌥ Option+F on a MacReplace in Section
Ctrl/Cmd+Shift+FFind in Project
Ctrl/Cmd+Shift+HReplace in Project
Ctrl/Cmd+Shift+LFind Elements
Ctrl/Cmd+Shift+XIndex Selection: files the selected words in your index. With nothing selected, opens the Index panel

Copy Styles from Another Book and Open Hyphenation Dictionary have no shortcut until you give them one.

Sections

Press To
Ctrl/Cmd+Shift+AAdd Section: a Default Section
Ctrl/Cmd+Shift+IAdd Numbered Chapter
Ctrl/Cmd+Shift+JAdd Unnumbered Chapter

View

Press To
Ctrl/Cmd+Shift+ESection Explorer
Ctrl/Cmd+PCommand Palette
Ctrl/Cmd+Shift+PDevice Preview
Ctrl/Cmd+Alt/Option+ZZen Mode: buttons show only their icons
Ctrl/Cmd+=Zoom In
Ctrl/Cmd+-Zoom Out
Ctrl/Cmd+0Reset Zoom Level

Preview

Press To
Ctrl/Cmd+]Show Editor Content in Preview
Ctrl/Cmd+[Show Preview Content in Editor

Text Editing

These work while your cursor is in your text.

Press To
Ctrl/Cmd+ZUndo in Editor: your typing in this section
Ctrl/Cmd+YRedo in Editor
Ctrl/Cmd+KAdd/Edit Link
Ctrl/Cmd+Shift+NAdd/Edit Footnote
Ctrl/Cmd+Shift+MAdd/Edit Endnote
Ctrl/Cmd+Shift+CToggle Callout Box
Ctrl/Cmd+Shift+GInsert Grid
Ctrl/Cmd+Shift+OInsert Columns
Ctrl/Cmd+Shift+RInsert Line Rows: blank lines to write on
Ctrl/Cmd+Shift+DToggle Device-Specific Block
Ctrl/Cmd+Shift+BToggle Blockquote
Ctrl/Cmd+Shift+TToggle Text Conversation
Ctrl/Cmd+Alt/Option+←Text Conversation: Set as Receiver (Left)
Ctrl/Cmd+Alt/Option+→Text Conversation: Set as Sender (Right)
Ctrl/Cmd+Alt/Option+↑Text Conversation: Toggle Character Name
Ctrl/Cmd+Shift+KToggle Small Caps
Ctrl/Cmd+/Insert Ornamental Break
Ctrl/Cmd+\Insert Page Break

Help

Press To
F1Keyboard Shortcuts

Formatting keys

These are built into the editor, so they aren’t on the Hotkeys tab and can’t be changed.

Press To
Ctrl/Cmd+BBold
Ctrl/Cmd+IItalic
Ctrl/Cmd+UUnderline
Ctrl+, on Windows and Linux, ⌘ Cmd+⇧ Shift+, on a MacSubscript
Ctrl/Cmd+.Superscript
Ctrl/Cmd+Alt/Option+0Paragraph
Ctrl/Cmd+Alt/Option+1 to Ctrl/Cmd+Alt/Option+6Heading 1 to Heading 6
Ctrl/Cmd+Shift+8Bullet List
Ctrl/Cmd+Shift+7Ordered List
Shift+EnterA new line in the same paragraph
TabA tab, for indented verse. In a list, moves the item in a level
Ctrl/Cmd+ASelect all. Inside a blockquote, callout box, grid or text conversation, just that

Questions

What is Zen Mode?

It shows only icons on the buttons along the top and in the sidebar, which leaves more room for your text. Press Ctrl/Cmd+Alt/Option+Z, or choose View › Zen Mode, to turn it on or off.

Why doesn’t Cmd+Shift+Z redo on my Mac?

In Lacuna it is Undo Project Change, which undoes changes to your book such as a deleted section. To redo typing, press Ctrl/Cmd+Y; to use other keys, change them on the Hotkeys tab.

Can I change the Bold shortcut?

No. Bold, Italic, Underline and the other formatting keys are built into the editor. Every shortcut on the Hotkeys tab can be changed.

How to Customize the Editor

docs.lacuna.pub/use-the-editor/customize-the-editor/

The Aa button on the right of the window sets how the editor looks while you work: its font, text size and line spacing, with switches for spell check and smart quotes. Your exported e-book and print-ready PDF stay as your book’s styles make them.

How to change how the editor looks

  1. Click Aa (Change the Editor’s Font, Font Size, and Settings) in the side menu at the far right of the window.

  2. Change any setting. The editor shows it at once.

  3. Click Apply to keep it. Cancel puts everything back.

Setting What it does
Font FamilyThe editor’s font. Starts as Charis SIL. The mark beside it warns when a font lacks bold, italic or small caps.
Text SizeHow big the editor’s text is, from XS (where it starts) to XL.
Line SpacingThe space between the editor’s lines, from 1×. Starts at 1.75×.
Smart QuotesCurls quotes as you type. On to start. See smart quotes.
Spell CheckUnderlines misspelled words in the editor. Off to start.

Font Family, Text Size, Line Spacing and Spell Check change only the editor. Your book keeps the font, size and spacing set in body text. Smart Quotes is different: the quotes you type are part of your book, so they print and export as typed.

These settings are Lacuna’s, not the book’s: every book you open on this computer uses them. Restore to Default puts back the settings Lacuna starts with. The preview has its own Aa (Font settings), which changes only the e-reader preview.

How to turn on spell check

  1. Click Aa and turn on Spell Check.

  2. Click Apply. As you type, words the spell checker doesn’t know are underlined.

The underlines are only in the editor: they never reach your book.

How to use smart quotes

Smart quotes are the curly quotation marks and apostrophes of a typeset book (“ ” ‘ ’). An opening quote curls toward the words it opens and a closing quote curls back, so a reader sees at a glance where speech starts and stops. The straight quotes on your keyboard (” ’) come from the typewriter, and in a printed book they look like a mistake.

Lacuna curls your quotes for you as you type, and it can change every quote already in your book at once.

How to turn smart quotes on or off

  1. Click Aa, turn Smart Quotes on or off and click Apply.

  2. Click your Title Page in the sidebar, then click back to your section. The editor uses the new setting from then on.

The switch changes only the quotes you type from then on. To change the ones already in your book, change every quote at once.

How to change every quote in your book

  1. Choose Edit › Convert Straight Quotes to Smart Quotes…, or Edit › Replace Smart Quotes with Straight Quotes… to go the other way.

  2. Choose all quotes, only double quotes or only single quotes, then click Convert (or Replace).

The text of every section changes, footnotes and endnotes included, and apostrophes come out right (’90s, rock ’n’ roll). Changed your mind? Choose Edit › Undo, or press Ctrl/Cmd+Shift+Z.

Questions

How do I change the font size?

For the editor only, click Aa and choose a Text Size. To change the size of your book’s text, set its body text size.

How do I change the line spacing?

For the editor only, click Aa and set Line Spacing. For your book’s lines, set Line Spacing in body text.

Does Lacuna have spell check?

Yes. Click Aa, turn on Spell Check and click Apply.

How do I stop two hyphens turning into a dash?

Press Backspace on Windows and Linux, Delete on a Mac right after the dash appears, and your two hyphens come back (the same works for a quote that curled). To stop words breaking with a hyphen at the end of a line, see justification and hyphenation.

How do I quote several paragraphs in a row?

Start each paragraph with an opening quote and close only the last one, the way books print it. Lacuna curls each paragraph’s opening quote the right way, as you type and when it changes every quote.

How to Use the Paragraph Menu

docs.lacuna.pub/use-the-editor/paragraph-menu/

Every paragraph has its own menu: click in a paragraph and a small gear appears at its top right. Use it to give that one paragraph its own drop cap, indents or letter spacing, or to turn it into a heading or blockquote.

What’s in the paragraph menu

Choose To
ParagraphThe menu’s title: turn it into a subheading (Heading 1 to Heading 4), a Blockquote, Handwriting or a Callout Box.
Duplicate block, Copy to clipboard, Delete blockThe three icons beside the title: copy the paragraph right below, copy its text, or delete it.
Set as First Paragraph (Drop Cap)Move the section’s drop cap to this paragraph.
Force Drop CapGive this paragraph a drop cap of its own.
Disable IndentationRemove this paragraph’s first-line indent.
Apply First Line StyleGive this paragraph the first line style, such as small caps. Greyed out, with the reason, where the section’s first-line styling is off.
Letter SpacingTighten or loosen the space between its letters, in print.
Copy indents, Paste indentsCopy this paragraph’s indents, and paste them onto another.
First-Line IndentIndent its first line by its own amount. Below 0 pulls the first line out: a hanging indent.
Left IndentMove the whole paragraph to the right.

A heading’s menu has only the title and the three icons. The gear turns blue while a tick is on, and purple when the paragraph has its own letter spacing or indents.

Lists, tables and text conversations have no gear, and it hides while words are selected.

How to move or add a drop cap

The drop cap shows in the preview and in your exported book, not in the editor.

  1. To move the section’s drop cap, open the paragraph menu on the paragraph that should have it and tick Set as First Paragraph (Drop Cap).

  2. To add another, open the next paragraph’s menu and tick Force Drop Cap. Tick it on as many paragraphs as you like.

Untick it to undo. To style drop caps or turn them off, see drop caps.

How to adjust letter spacing in one paragraph

Letter spacing is for your print book: it changes your print-ready PDF, not your EPUB. Tighten a paragraph to pull a short last word up a line, or to close gaps that run down the page.

  1. Open the paragraph menu and click the Letter Spacing number.

  2. Type a value and press Enter: below 0 tightens, above 0 loosens. − and + change it a little at a time.

Small values do it: it runs from −0.05 em to 0.1 em. Watch your print preview while you set it; Print - Single Section (Fast) shows each change quickly. To go back, set it to 0.

A paragraph with its own letter spacing prints exactly as you set it: Fix runts leaves it alone. To find every one, tick Letter Spacing in the sidebar’s Elements tab.

How to make a hanging indent

A hanging indent keeps the first line at the margin and moves the rest of the paragraph in, the usual look for a bibliography or glossary.

  1. Open the paragraph menu and set Left Indent first: how far in the rest of the paragraph sits.

  2. Set First-Line Indent to the same amount below 0 (24 and −24, for example).

  3. For the next entry, click Copy indents, open the other paragraph’s menu and click Paste indents.

Indents show in your print-ready PDF, your EPUB and your Word document. To set them for your whole book or a whole section, see indentation.

Questions

How do I create hanging indents?

In the paragraph menu, set a Left Indent, then a First-Line Indent of the same amount below 0. Then click Copy indents and Paste indents onto each paragraph that should hang the same way.

How do I indent the first line of one paragraph?

Set First-Line Indent in its paragraph menu. For every paragraph in your book, see indentation.

Why isn’t my paragraph indented?

Open its paragraph menu: Disable Indentation and Force Drop Cap both remove the first-line indent. To indent a whole section, use its Options menu.

Does Letter Spacing change the space between lines?

No, only the space between letters. The space between lines is Line Spacing, in Print Settings › Body Text.

How to Color and Highlight Text

docs.lacuna.pub/use-the-editor/color-highlight-text/

Give any words in your book a color, or a highlight behind them. Select the words, and both are in the small menu that appears above them.

How to color text

  1. Select the words, then click Text color (the A) in the menu above them.

  2. Choose a color. Press Esc when you’re done.

Choose To
A circleUse that color.
The striped circleTake the color off.
The square and the sliderMix any color: drag in the square, slide for the shade.
The color code boxType a code such as #800020 and press Enter.
+Save a brand color.
WCAG ContrastCheck the words are easy to read: a green check means they are.

Colors and highlights show in your e-book, your print-ready PDF and your DOCX. The colors in your Word document come in with it when you import.

How to highlight text

  1. Select the words, then click Highlight color (the highlighter) in the menu above them.

  2. Choose a color. Press Esc when you’re done.

The highlight picker works the same way as the text color one.

How to remove a color or highlight

  1. Select the words and open Text color or Highlight color.

  2. Click the striped circle, the first one in the row (No Color for text, Transparent for a highlight).

How to save a brand color

A brand color is one you save to use again anywhere in your book.

  1. Open Text color or Highlight color and click +.

  2. Choose the color, then click Save.

It shows in every color picker in this book. Click it twice to change it, or point at it and click its × to delete it. A style saved in My Styles, and Copy Styles from Another Book, bring brand colors along (Brand Colors).

Other places you can set colors

Many parts of your book have colors of their own: text, backgrounds and borders. Set those in each element’s settings.

To color See
Every printed page and its textPrint page colors
Section titles and subtitlesSection titles, section subtitles
SubheadingsSubheadings
Chapter numbers and drop capsChapter numbering, drop caps
Callout boxes, grids and columnsCallout boxes, grids, columns
Tables, text conversations and line rowsTables, text conversations, line rows
Image captions, ornamental breaks and list markersImage captions, ornamental breaks, lists
Footnotes, header and footer lines, contents entriesFootnotes, headers and footers, table of contents

Questions

Is there a way to change the text color in Lacuna?

Yes. Select the words, then click Text color in the menu above them.

Can I color text in a table?

No, the menu with Text color doesn’t open inside a table. To color a table’s header row, click the table, then Edit Table Style › Header Row › Text Color.

Will my colors show in black and white?

Yes, as shades of gray. A black and white print book prints your colors in gray (your print-ready PDF keeps them, whichever Interior Color you choose): turn on Grayscale Mode in the print preview settings to check. Some e-readers are black and white too: choose Kindle E-reader, Kobo Clara BW or Nook Simple Touch in the e-reader preview to see your colors there.

Section Types

docs.lacuna.pub/book-structure/section-types/

Every section in your book has a type: a title page, a dedication, a chapter, an index. The type tells Lacuna what the section is, so Lacuna formats it the way books format that kind of page.

What it does
Tells Lacuna what each section of your book is.
What it decides
The section title, the table of contents, the paragraph styling, and what the section does.
Where you choose it
When you add a section, or later in its Options › Convert Section Type.
Works in
EPUB, print-ready PDF and DOCX.

What section types change

Click a section to see the page its type draws, and what Lacuna does with it.

Introduction

Front Matter
What type of section is it?
Introduction
Is its title shown?
No, it’s hiddenTo show it: Options › Customize Section Settings › Display › Show Title in Header
Who writes its title?
You do: rename it whenever you like.
Is its content generated by Lacuna?
No, you control it
Is it in the table of contents?
No, it’s left outTo list it: Options › Show in Table of Contents
How do its paragraphs look?
A blank line between paragraphs, and no indent.

Why Lacuna has section types

Printed books follow habits readers expect. A section type carries those habits for you, so you never set them one section at a time. For every section, its type decides:

The section title and subtitle

Shown at the top of the section, or hidden.

Hidden: Title Page, Copyright, Dedication, Introduction, Full Page Image

The table of contents

Listed, or left out.

Left out: Title Page, Copyright, Dedication, Table of Contents, Foreword, Introduction, Full Page Image

The paragraph styling

Chapters
A drop cap, and indented paragraphs after the first
Every other type
Space between paragraphs, no indent

What the section does

Some types do the work for you. A Title Page, Table of Contents, Endnotes or Index is Lacuna generated: Lacuna builds its content. A Full Page Image takes over its whole page, and Numbered Chapters number themselves. See what Lacuna builds.

Each of these is a starting point. Change any of them for one section, and its type stays the same.

Front matter, chapters and back matter

A book has three parts, and Lacuna groups the section types the same way.

Front matter before your story

  • Title Page
  • Copyright
  • Dedication
  • Table of Contents
  • Foreword
  • Preface
  • Introduction
  • Summary
  • About This Book
  • Author Note
  • Prologue
Body matter begins

Chapters your story

  • Numbered Chapter
  • Unnumbered Chapter

Back matter after your story

  • Epilogue
  • Extended Epilogue
  • About the Author
  • Also By
  • Acknowledgments
  • Bibliography
  • Endnotes
  • Other Books
  • Appendix
  • Glossary
  • Index

Anywhere a Default Section is for anything that isn’t a named type

  • Full Page Image
  • Default Section

These groups are there to help you find the type you want in the menus. They don’t limit where a section can go: put an About This Book at the back or a Summary after your story, and Lacuna formats it the same way. What decides where your book’s front matter stops is where your body matter begins.

Where your body matter begins

A section’s type does not decide where your body matter begins. The bookmark in your sections does: everything above it is front matter, so a Prologue can stay in your front matter. See where your body matter begins to move it.

Front matter pages hide their headers and footers, page numbers included: see how to hide or show headers and footers on chapter openings and front matter.

Sections Lacuna builds for you

Add one of these, and Lacuna does the work. Each one stays right as your book changes, which a page you type yourself can’t.

Table of Contents Lacuna generated

  • Rebuilt from your sections every time you export
  • Page numbers and leader dots in print
  • Links in the e-book
Table of Contents

Endnotes Lacuna generated

  • Gathers the notes from the sections before it
  • Each section’s notes under its title
  • In the e-book, readers jump to a note and back
How to Add Endnotes

Index Lacuna generated

  • Built from the topics you mark in your text
  • Sorted under letter headings
  • Page numbers in print, links in the e-book
How to Add an Index

Full Page Image

  • One image, and nothing else on the page
  • To the paper’s edge, the safe zone or the text block, on one page or across two
  • No title, and left out of your table of contents
Full Page Images

Chapters have types too

Your story’s chapters come in two types. A Numbered Chapter is numbered for you: Chapter 1, Chapter 2, and so on. An Unnumbered Chapter has only the title you give it. Both get the drop cap and indented paragraphs. See Chapter Types for when to use each.

Questions

Why doesn’t my Introduction have a title?

Lacuna hides an Introduction’s title, the way many printed books open theirs. To show it, open the section and choose Options › Customize Section Settings › Display, then turn on Show Title in Header.

Why doesn’t my Dedication have a title?

A dedication page usually shows only its words, so Lacuna hides its title. Turn it on the same way: Options › Customize Section Settings › Display › Show Title in Header. See how to add a dedication page.

Why isn’t my Foreword in the table of contents?

Lacuna leaves a Title Page, Copyright, Dedication, Table of Contents, Foreword, Introduction and Full Page Image out of it. To list one, open the section, click Options, and turn on Show in Table of Contents.

Why is my Untitled section in the table of contents?

A Default Section is listed under whatever title it has. Give it a title, give it the type it really is, or turn off Show in Table of Contents in its Options.

Can my Prologue look like a chapter?

Yes. Open it and choose Options › Customize Section Settings › Text. Set Indent All Paragraphs, Drop Cap and First Line Style the way you want (see how to give any section type first-line styling). It stays a Prologue.

Chapter Types

docs.lacuna.pub/book-structure/chapter-types/

Every chapter is one of two chapter types, Numbered Chapter or Unnumbered Chapter, formatted the same way. The difference is who writes the title: Lacuna numbers one, you name the other.

What it does
Decides whether Lacuna numbers a chapter for you.
Where you choose it
Add New Section(s) › Chapters, or a section’s Options › Convert Section Type › Chapters.
Shortcuts
Numbered Chapter Ctrl/Cmd+Shift+I, Unnumbered Chapter Ctrl/Cmd+Shift+J.
Works in
EPUB, print-ready PDF and DOCX.

What both chapter types get

Numbered or unnumbered, every chapter type gets

  • A drop cap on the first paragraph
  • Indented paragraphs, with no space between them
  • Your book’s chapter heading image
  • A title and subtitle at the top
  • An entry in your table of contents

Numbered or unnumbered

The same chapter, both ways. Type a name, or pick a number format.

Numbered Chapter

Numbered chapters are titled automatically, from their place in your book.

Chapter 3The Beaver Dam

Edgehill was positioned between Marbleglen to the north and Belhaven to the south.

In your section list
3. The Beaver Dam
In your table of contents
Chapter 3: The Beaver Dam
Unnumbered Chapter

Unnumbered chapters keep the title you give them, wherever they sit.

The Beaver Dam

Edgehill was positioned between Marbleglen to the north and Belhaven to the south.

In your section list
The Beaver Dam
In your table of contents
The Beaver Dam

Why you can’t change a numbered chapter type’s title

Lacuna writes it (Chapter 1, Chapter 2) and rewrites it whenever your chapters move. To give a numbered chapter type a name, use its subtitle: Lacuna never changes it.

  1. Click Rename at the top of the chapter.

  2. Type the chapter’s name in the subtitle box, then click Save.

Several narrators? Put each chapter’s narrator in its subtitle.

Numbered chapter types stay in order

Lacuna renumbers whenever you add or move chapters, so your book always stays in order. Undo puts the old numbers back.

  • Only numbered chapter types get a number. Unnumbered chapter types and other sections, such as a Prologue, are left out of the count.
  • In a box set, each volume starts again at Chapter 1.

Choose the number format for numbered chapter types

One format for every numbered chapter type in your book: Edit Styles › Numbered Chapter Settings › Format.

Format Chapter 3 prints
Chapter + Number Chapter 3
Chapter + Number (padded) Chapter 03
Chapter + Spelled Chapter Three
Chapter + Spelled (capitalized) Chapter Three
Chapter + Roman Chapter III
Number Only 3
Number Only (padded) 03
Spelled Only Three
Spelled Only (capitalized) Three
Roman Only III
Hidden No number, only the subtitle

Padded numbers are padded to your book’s largest chapter number: Chapter 03 in a book of twelve chapters.

Custom Number Format lets you write the number line yourself. The prefix word and the number’s font are on Chapter Numbering.

Change a chapter’s type

  1. Open the chapter and click Options.

  2. Choose Convert Section Type › Chapters, then the other chapter type.

To Numbered Chapter

Leave Keep current titles as subtitles on, and the chapter’s name moves under its number.

To Unnumbered Chapter

It keeps its title, such as Chapter 3. Rename it.

Several at once: select them, right-click, and choose Convert To › Chapters.

Choose your chapter type when you import

When you import a Word document (.docx), Chapter Section Type sets every chapter to Numbered (the default) or Unnumbered. Choose Unnumbered to keep your chapter titles exactly as written.

  • A chapter is a heading that starts with Chapter. Chapter 1: The Bilberry Weeks splits at the colon, so the name becomes the subtitle.
  • Any other heading, such as Interlude, comes in as a Default Section. Change its type after you import.

Questions

How do I turn off chapter numbers?

Make them unnumbered chapter types. Or keep them numbered and choose Hidden in Numbered Chapter Settings › Format.

How do I add a subtitle to a chapter?

Click Rename at the top of the chapter, type it in the subtitle box, and click Save.

How do I put a character’s name under each chapter?

Make it the chapter’s subtitle. Style it in Edit Styles › Heading Subtitle.

Why did my chapter numbers change?

Adding, moving or deleting a chapter renumbers the ones after it. Subtitles never change, and Undo puts the old numbers back.

How do I remove the big first letter of a chapter?

That’s the drop cap. Turn it off for one chapter in Options › Customize Section Settings › Text › Drop Cap, or for the whole book in Drop Caps.

How to Use Book Parts

docs.lacuna.pub/book-structure/book-parts/

A book part groups sections under a page of its own, like “Part I” before its chapters. Make one, choose how its page looks, and number your parts.

How to make a book part

  1. Click Add New Section(s) at the bottom of the sidebar.

  2. Choose Create New Book Part.

Your new part is called New Part and goes at the end of your book. Drag sections onto it to put them inside, and right-click it and choose Rename to name it.

Already have the sections? Select them, right-click and choose Create Part from Selected Sections (see book parts and volumes in Manage Sections). The sections have to sit next to each other.

How to choose how a book part’s page looks

  1. Click the book part in the sidebar.

  2. Click the button beside Select Book Part Mode: and choose how its page looks.

Choose To
Lacuna GeneratedLet Lacuna make its page: its number and title, in the look you set. Every part starts here.
Full Page ImageShow a picture as its page (see Full-Page Images).
Custom ContentWrite its page yourself, like any section.
No PageLeave out its page. Its sections stay grouped under it in your table of contents, and its line opens on the first of them.

How to style the page Lacuna makes for a book part

On Lacuna Generated, the settings for its page are right below the button. They’re shared by every book part in your book.

Setting What it does
Center on ScreenCenters the number and title down the page.
AlignmentLeft, Center or Right.
Top MarginThe space above them, when Center on Screen is off.
Number PositionThe number Above or Below the title, or Inline (Part I: Title).
Part Number TypographyThe Font, Weight and Size of “Part I”.
Part Name TypographyThe Font, Weight and Size of the part's title.
Spacing Between ElementsThe space between the number and the title.

How to number your book parts

  1. Click the book part, then Part Settings beside the button.

  2. Make your change on a tab and click Apply.

Tab What it sets
Prefix TextThe word before the number (Prefix Text, “Part”), or none (Show Prefix Text off).
Part NumbersThe Number Style: Roman (I), Numbers (1) or Words (One), or no number (Show Part Numbers off).
T.O.C. Custom FormatHow a part reads in your table of contents, from {part-prefix}, {part-number}, {title} and {subtitle}. It starts as Part I: Title.

The same panel is Edit Styles › Book Part Settings. Parts are numbered from I through your book.

How book parts look in print and e-books

Where How a book part looks
Print-ready PDFIts page starts on a right-hand page, with no header or page number.
EPUBIts page comes before its sections, and the e-reader's contents list its sections under it.

Chapter numbers keep counting across parts: a part doesn’t start them again.

How to show book parts in your table of contents

A book part is listed with its sections indented under it, even on No Page.

To Do
List the part aloneTurn off Include Book Part Sections on your table of contents.
Leave the part outTurn off Show in Table of Contents in the part's Options. Its sections stay listed.
Change how one part readsOptions › Customize TOC Text.
Change how parts lookStyling › Part Entries on your table of contents (see Table of Contents).

Book volumes and box sets

A volume holds a whole book, so you can put several books in one box set. A part can go inside a volume, and its page has the same four choices. See Book Volumes / Box Sets.

Questions

How do I format Part 1?

Click the part in the sidebar. On Lacuna Generated, its page’s settings are right there, and Part Settings sets its prefix and number style.

Can I delete a part without deleting its sections?

Yes. Right-click the part and choose Delete: its sections stay in your book, outside any part.

Do chapter numbers start again in each part?

No. They keep counting across parts. Each volume starts again at Chapter 1, like a book of its own.

How to Make a Box Set with Volumes

docs.lacuna.pub/book-structure/book-volumes/

A volume holds one whole book of a box set: its sections and its book parts. Each volume gets its own page, and its chapters start again at Chapter 1.

How to add a volume

  1. Click Add New Section(s) at the bottom of the sidebar.

  2. Choose Create New Volume. A new, empty volume goes at the end of your book.

Already have the sections? Select them, right-click and choose Create Volume from Selected Sections. To name a volume, right-click it and choose Rename.

Volumes are blue in the sidebar, book parts purple.

How to put sections in a volume

Right-click the volume to add to it, or drag sections onto it (drag and drop).

Choose To
Add New SectionAdd a section of any type at the end of this volume.
Add New Book PartAdd a book part inside this volume.
Import from ManuscriptBring in a Word document as this volume’s sections.
Import from Other Lacuna ProjectBring in the sections of another book you made in Lacuna.
This Can go inside
A sectionA book part or a volume.
A book partA volume, but not another book part.
A volumeNothing: volumes sit side by side.

Deleting a volume keeps its sections and book parts.

How chapters are numbered in a box set

Chapters start again at Chapter 1 in each volume, and book parts at Part I, in your EPUB and print-ready PDF. Move a chapter into a volume and it renumbers at once.

How to give each volume its own table of contents

A table of contents lists what sits beside it: put one inside a volume and it lists only that volume.

Where your Contents is What it lists
Outside every volumeEach volume as one entry, and the sections outside volumes. Turn on Include Volume Sections to list each volume’s sections under it.
Inside a volumeOnly that volume’s sections and book parts.

To add one, right-click the volume and choose Add New Section › Front Matter › Table of Contents. It goes at the end of the volume; drag it up to sit first. Everything else about it is on Table of Contents.

How to choose how a volume’s page looks

Click a volume in the sidebar, then click the button beside Select Volume Mode:.

Choose To
Lacuna GeneratedLacuna makes the page: its number and title.
Full Page ImageA picture is the page (full-page images).
Custom ContentYou make the page in the editor, like a section.
No PageNo page in your book. Its chapters still start at Chapter 1, and its line in the contents opens on its first page.

A volume’s page is styled the way a book part’s is: see how to style the page Lacuna makes for a book part. In print, each volume’s page starts on a right-hand page.

How to change how your volumes are numbered

Volume Settings, beside Select Volume Mode:, sets how every volume is numbered.

Tab What it sets
Prefix TextThe word before the number. Starts as “Volume”, in your book’s language.
Volume NumbersRoman (I, II), Numbers (1, 2) or Words (One, Two), or no number.
T.O.C. Custom FormatHow a volume reads in your table of contents. Starts as “Volume I:” and the volume’s title.

The same panel opens from Edit Styles › Volume Settings. Click Apply to keep your changes.

Questions

Why did my chapter numbers start over at 1?

Each volume is its own book, so its chapters start at Chapter 1. Chapters outside volumes keep their own count.

Why doesn’t my table of contents list the chapters in my volume?

A table of contents outside your volumes lists each volume as one line. Turn on Include Volume Sections in it, or put a Contents inside each volume. The e-reader’s own contents menu nests each volume’s sections under it either way.

How to Show a Section Only in Print or Only in Your E-Book

docs.lacuna.pub/book-structure/device-specific-sections/

A device-specific section goes into one edition of your book only: your print-ready PDF or your e-book. A hidden section stays in your project and goes into neither.

Set it from the section’s right-click menu in the sidebar. For a few paragraphs inside a section, use a device-specific block instead.

How to show a section only in print or only in your e-book

  1. Right-click the section in the sidebar and choose Set Device Type.

  2. Choose Ebook or Print.

Choose To put the section in
AnyYour e-book and print: every file. Where every section starts.
EbookYour e-book only: the EPUB and the eBook PDF. A phone marks the section.
PrintPrint only: your print-ready PDF and your Word document (DOCX). A book marks the section.
HiddenNo file at all. The section stays in your project. A crossed-out eye marks it.
Split to Both Device TypesTwo copies: one for your e-book, one for print.

A mark beside the section shows where it goes:

Beside the section Means
A phoneE-book only.
A bookPrint only.
A crossed-out eye, the name gray and italicHidden: in no file.
NothingIn your e-book and print.

To change several sections at once, select them and right-click one of them.

If the section is where your body matter begins, Lacuna asks Continue with this change?, because the edition you take it out of needs a new start. Click Continue, then right-click the section where that edition should begin and choose Begin body matter here.

How to preview a print-only or e-book-only section

The editor shows every section. The preview shows a section only on a device the section goes to. Otherwise it says so, or an e-reader stays on the section before it:

Open The preview shows
A print only section on an e-readerThe section before it: a print only section is not in the e-book, so the e-reader has no page to turn to (device-renderer.tsx:294 never raises the message).
A print only section on the eBook PDFDevice Incompatibility, and which preview to switch to.
An e-book only section on a print modeDevice Incompatibility, and which preview to switch to.
A hidden section, on any deviceSection Hidden.

Switch the device list at the top of the preview: an e-reader or the eBook PDF for an e-book section, a print mode for a print section. See how to choose a device and how to choose a print mode.

How to make one copy of a section for your e-book and one for print

  1. Right-click the section in the sidebar and choose Set Device Type › Split to Both Device Types.

You get two copies, one under the other, with the same title, text and settings: a phone marks the e-book copy and a book marks the print copy. Open each and change what differs. A split chapter keeps its number in both editions.

Split a section once: a section that already has its copy is skipped. To copy a section into one edition and leave the original in both, choose Clone › Clone as EPUB Only or Clone as Print Only instead.

How to hide a section from every export

Keep an outline, notes or a chapter you are not ready to publish in your project without putting it in your book.

  1. Right-click the section in the sidebar and choose Set Device Type › Hidden.

Its name turns gray and italic, with a crossed-out eye beside it. The section stays in the sidebar to open and edit, and the preview shows Section Hidden while it is open. A hidden chapter gives up its number to the next chapter.

To put it back in your book, choose Set Device Type › Any.

How to filter the sidebar by device type

  1. Click Filter sections, the button beside Add New Section(s) at the bottom of the sidebar.

  2. Under Filter by Device Type, untick the types to hide: Any (E-Book & Print), E-Book Only, Print Only or Hidden.

The button turns blue while a filter is on. Book parts and volumes always show. Click Reset Filters to show every section again.

Which sections each file includes

In Sections it includes
Your EPUB and eBook PDFAny and Ebook sections.
Your print-ready PDFAny and Print sections.
Your Word document (DOCX)The same as print: Any and Print sections.
Every fileNever a Hidden section.

Each file numbers only the chapters it includes, and its table of contents lists only the sections it includes. A Contents section you split uses each copy’s own settings for its edition.

Questions

Can I keep a draft chapter in my book without publishing it?

Yes. Right-click it and choose Set Device Type › Hidden. It stays in your project and goes into no file until you set it back to Any.

Why does the preview say Device Incompatibility?

The section is print only and the preview is on the eBook PDF, or e-book only and the preview is on a print mode. Switch the device, or set the section back to Any. An e-reader shows no message: it stays on the section before.

Why do two chapters have the same number in the sidebar?

One is hidden, or one is e-book only and the other print only. A hidden chapter keeps the number it would have, and the next chapter takes it too. An e-book chapter and a print chapter each count only in their own edition.

How to Design Your Book's Title Page

docs.lacuna.pub/book-structure/title-page-designer/

Your title page is the page inside your book with its title, author and publisher. Design it in Lacuna’s designer: place your words, logo and artwork exactly where you want them, and the page looks the same on every e-reader and in print.

How to switch to the designer

Use the designer for your title page unless you have a reason not to. Click Title Page in the sidebar, then click Designer Mode at the top right. The same link, now reading Lacuna Mode, switches back.

Where Lacuna Mode Designer Mode
Print-ready PDFText, in your fonts.Your design, scaled to fit inside the page’s safe zone. Never cropped or stretched.
E-bookText. Each e-reader sets it its own way.Your design as one picture, filling the screen.
Word document (DOCX)Text.Your design as one picture.

Switching keeps both: your design stays in the designer while you use Lacuna Mode. Neither mode prints a page number, header or footer on the title page.

How to design your title page in the designer

The designer opens with your title and author on a 6 by 9 inch page (and your subtitle, if your book has one). Drag anything to move it, drag a corner to resize it, and double-click text to change its words.

Click To add
TextA line of text, in your title’s font.
ImageA picture from your book’s images: your publisher’s logo, artwork, an ornament.
Rectangle, Circle, LineA shape.

Click anything on the page for its settings in the bar above it: text has its font, size, bold, italic, underline, capitals, color, alignment, border and spacing; a picture has its corners and border; a shape has its fill and outline. Right-click anything to bring it to the front, send it back, copy it or delete it.

Magenta lines show when something lines up with the middle of the page, its margins or another item. Press Ctrl/Cmd+Z to undo. Lacuna saves your design as you go.

How to start the designer over

  1. Click Options at the top right and choose Reset Designer.

  2. Click Reset designer.

Everything on the page goes, and the designer starts again from your book’s title and author. This can’t be undone.

How to use your own picture as your title page

Made your title page in another program? Right-click Title Page in the sidebar and choose Delete, then add your picture as a full-page image and drag it to the top of your book. To bring a title page back, choose Add New Section(s) › Front Matter › Title Page.

How to style your title page in Lacuna Mode

In Lacuna Mode, Lacuna lays out the page from your book’s details. Click Edit at the top to change them (see Edit Book Metadata).

Group Sets
LayoutCenter on screen: centers the page on Apple Books and Google Play Books.
Publisher, Publisher LogoYour publisher’s name and website, or a logo in place of the name.
Title Typography to PublisherEach line’s font, size and the space around it.

Questions

I changed my book’s title. Why didn’t my title page change?

In Designer Mode the words are yours: double-click the title to change it, or start over with Reset Designer. In Lacuna Mode the title page always shows your book’s details.

My book isn’t 6 by 9 inches. Can I use the designer?

Yes. Lacuna scales your design to fit any trim size without cropping or stretching it; on a page of another shape, the space left over goes to two sides.

Does the title page print on a right-hand page?

Yes, as your book’s first page: a printed book’s first page is always a right-hand page. To start other sections on the right, see page numbering.

How to Add a Dedication Page

docs.lacuna.pub/book-structure/dedication-page/

A dedication is the short page near the front of your book that honors someone. Add one from the sidebar, put your own words on it, and choose where they sit on the page.

How to add a dedication page

  1. Click Add New Section(s) at the bottom of the sidebar.

  2. Choose Front Matter › Dedication.

Your dedication goes right after your Copyright page and opens in the editor. In a book with volumes, or one that already has a dedication, it goes at the end of your book instead: drag it up to where you want it.

It starts with sample words, centered and in italics: select them and type your own.

Your words are centered when each line is set to Align Center in the editor toolbar. The sample words already are.

How to place your dedication on the page

The bar under the editor sets where your dedication sits on its page.

Choose To
Top MarginSet how far down the page your words start. A new dedication starts at 48 px.
Center on screenPut your words in the middle of the page, top to bottom. Top Margin does nothing while it is on.

On e-readers, Apple Books and Google Play center it. Kindle, Kobo and Nook put it at the top of the screen instead. Hover the warning sign beside Center on screen for the list, and preview your e-book on each device to compare.

What the e-book and print do with your dedication

A dedication is front matter: it sits above the bookmark that marks where your body matter begins.

Where What happens
E-bookIt gets its own screen. E-readers open your book at your body matter, after it.
PrintIt gets its own page, with no header, footer or page number. Its page still counts in your page numbers.
BothIts title is hidden, and it isn’t listed in your table of contents.

To print headers, footers or a page number on front matter, see how to hide or show headers and footers on front matter.

Questions

Can I change my dedication’s font and spacing?

It uses your book’s body text font. Select words to set italics, bold or alignment with the editor toolbar, and set the space above them with Top Margin.

Can I make a dedication page for free?

Yes. Lacuna’s trial does everything but Generate, so you can add, place and preview your dedication before you buy.

Why doesn’t my dedication show its title?

Lacuna hides it, since a dedication page usually shows only its words. To show it, open Options › Customize Section Settings › Display, turn on Show Title in Header, and click Apply.

How to Add Full-Page Images to Your Book

docs.lacuna.pub/book-structure/full-page-images/

A full-page image is a picture with a page of its own: a map, an illustration, a frontispiece, or a title page you designed yourself. Add one as its own section, turn a picture in your text into one, or use one as the page of a book part or volume.

How to add a full-page image

  1. Click Add New Section(s) at the bottom of the sidebar and choose Full Page Image.

  2. Drag your picture onto Upload Full Page Image, or click it to choose one from your computer. To use a picture already in your book, click Browse Existing Images, choose it and click Select Image.

The new section goes at the end of your book; drag it where you want it in the sidebar. Nearly any picture works, and JPEG works best. To change it, click Remove Image and add another.

The Print Quality line under the picture says whether it is sharp enough for print (300 PPI) and the size in pixels it should be. In Accessibility, describe the picture for readers who use a screen reader.

How to choose how far a full-page image reaches in print

Two settings shape a full-page image in print: Extend To is the area the picture covers, and Scale is how the picture fits inside that area.

Choose To
Content ZoneFill the area your text fills, inside your margins. A new picture starts here.
Safe ZoneFill out to your printer's safety line, over the header and footer bands.
Full BleedPrint past the edge of the page, so the picture runs to every edge once trimmed.

With Full Bleed, Lacuna adds bleed to your print-ready PDF for you; set how much in Page Margins. Margin Guidelines draws the zones on your print preview while you work; they never print.

How to choose how a full-page image fits its area

Scale matters when the picture and its area are different shapes, like a square picture on a tall page.

Choose To
ContainShow the whole picture. Space may be left around it. A new picture starts here.
CoverFill the area completely. Edges that don't fit are cut off.
StretchFill the area exactly. The picture may look squashed or stretched.

How to spread a full-page image across two pages

  1. Click Two-Page Spread in Layout.

  2. To see both pages at once, choose Print - Whole Book (Slower) in the preview and click Open whole-book preview (see spreads).

Lacuna splits the picture down the middle and prints the left half on a left-hand page, facing the right half on a right-hand page. Use a wide picture: the Print Quality line gives the size for both pages together. Only a Full Page Image section can spread.

For art behind your text across two pages, use a background image instead.

How to turn a picture in your text into a full-page image

  1. Click the picture in your text, then Full Page in the bar above it.

  2. Choose its Extend To and Scale on the Full Page Image card. The card draws the page it prints on.

It prints on a page of its own where it sits in your text. On Content Zone that page keeps your header and page number; Safe Zone and Full Bleed take them off. It can’t spread across two pages.

Change swaps the picture, Alt Text describes it, and Inline Image in its bar puts it back in your text.

How to use a full-page image for a book part or volume

A book part or volume can show a picture as its page, in place of the page Lacuna makes for it.

  1. Click the book part or volume in the sidebar.

  2. Click the button beside Select Book Part Mode: (or Select Volume Mode:) and choose Full Page Image.

  3. Add your picture as you would for a section.

It has the same Extend To and Scale, but can’t spread. The part still groups its sections in your table of contents, and in print its picture starts on a right-hand page.

How it looks on an e-reader and in print

Where How it looks
Print-ready PDFA page of its own, set by Extend To and Scale, with no header or page number (a picture in your text on Content Zone keeps them). A spread prints across two facing pages.
E-readerA screen of its own, with the whole picture as large as the screen allows. Extend To, Cover and Stretch change print only. A spread shows each half on its own screen.

On e-readers, a portrait picture about 3:4 (3 wide, 4 tall) fills the screen best. Check both in the e-book preview and the print preview.

Questions

What size should my full-page image be?

The Print Quality line under your picture gives the size in pixels for sharp printing (300 PPI) at your trim size. For e-readers, a portrait picture about 3:4 fills the screen best.

Can I add a caption to a full-page image?

No. A full-page image has no caption. To keep a caption with a picture on a page of its own, use Put on its own page.

Can I crop my picture in Lacuna?

No. Crop it before you upload it. In print, Cover fills the page and cuts off what doesn’t fit.

Is a full-page image my book’s cover?

No. Your cover goes in Book Metadata; a full-page image is a page inside your book.

How to Use Lacuna's Table of Contents

docs.lacuna.pub/book-structure/table-of-contents/

Lacuna builds your table of contents for you: page numbers in your print-ready PDF, links in your EPUB, and a fresh list every time you export.

What it does
Lists your sections, with page numbers in print and links in e-books.
Where you find it
New books and imported Word documents already have one, titled Contents. Click it to see its settings.
How to add one
Add New Section(s) › Front Matter › Table of Contents
Works in
EPUB, e-book PDF and print-ready PDF. A Word document (.docx) gets Microsoft Word’s own table of contents.

Why use Lacuna’s table of contents

A table of contents you type Lacuna’s table of contents
Page numbers in printYou look up every page and type itFilled in for you in your print-ready PDF
Links in your e-bookNoneEvery entry is a link in your EPUB and e-book PDF
You add, move or rename a sectionYou fix the list by handThe list follows on your next export
Your page count changesPage numbers go wrongPage numbers follow

How Lacuna builds your table of contents

Switch sections on and off, drag the Begin body matter here bookmark, or change a setting, and watch the page follow.

Your section listShow in Table of Contents
  1. Title Page
  2. Copyright
  3. Dedication
  4. ContentsThis page
  5. Introduction
  6. Prologue
  7. Chapter 1 The Bilberry Weeks
  8. The Beaver Dam
  9. Epilogue
  10. Pawsitively Poisonous subheading
  11. About the Author
Settings
Roman numerals on front matter pages Print Settings › Page Setup › Page Numbering
Show leader dots Table of Contents › Print Settings
Subheading Hierarchy Table of Contents › Hierarchy
Strategy Table of Contents › Formatting
Your print-ready PDF
ContentsPrologueviiChapter 1: The Bilberry Weeks1The Beaver Dam10Epilogue21About the Author25iv

The bookmark marks where your body matter begins. See how to move it.

How to add a table of contents

New books and imported Word documents already have one. To add another:

  1. Click Add New Section(s).

  2. Choose Front Matter › Table of Contents.

Lacuna titles it Contents and puts it after your title page, copyright and dedication.

How to show or hide sections in the table of contents

Most sections have Show in Table of Contents.

  1. Open the section and click Options.

  2. Under Table of Contents Options, turn Show in Table of Contents on or off.

Hiding a book part or volume hides only its own entry. The sections inside keep theirs.

Change the text the table of contents shows for a section

  1. Open the section and click Options › Customize TOC Text. It’s there while the section is listed.

  2. Type the new text, or pick one of the section’s headings, and click Save.

Your running heads use the new text too. Reset to Default brings back the section’s title.

Choose how chapter types are listed

Click your table of contents and choose a Strategy under Formatting: the title, the subtitle, or both.

Strategy Chapter 1 is listed as
TitleChapter 1
SubtitleThe Bilberry Weeks
Title & Subtitle (where it starts)Chapter 1: The Bilberry Weeks

Page numbers and leader dots Print only

Your print-ready PDF gives every entry the page its section starts on. To see page numbers in the preview, choose Print - Whole Book (Slower).

Roman numerals for front matter

With Roman numerals on front matter pages on, your front matter is numbered i, ii, iii and page 1 starts at the body matter bookmark. New books and imported Word documents start with it on. See Page Numbering.

Leader dots

Find these under Print Settings on your table of contents.

Setting What it does
Show leader dotsA line from each entry to its page number. On when you start.
Leader styleDotted, Solid, or Custom with a character you type.
Align leader endingsEnds every line at the same spot, with page numbers in a column. Off when you start.

To drop page numbers or dots from one kind of entry, use the Page Numbers tab in its entry style.

Add subheadings to your table of contents

Turn on Subheading Hierarchy under Hierarchy, and each section’s subheadings are listed under it, with their own page numbers and links.

Setting What it does
Subheading HierarchyLists the subheadings inside each section. Off when you start.
Max DepthHow many levels of subheadings are listed. Starts at 2.
Numbering StyleA number before each subheading, such as 1 or 1.1. Starts at None (indent only).

Book parts and volumes in your table of contents

A book part is listed in bold, with its sections indented underneath. A volume is one line until you turn on Include Volume Sections.

Setting What it does
Include Book Part SectionsLists the sections inside each book part under it. On when you start.
Include Volume SectionsLists each volume’s sections under it. Off when you start, so each volume is one entry.
Indent SizeHow far nested entries are indented. Starts at 16 px.

Style your table of contents

Click Styling at the top of your table of contents and choose Section Entries, Subheading Entries, Part Entries or Volume Entries. The same panels open from Options › Edit TOC Styles.

Tab What it sets
TextFont, size, weight, style, color and capitals.
SpacingThe space Around Entry, such as more room above each book part.
Page NumbersShow page numbers and Show leader dots for this kind of entry.
BorderA border around the entry: Style, Roundness and Color. On Default, the color follows your book’s border color in print. Subheading entries have none.

Questions

Does the table of contents show page numbers?

Yes, in your print-ready PDF. Your EPUB gives each entry a link instead, because e-readers have no fixed pages.

How do I include chapter titles in my table of contents?

Give each numbered chapter type its name as its subtitle. With Strategy on Title & Subtitle, where it starts, the entry reads Chapter 1: The Bilberry Weeks. Each entry reads as the chapter’s heading does: its language, its number format and its chapter word.

Why isn’t my Foreword in the table of contents?

A Foreword, an Introduction and the pages before your table of contents start hidden. Turn on Show in Table of Contents in the section’s Options.

Can I type my own table of contents?

No. Lacuna builds it from your sections, so there’s nothing to type. To change one entry, use Customize TOC Text.

Add Images to Your Book Content

docs.lacuna.pub/use-the-editor/add-images-to-book/

Put a photo or illustration anywhere in your text, then lay it out: line it up, size it, give it room, float it so your text runs beside it, or give it a page of its own. For the full tour, watch the deep dive first.

What it does
Places pictures in your text and lays them out: alignment, width, spacing, floating, captions and alt text.
Where to find it
The Add Image button in the editor toolbar. Click a picture to show its tools.
Works in
EPUB, print-ready PDF and DOCX. Text Wrap, Fit to Page and a full-page image's Extend To are print only.
Before you start
JPEG and PNG work best. For text that wraps around a picture's outline, use one with a transparent background.

Add an image

  1. Click in your text where the picture goes.
  2. Click Add Image in the editor toolbar. A box for the picture appears.
  3. Click Upload Image to choose a picture from your computer, or Browse Existing Images to choose one already in your book.
  4. In the gallery, click the picture, then Select Image.

You can also paste a picture straight into your text: copy one from a web page (right-click, Copy Image) or copy an image file on your computer, then paste it where you want it. Every picture you add is kept in your book’s image gallery, ready to use again.

Lay out an image

Click a picture to select it. A bar of tools appears above it:

  • Align. Line the picture up on the Left, Center or Right.
  • Float. Let your text run beside the picture (see Float an image).
  • Width. The picture’s maximum width on the page, as a percentage. Fit to Page shrinks a picture that would otherwise be pushed to the next page, so it fits the space left on the current one. Print only. Floating is off while Fit to Page is on.
  • Space. The room around the picture, on all four sides or each side on its own, and Put on its own page (see Put on its own page).
  • Full Page. Makes the picture fill a page of its own (see full-page images).

Under the picture sit Alt Text (see Alt text), Link (makes the picture a link, to a web address or another section of your book), Caption (see Captions), and Upload and Browse Images, which swap in a different picture and keep its layout and caption.

Float an image

  1. Click the picture, then Float.
  2. Choose Left or Right. None puts it back in line with your text.

Your text now runs beside the picture, in your ebook, your print-ready PDF and DOCX. Give a floated picture a width well under 100% (under Width) so there is room for text beside it. The editor keeps showing the picture in its own box; the previews show the float.

Wrap text around an image Print only

  1. Click a floated picture, then Float.
  2. Choose Wrap in Text Wrap to make the text follow the picture’s own outline instead of its rectangle.
  3. Set the gap between the text and the picture, from 0 to 48 px (12 px to start with).

Wrap is meant for pictures with a transparent background, such as a logo, an ornament or a cut-out illustration: the text follows the edge of what is drawn, keeping the gap you set. The outline shows in the print preview and your print-ready PDF.

Give a picture its own page

There are two ways, and the caption decides between them.

Full page imagePut on its own page
CaptionNoneComes along, under the picture
SizeFills the page: to your margins, the safe zone, or the trimmed edgeKeeps its width
WhereFull Page in the bar above the pictureSpace menu in the bar above the picture

Full page image

To give a picture a page of its own, click Full Page in its bar; see full-page images.

Put on its own page

  1. Click the picture, then the Space menu in its bar.
  2. Turn on Put on its own page. The picture and its caption move to a page by themselves, and your text continues on the next page.
  3. Turn on Center on page to set them in the middle of that page.

The picture keeps its width, alignment and caption.

For a picture that is a section of its own, like a frontispiece or a book part divider, use a full-page image section. For the same art at the top of every chapter, use chapter heading images.

Captions

A caption is the line of text under a picture.

Add a caption

  1. Click the picture, then Caption under it.
  2. Choose Add Caption.
  3. Write the caption. Bold, italic and links work in captions.
  4. Click Save Caption.

The caption shows under the picture in the previews and every format. In the editor, the picture’s Caption button turns blue. To change the words later, open Caption and choose Edit Caption; to take the caption off, choose Remove Caption.

Style your captions

Every caption uses a caption preset, shown under Preset in the Caption menu. Pick another preset there to restyle this caption, or click the pencil beside it to open the Image Caption panel and change the preset itself, which restyles every caption that uses it.

Every caption starts in the Default preset, so styling it once styles every caption in your book. For captions with a look of their own, choose Create New Preset… under Preset. More on preset groups: Presets.

All the image caption settings

The Image Caption panel has four tabs. Click Apply when you are done.

Text tab Sets
FontThe caption's typeface. Inherit from Body uses your body text's font.
Size5 to 72 pt.
Line SpacingThe space between a long caption's lines, 1× to 3×.
WeightHow heavy the letters are, with an italic button beside it.
AlignmentInherit lines it up the way its picture is aligned. Or left, center, right, or justified.
Spacing tab Sets
Around CaptionThe room outside the caption, up to 100 px: all four sides, in pairs, or one by one.
Maximum WidthHow wide the caption can grow, 1% to 100%. Lower it to keep a long caption within a narrow picture.
Border tab Sets
Enable BordersA line around the caption. The settings below show once it is on.
ThicknessThe line's width, up to 16 px: all four sides, in pairs, or one by one.
Inside CaptionThe gap between the caption and its border, up to 48 px. While Enable Colors is on, the Colors tab's Inside Caption is used instead.
Line StyleSolid, Dashed or Dotted.
RoundnessRounds the corners, 0 to 32 px.
Colors tab Sets
Enable ColorsTurns on the settings below.
Text ColorThe caption's color. Inherit from Body keeps your text's color.
BackgroundA band of color behind the caption. Transparent for none.
Border ColorThe color of the border from the Border tab. Default follows your book's Border color in print, and black when none is set.
Inside CaptionThe gap between the caption and the edge of its band or border, up to 48 px.

A caption’s border color lives on the Colors tab, so turn on Enable Colors to change it.

Alt text

Alt text is a short description of a picture for readers who cannot see it, such as those using a screen reader. Add it to every picture.

  1. Click the picture, then Alt Text under it.
  2. Describe what the picture shows, in up to 255 characters.
  3. Click Save Alt Text.

A picture without alt text shows a red border, and its Alt Text button is red. Both turn normal once you save a description.

How do I find every picture missing alt text at once?

Use the Elements tab in the sidebar to list pictures without alt text, and jump straight to each one. The image gallery also lists them under Missing alt text.

Elements tab showing an alert icon for images without alt text

Questions

What is the difference between Full Page and Put on its own page?

Put on its own page keeps the picture at its width, with its caption, on a page by itself. Full Page makes the picture fill the page, out to your margins, the safe zone or the trimmed edge, with no caption. Each has a short video: Full page image and Put on its own page.

Can Lacuna handle a book with a hundred pictures or more?

Yes. There is no limit on how many pictures a book can have. Lacuna keeps your original pictures in your book file and makes one optimized copy of each picture for each format, then reuses it, so your files stay small. Kindle copies are compressed harder to suit Kindle’s size limits.

Can I make a children’s picture book?

Yes, for print: full-page images out to the edge of the page (Full Bleed), background images behind your text, floated pictures with text wrapped around their outline, and grids for several pictures side by side. Lacuna’s ebooks are reflowable: each picture and its text flow to fit the reader’s screen, rather than fixed spreads that look the same on every device.

What size should my pictures be? Will they look sharp in print?

For print, aim for about 300 pixels for every inch the picture fills on the page: a picture printed 5 inches wide needs about 1,500 pixels across. Smaller pictures still print, but can look soft. You don’t need to shrink anything for ebooks: Lacuna sizes and compresses each picture for each store.

Can I use photos from my phone?

Yes, as JPEG or PNG. iPhones often save photos as HEIC, which Lacuna doesn’t read: export or share the photo as a JPEG first.

Will the pictures in my Word manuscript come in?

Yes. When you import a Word manuscript, its pictures come in with it, converted to JPEG or PNG where needed. Drawings Word saved as EMF or WMF can’t be read and are left out: save those as PNG or JPEG and add them to your book.

My picture won’t show up.

Check the file: HEIC, AVIF, EMF and WMF files aren’t supported, and each picture must be under 30 MB. Lacuna names the reason when it turns a picture down. If the picture is in your book but missing from a preview, click the preview’s refresh button.

Can I crop or edit a picture in Lacuna?

No. Edit the picture in a photo app, then swap it in with Upload or Browse Images under the picture; its layout and caption stay. A full-page image set to Cover crops itself to fill the page. To swap it everywhere it is used at once, replace it in the image gallery.

Can a full-page image have a caption?

No. A full-page image fills its page, with no caption. For a picture with its caption on a page of its own, use Put on its own page under Space instead.

How do I put a picture at the start of every chapter?

Use chapter heading images: set the picture once and it appears with every chapter heading.

How do I put several pictures on one page?

Place them in a grid: each row holds 2 to 4 pictures side by side, and you can add as many rows as you need.

I chose Wrap, but the text still runs beside a rectangle.

Look at the print preview or your print-ready PDF: the editor always shows the picture’s box. If the print preview shows a rectangle too, check that the picture is floated, has no caption, and has a transparent background. A picture with a solid background has a rectangle for its outline.

My picture jumped to the next page and left a gap.

A picture too tall for the space left on a page moves to the next one. Turn on Fit to Page under Width, and the picture shrinks to fit the space that is left. Print only.

How do I replace a picture without losing its settings?

Click Upload or Browse Images under it, and choose the new picture. Its width, alignment, spacing and caption stay as they were. Its alt text stays too, unless the new picture already has alt text in your gallery. To change a picture everywhere it is used at once, replace it in the image gallery.

How to Use Subheadings

docs.lacuna.pub/use-the-editor/add-subheadings-to-book/

A subheading is a heading inside a section, below its title. Turn any line into one, then style each level once: every subheading of that level in your book follows.

How to add a subheading

  1. Click in the line.

  2. In the editor toolbar, open Paragraph & Headings and choose a heading level, Heading 1 to Heading 6, or press Ctrl/Cmd+Alt/Option+1 to Ctrl/Cmd+Alt/Option+6.

Each level has its own style and its own presets. To make the line body text again, choose Paragraph.

Importing a Word document? See how to set subheadings in Word.

How to style a subheading

  1. Click into the subheading, then click the pencil in its toolbar (Edit Subheading Style).

  2. Set it up on the panel’s tabs and click Apply.

Tab What you can set
TextFont (or Inherit from Body), Size, Letter Spacing, Weight, Transform and Alignment.
SpacingSpacing Around Heading, and the space above it at the top of a page or section.
BorderTurn on Enable Borders, then set Thickness, Spacing Inside Border, Style and Roundness. Borders can be colored too: see how to color a subheading.
BreaksPrevent Page Breaks, to keep it with its text, and Add Before Heading, to put an ornamental break above it.
ColorsA text color, a band of color behind it, and its border’s color. See how to color a subheading.

The panel styles one level, named in its title (Subheading H2): every Heading 2 on the same preset changes with it.

In the e-reader preview, point at a subheading and click Edit to open the same panel.

How to color a subheading

  1. Click into the subheading, then click the pencil in its toolbar.

  2. Open Colors and turn on Enable Colors.

  3. Choose a Text Color, a Background Color, or both, and click Apply.

Choose To
Text ColorColor its words. Inherit from Body keeps your text color.
Background ColorPut a band of color behind it. Transparent means no band.
Border ColorColor its border, when the Border tab turns one on. Default follows your print page colors.
WidthStretch the band across the page (Full Width), or hug the words like a highlighter (Around Text).
Spacing Around TextSet the room between the words and the band’s edges.

To color a border, turn it on in the Border tab first, then choose its Border Color here. Colors show in your e-book and your print-ready PDF.

How to keep a subheading with its text

Turn on Prevent Page Breaks on the Breaks tab, and the subheading stays on the same page as the text below it: it is never the last line of a page.

It is for your print-ready PDF. Your e-book carries it too, but only some e-readers honor it, and the e-reader preview often won’t show it: check your print preview.

How to put a break above a subheading

Put an ornamental break above every subheading of a level, without adding one by hand.

  1. Click into a subheading and click the pencil in its toolbar.

  2. Open Breaks, turn on Add Before Heading, choose a Preset, and click Apply.

How to remove the space above a subheading

A subheading’s top spacing can look too large where nothing sits above it. Turn on either rule on the Spacing tab, under Rules; anywhere else, your spacing stays as you set it.

Turn on To remove the space above it
Trim Top Spacing at Page StartWhen it lands at the top of a printed page, from page 2 on. Print only.
Trim Top Spacing at Section StartWhen it is the first thing in a section, right under the section’s title. In print and in your e-book.

Where else your subheading styles appear

Lacuna styles some headings it makes for you with your subheading presets, so they match your subheadings with no extra work.

Where Which heading
Endnotes at the end of each sectionThe heading above the notes (Notes): Subheading Preset (H2).
An Endnotes sectionThe heading for each volume and book part (Subheading Preset (H1)), and for each section (Subheading Preset (H2)).
An IndexIts letter headings: Heading Preset (H2).

Each one has a pencil beside its preset box that opens the same subheading panel.

How to use presets for subheadings

Every subheading uses the Default preset for its level until you choose another.

Choose a preset for a subheading

  1. Click into the subheading. Its toolbar shows above it.
  2. Choose a preset in the toolbar’s Preset box.
  3. Click the pencil beside the box to style that preset.

The editor shows every subheading the same way; the print preview shows its preset.

Questions

Can I use small caps for subheadings?

Yes. Select its words and choose Text Formatting › Small Caps in the editor toolbar. The panel’s Transform has CAPS, but no small caps.

Why isn’t my subheading in the table of contents?

Turn on Subheading Hierarchy in your table of contents. It lists Heading 2 to Heading 6, never a Heading 1.

Where do I set the color of a subheading’s border?

On the Colors tab, as Border Color, once Enable Colors is on. The Border tab sets everything else about it.

How to Add Emojis to Your Book

docs.lacuna.pub/use-the-editor/add-emojis-to-book/

Add emojis anywhere in your text, from the editor toolbar or your computer’s own emoji picker. Lacuna turns each one into a full-color picture, so it prints in your print-ready PDF and looks the same on every e-reader.

How to add an emoji

  1. Click in your text where the emoji goes.

  2. In the editor toolbar, click Insert Emoji (the smiley face).

  3. Type a word in Search, or browse the categories, and click an emoji.

The picker stays open, so you can click several emojis in a row. The icons along its top jump to each category, from Frequently used (your recent picks) to Flags. Click Insert Emoji again, or anywhere outside the picker, to close it.

How to use your computer’s emoji picker

  1. Click in your text where the emoji goes.

  2. On Windows, press Win+. (period). On a Mac, press Control+Cmd+Space, or fn+E on newer Macs.

  3. Click an emoji.

Lacuna treats these emojis the same as the ones from Insert Emoji. One with a skin tone shows in the default yellow (see the questions below).

How emojis look in print and e-books

Where Your emojis
The editorYour computer’s own emojis, so they can look a little different from your book.
Print-ready PDFFull-color pictures from Noto Color Emoji, the height of the text around them.
EPUB and the e-reader previewThe same pictures, so every e-reader shows them alike. Each carries the emoji’s name for screen readers.
DOCXCharacters, which Word draws in its own emoji font.
©, ®, ™ and the arrows ← ↑ → ↓Text in your book’s font, never pictures.

An emoji takes the height of the text around it, so it is larger in a subheading than in your paragraphs. In a text conversation, a message of only emojis can show them larger with Enlarge Emoji-Only Messages.

In your EPUB, every emoji in your text is its own small picture of about 3 KB, so even a hundred add only about 300 KB.

Questions

Do emojis work in e-books?

Yes. Lacuna puts each emoji in your EPUB as a small picture, so it shows on Kindle, Apple Books, Kobo and every other e-reader, even one with no emoji font of its own.

Can I use emojis in a printed book?

Yes. Your print-ready PDF holds each emoji as a full-color picture, the same one you see in the print preview, ready for KDP, IngramSpark or any printer.

Can I use an emoji with a skin tone?

Yes, but it shows in the default yellow. Lacuna’s pictures have no skin tones, so an emoji with one from your computer’s emoji picker gets the default-tone picture in your print-ready PDF and EPUB. An emoji newer than Lacuna’s pictures stays as text.

Why does a heart or check mark in my text stay a symbol?

A symbol typed as text, such as ♥, ✔, © or ™, stays text in your book’s font. Only its emoji form, from Insert Emoji or your computer’s emoji picker, becomes a picture, so a plain ♥ and the emoji ♥️ can sit side by side.

How to Use Text Conversations

docs.lacuna.pub/use-the-editor/add-text-conversations-to-book/

A text conversation shows a text message exchange the way a phone does: each message in its own bubble, one person’s on the left and the other’s on the right, with names above them. Use it for texts, chat logs, or any back and forth your characters have on a screen.

What it does
Turns lines of dialogue into chat-style bubbles, with names, pictures, receipts and times.
Where to find it
The Text Conversation button in the editor toolbar, or Ctrl/Cmd+Shift+T.
Works in
EPUB, print-ready PDF and DOCX.
Before you start
Write each line as Name: message, one line per message.

Turn text into a conversation

  1. Write each message on its own line, starting with the person’s name and a colon: Betty: Want to be my test subject?
  2. Select the lines. Click before the first line, then hold Shift and click after the last.
  3. Click Text Conversation in the editor toolbar.
  4. Choose each person’s side in the People list: Receiver bubbles sit on the left, Sender bubbles on the right. All left and All right set everyone at once.
  5. Click Yes, create bubbles.

Each line becomes a bubble, and each person’s name becomes a name row above their messages. With two people, Lacuna starts with the first person on the left and the second on the right, so often there is nothing to change.

The window has two other choices:

  • No, keep plain makes the conversation with your lines exactly as written, names and all.
  • Nevermind closes the window and leaves your lines untouched.

Lines without names work too: each selected paragraph becomes a bubble on the left, and you set the sides afterwards.

Add messages and names

  1. Click a message. Its tools appear above it.
  2. Click the plus (Add Message) and choose Add message above or Add message below. The new message starts on the same side as the one you clicked.
  3. Type the message.
  4. Set its side with Set as Receiver (Left Align) or Set as Sender (Right Align).
  5. To add a name, add a message where the name goes, type the name, and click Set as character name.

The message tools, from left to right:

  • Set as Receiver (Left Align) and Set as Sender (Right Align) move a bubble to the left or the right.
  • Set as character name turns a message into a name row. Click it again (Remove character name) to turn it back.
  • Set as image turns a message into a picture (see Add a picture).
  • The receipt menu shows a delivery status under the bubble: Sending, Delivered, Read or Failed, or None for no status.
  • The time menu shows a time under the bubble, on a 12-hour or 24-hour clock.
  • Add Message adds a message above or below.
  • Remove Message deletes the message.

You can also drag a message to a new place, or out of the conversation.

Keyboard shortcuts

The side and name shortcuts work on every message you select, so you can change a whole scene at once:

Press To
Ctrl/Cmd+Shift+TMake a conversation
Ctrl/Cmd+Alt/Option+←Set as Receiver (Left)
Ctrl/Cmd+Alt/Option+→Set as Sender (Right)
Ctrl/Cmd+Alt/Option+↑Set as character name, or remove it

Add a picture

  1. Click a message, then the plus (Add Message), and add a message where the picture goes.
  2. Click Set as image. The message becomes a box for a picture.
  3. Click Upload Image to choose a picture from your computer, or Browse Existing Images to choose one already in your book.
  4. In the gallery, click the picture, then Select Image.

The picture sits on its sender’s side of the conversation, like a photo sent in a chat. Click it to show its tools:

  • Size sets the picture’s Width, as a share of the space a message can take, and its corners. Match Bubble Corners rounds them like the bubbles; turn it off to set the picture’s own Corner Radius.
  • Show character name shows the sender’s name with the picture.
  • Set as text message turns it back into a text message.
  • The sides, receipt, time, Add Message and Remove Message work as they do for a text message.

Style your conversations

  1. Find the conversation’s preset at its foot, Default to start with.
  2. Click the pencil beside the preset to style it.
  3. Click Apply to keep your changes.

Every conversation uses a preset, so a change styles every conversation that uses it. Choose another preset from the menu at the conversation’s foot, for example one per character or one per app your characters text in. The panel has four tabs.

Bubbles

  • Receiver Colors and Sender Colors. The Background and Text Color of each side’s bubbles.
  • Style. The Font of the messages (or Inherit from Body to match your book’s text), their Size, and the bubbles’ Corner Radius.
  • Emojis. Enlarge Emoji-Only Messages shows a message of one to three emojis larger, the way phones do. Emoji Size sets how large, Transparent Background takes the bubble away behind them, and Show Name keeps the sender’s name on them.
  • Spacing. Inside Bubble is the room between a bubble’s edge and its words. Between Bubbles is the space from one message to the next; a little more is added when the speaker changes. Fit to Content makes each bubble as wide as its message; when it is off, every bubble takes 80% of the width.

Names

  • Text. The names’ Font, Size, Transform (None, CAPS or Capitalize) and Weight.
  • Spacing Around Name. The space above and below a name (Top / Bottom). Line Up with Bubble Text lines the name up with the words in the bubble; turn it off to set the name’s own left and right spacing.
  • Layout. Placement puts the name above the bubble (Top), inside it (Bubble), or on the same line as the message (Inline). Repeat Names shows the name on every message; when it is off, the name shows only when the speaker changes.

Receipt & Time

  • Text. The Font, Size, Transform and Weight of the small receipt and time text under a bubble.
  • Spacing Around Receipt. The space above and below it (Top / Bottom), and Line Up with Bubble Text, which lines it up with the words in the bubble.

Spacing

  • Spacing Around Conversation. The room above and below (Top & Bottom) and on each side (Left & Right) of the whole conversation.

Questions

I clicked Text Conversation, but the names stayed in the bubbles.

Lacuna finds names only at the start of a line, followed by a colon, as in Betty: Sure thing, sugar. If your lines are written another way, or you chose No, keep plain, the names stay in the text. Click the trash button at the conversation’s foot (Remove conversation formatting) to turn it back into paragraphs, fix the lines, and try again.

All the bubbles ended up on one side.

With one person, or with three or more, every bubble starts on the left. Select the messages that belong on the right and press Ctrl/Cmd+Alt/Option+→, or set each person’s side in the People list before you click Yes, create bubbles.

I wrote my text messages in Word. Can Lacuna turn them into bubbles?

Yes. Import your Word manuscript, and the messages come in as ordinary paragraphs. Select them and click Text Conversation. If you wrote each one as Name: message, Lacuna makes the name rows and sides for you; otherwise every line becomes a bubble on the left, and you set the sides afterwards.

Can a group chat have more than two people?

Yes. Every person gets a name row, and you choose each one’s side. A common choice is to put the person whose phone the reader is looking at on the right, and everyone else on the left.

How do I turn a conversation back into normal text?

Click the trash button at the conversation’s foot (Remove conversation formatting). Each message and each name becomes a paragraph again, and each picture becomes an ordinary image.

How to Format Blockquotes and Epigraphs

docs.lacuna.pub/use-the-editor/add-blockquotes-to-book/

A blockquote sets a passage apart from your text: a quotation, a letter, a poem. Turn any paragraphs into one, style every blockquote at once, and show one above a section’s heading as an epigraph.

How to add a blockquote

  1. Select the paragraphs, or click in one.

  2. In the editor toolbar, click Blockquote, or press Ctrl/Cmd+Shift+B.

Every paragraph you selected goes into one blockquote. You can also turn a paragraph into a blockquote from its paragraph menu. Paragraphs set to Quote in your Word document import as blockquotes, one per paragraph.

A bar at the blockquote’s foot holds its controls:

Choose To
PresetChoose the preset it uses.
The pencil (Edit blockquote style)Style its preset.
The settings button (Blockquote settings)Turn on its two settings (below).
Copy blockquoteCopy it, to paste somewhere else.
Remove blockquoteTurn it back into ordinary paragraphs. Its words stay.

The settings button holds two settings, both off until you turn them on. The button turns blue while either is on.

Choose To
Keep Lines TogetherKeep the whole blockquote on one page.
Show Above the Section HeadingPrint it above the section’s title, as an epigraph. Only for a blockquote that sits straight in the section.

The Handwriting button beside Blockquote in the toolbar turns it into handwriting.

How to style blockquotes

  1. Click the pencil on the blockquote’s bar (Edit blockquote style).

  2. Set it up on the Text and Spacing tabs, and click Apply.

Every blockquote on the same preset changes with it. In the e-reader preview, point at a blockquote and click Edit to open the same panel.

Text

Setting To
FontChoose its typeface.
SizeSet its size, in points.
WeightMake it lighter or bolder, or turn on Italic.
Line SpacingSet the space between its lines. Kobo e-readers use their own.
AlignmentAlign it left, center or right, or justify it.

Spacing

Setting To
Spacing Around BlockquoteSet the space above and below it (Top / Bottom), and how far it sits in from your text on each side (Left / Right).
Spacing BetweenSet the space between its paragraphs.
Use IndentationIndent the first line of each of its paragraphs.
Trim Top Spacing at Page StartRemove the space above it when it starts a printed page. Print only.
Trim Top Spacing at Section StartRemove the space above it when it is the first thing in a section. In print and in your e-book.

Spacing Between works between paragraphs (Enter). A line break (Shift+Enter) stays inside one paragraph.

How to put a blockquote above the section heading

An epigraph is a quotation that opens a chapter or another section, above its title. Make the quotation a blockquote, then show it above the section’s heading.

  1. Click the settings button on the blockquote’s bar (Blockquote settings).

  2. Choose Show Above the Section Heading.

Where The blockquote
Your print-ready PDF, e-book and Word documentPrints above the whole heading: its heading image, title and subtitle.
The e-reader and print previewsShows above the heading, as in your book.
The editorStays where you put it, tinted amber, with a thick amber rule below it.
  • Any section type. It works in chapter types and in front and back matter, such as a Dedication or a Copyright page.
  • Several quotes. Turn it on for each one: they stack above the heading in the order they appear in the editor.
  • A hidden heading. In a section type that hides its heading, the quote simply prints first, before the section’s text.
  • Only a blockquote straight in the section. One inside a callout box, a grid or a table doesn’t offer the setting, and stays where it is.

To move it back into your text, click the settings button again and choose Show Above the Section Heading to turn it off.

How to keep a blockquote on one page

Click the settings button on the blockquote’s bar and choose Keep Lines Together. When it doesn’t fit at the foot of a page, the whole blockquote moves to the next one. It is off until you turn it on, so a long quotation can split.

Where Keep Lines Together
Print-ready PDFKeeps it on one page.
Word document (DOCX)Keeps it on one page.
Apple Books and NookKeep it on one page.
KindleKeeps its paragraphs together, but can split inside one.
Kobo and Google PlaySplit it at the foot of the page, like any text.

The warning icon beside Keep Lines Together lists the same. Switch devices in the e-reader preview to see each one.

How to use presets for blockquotes

Every blockquote uses the Default preset until you choose another, so styling one styles them all. To give some blockquotes a look of their own, such as letters or poems, make a preset for them.

Make a preset for a blockquote

  1. Click the Preset box at the blockquote’s foot and choose Create New Preset….

  2. Choose a group under Choose an existing group, then click its Create in button (such as Create in Elegant). Or choose Create a new group, type a name and click Create Group and Preset.

  3. Click the pencil and style the preset, then click Apply.

A new preset starts from Lacuna’s own blockquote look (centered, in a small caps font), not from your Default, so the blockquote changes at once. Style it with the pencil.

Choose a preset for a blockquote

  1. Click the Preset box at the blockquote’s foot.

  2. Choose a preset. Type in the box to search when you have many.

The Preset box inside the panel chooses which preset the panel edits, not which one the blockquote uses.

Questions

How do I align a blockquote?

Click its pencil and choose an Alignment on the Text tab: left, center, right or justified. Every blockquote on the same preset follows.

How do I make one blockquote from several paragraphs?

Select all the paragraphs, then click Blockquote. To join two blockquotes that sit together, click at the start of the second one and press Backspace: they join when they share a preset and settings.

How to Add a Handwriting Font to Your Book

docs.lacuna.pub/use-the-editor/add-handwriting-to-book/

Handwriting sets a passage in a handwriting font: a letter, a note, a journal entry. Turn any paragraphs into handwriting, style every handwriting block at once, and see how it prints and shows on e-readers.

How to add handwriting

  1. Select the paragraphs, or click in one.

  2. In the editor toolbar, click Handwriting.

Every paragraph you selected goes into one handwriting block, tinted blue in the editor. You can also turn a paragraph into handwriting from its paragraph menu: click the menu’s title and choose Handwriting. To turn a blockquote into handwriting, click in it and click Handwriting.

A bar at the block’s foot holds its controls:

Choose To
PresetChoose the preset it uses.
The pencil (Edit handwriting style)Style its preset.
The settings button (Handwriting settings)Turn on its two settings (below).
Copy handwritingCopy it, to paste somewhere else.
Remove handwritingTurn it back into ordinary paragraphs. Its words stay.

The settings button holds two settings, both off until you turn them on. The button turns blue while either is on.

Choose To
Keep Lines TogetherKeep the whole block on one page. Where it works is the same as for a blockquote.
Show Above the Section HeadingPrint it above the section’s title, like an epigraph. Only for handwriting that sits straight in the section.

How to style handwriting

  1. Click the pencil on the handwriting’s bar (Edit handwriting style).

  2. Set it up on the Text and Spacing tabs, and click Apply.

Every handwriting block on the same preset changes with it. In the e-reader preview, point at handwriting and click Edit to open the same panel.

Text

Setting To
FontChoose from the handwriting fonts. Lacuna comes with 41, each name drawn in its own font.
SizeSet its size, in points.
WeightMake it lighter or bolder, where the font has more than one weight. Italic works only for a font that has an italic.
Line SpacingSet the space between its lines. Kobo e-readers use their own.
AlignmentAlign it left, center or right, or justify it.

The Font list shows only handwriting fonts. To add one from Google Fonts, click Add beside the Font box, and choose Handwriting under Choose category as you add it. The fonts guide explains the check mark beside a font and its weights.

Spacing

Setting To
Spacing Around HandwritingSet the space above and below it (Top / Bottom), and how far it sits in from your text on each side (Left / Right).
Spacing BetweenSet the space between its paragraphs.
Use IndentationIndent the first line of each of its paragraphs.
Trim Top Spacing at Page StartRemove the space above it when it starts a printed page. Print only.
Trim Top Spacing at Section StartRemove the space above it when it is the first thing in a section. In print and in your e-book.

Spacing Between works between paragraphs (Enter). A line break (Shift+Enter) stays inside one paragraph.

How to use presets for handwriting

Every handwriting block uses the Default preset until you choose another, so styling one styles them all. To give some handwriting a look of its own, such as letters in one hand and a journal in another, make a preset for it. Handwriting presets are separate from blockquote presets.

Choose a preset for handwriting

  1. Click the Preset box at the handwriting’s foot.

  2. Choose a preset. Type in the box to search when you have many.

The Preset box inside the panel chooses which preset the panel edits, not which one the handwriting uses.

How handwriting looks in print and on e-readers

Your handwriting keeps its font everywhere you publish it:

Where Handwriting
Print-ready PDFPrints in its handwriting font.
E-book (EPUB)Carries the handwriting font inside it, so e-readers show it.
Word document (DOCX)Carries the handwriting font too.

Your e-book carries only the fonts your book uses, so a handwriting font you never use adds nothing to it. To compare, switch the preview between an e-reader and Print - Single Section (Fast).

How to remove handwriting

Click Remove handwriting (the trash can) at its foot, or click in it and click Handwriting in the toolbar again. Your words stay, as ordinary paragraphs. To make it a blockquote instead, click in it and click Blockquote.

Questions

How do I find all the handwriting in my book?

Open Search Elements and choose Blockquotes. Handwriting results read Handwriting.

Why isn’t my font in the handwriting Font list?

The list shows only fonts in the Handwriting category. When you add a font with Add, choose Handwriting under Choose category. A font added as Content doesn’t show in this list.

How to Use Ornamental Breaks

docs.lacuna.pub/use-the-editor/add-ornamental-breaks-to-book/

An ornamental break separates scenes inside a section. In Lacuna, a break can be blank space, text, a line or an image.

A new book’s breaks start as Space: you see a gap, not an ornament.

How to add an ornamental break

  1. Click at the end of the scene.

  2. In the editor toolbar, open Breaks and choose Ornamental Break, or press Ctrl/Cmd+/.

Typing *** on a line of its own and pressing Enter works too.

How to style your ornamental break

  1. Click the pencil on any break (Edit ornamental break style).

  2. Under Break Type, choose Space, Text, Line or Image, set it up, and click Apply. Every break that uses the same preset changes with it.

Kind What you can set
SpaceHow much blank space, top and bottom. Nothing is drawn.
TextContent (or a quick pick: , , ~ ~ ~ and more), Font, Weight, Size, Color and Position**.
LineThickness, Width, Color and Position. Leave Color on Default to follow the book’s Border color in print.
ImageA built-in image or your own picture, its Width, Position and Alt Text.

Every kind also has Keep together with content (on), so a break never ends a page, and Trim Top Spacing at Page Start for print.

How to use built-in images

  1. In the break’s panel, choose Image, then Choose from Built-In Images.

  2. Pick one and click Apply. To use your own picture, click Upload or Choose from Gallery.

How to use presets

Every break starts on the Default preset, so styling one styles them all. To give some breaks a look of their own, make a new preset for them.

  1. Click the break’s Preset box and choose Create New Preset….

  2. Give it a name and click Create Group and Preset. The break now uses it.

  3. A new preset starts as Space: click the pencil and style it.

To move another break onto it, choose it in that break’s Preset box.

Where else ornamental breaks appear

Above subheadings

  1. Click into a subheading and click the pencil in its toolbar.

  2. Open Breaks, turn on Add Before Heading, choose a Preset, and click Apply.

Before your endnotes

  1. Open Edit Styles › Endnote Settings and turn on Add Endnotes At End Of Section.

  2. On the End of Section tab, leave Separator Style on Ornamental Break (the default), choose its Ornamental Break Preset, and click Apply.

See endnotes.

The first line after a break

To start each scene with small caps, turn on Apply After › Ornamental Breaks in First Line Styling. See how to repeat the first-line style after breaks and subheadings.

Breaks from your Word document

The easiest way to get breaks is to have them in your Word document already: put ***, * * *, ---, ~~~ or ### on a line of its own between scenes, and each becomes an ornamental break when you import your manuscript.

Questions

Why can’t I see my ornamental break?

New books start with Space, a gap with nothing drawn. Click the break’s pencil and choose Text, Line or Image.

Can I use my own image?

Yes. In the break’s panel, choose Image, then Upload or Choose from Gallery.

Can I change the color of a break?

Yes. A Text break has Color, and so does a Line.

Why did my break move to the next page?

Keep together with content keeps it with the scene that follows, so it never ends a page. Turn it off in the break’s panel to let it stay.

How to Add Page Breaks to Your Book

docs.lacuna.pub/use-the-editor/add-page-breaks-to-book/

A page break ends a page early: the text after it starts on a new page. Every section already starts on a new page, so you only need one inside a section.

How to add a page break

  1. Click at the end of the text that should finish the page.

  2. In the editor toolbar, open Breaks and choose Page Break, or press Ctrl/Cmd+\.

A grey Page Break bar marks it in the editor. Everything after it starts on a new page.

How to remove a page break

  1. Hover over the Page Break bar.

  2. Click the bin at its right (Remove page break).

You can also click the bar and press Backspace on Windows and Linux, Delete on a Mac.

How page breaks print and show on e-readers

In The text after a page break
Print-ready PDFStarts on the next page, left or right.
Kindle, Apple Books and Google Play BooksStarts a new screen.
KoboRuns on: Kobo ignores page breaks.
Word document (DOCX)Starts a new page in Word.

Page breaks from your Word document

A page break in your Word document stays a page break in your book, and so does a paragraph set to start on a new page (Word’s Page break before). A page break at the end of a section is left out, because the next section starts on a new page anyway. See importing best practices.

Questions

Do I need a page break before each chapter?

No. Every section starts on a new page by itself, in print and on e-readers.

How do I start a chapter on a right-hand page?

Not with a page break: it starts the next page, left or right. To start a chapter type on a right-hand page, see how to start chapters on a right-hand page; for one section, see how to start your section on the right-hand page.

How do I remove the page breaks that came in with my manuscript?

Click Elements at the top of the sidebar, click Select Element Types and tick Page Breaks: every page break in your book is listed (see how to find elements). Click one to go to it, then remove it.

How to Add Callout Boxes to Your Book

docs.lacuna.pub/use-the-editor/add-callout-boxes-to-book/

A callout box sets a passage apart from your text, inside a border: a tip, a sidebar, a warning or a note your reader shouldn’t miss. Put any paragraphs in one, then style every box at once.

How to add a callout box

  1. Click in the paragraph, or select all the paragraphs the box should hold.

  2. In the editor toolbar, open Containers and choose Callout Box, or press Ctrl/Cmd+Shift+C.

A box holds whatever you put in it: paragraphs, subheadings, lists, blockquotes, pictures. You can also turn one paragraph into a box from its paragraph menu: click Paragraph at the top of the menu and choose Callout Box.

Every box has a toolbar at its foot:

Click To
PresetChoose the box’s preset.
The pencil (Edit callout box style)Style the box, and every box on the same preset.
The settings button (Callout box settings)Keep the box on one page, or let it split.
FloatFloat the box so your text runs beside it.
Copy (Copy callout box)Copy the box, to paste it somewhere else.
The trash (Remove callout box)Take the box away. Its text stays.

How to style a callout box

  1. Click the pencil at the box’s foot (Edit callout box style).

  2. Set it up on the panel’s tabs and click Apply. Every box on the same preset changes with it.

Border tab Sets
ThicknessThe border’s width, 0 to 30 px. One number sets all four sides; click Expand to set them in pairs or one by one.
Line StyleSolid, Dashed, Dotted or Double.
RadiusRounds the corners, 0 to 24 px.
ColorThe border’s color. Default follows your book’s Border color in print, and black when none is set.
Styling tab Sets
BackgroundA color behind the box. Transparent for none.
Text ColorThe color of the words in the box. Inherit from Body keeps your text’s color.
Line HeightThe space between lines in the box, 1× to 3×. Kobo uses its own.
Spacing tab Sets
Around Callout BoxThe room outside the box, 0 to 100 px: all four sides, in pairs, or one by one.
Inside Callout BoxThe room between the border and the words, 0 to 100 px.
Trim Top Spacing at Page StartIn print, removes the space above the box when it starts a new page.
Trim Top Spacing at Section StartRemoves the space above the box when it is the first thing in a section, in print and in your e-book.

In the e-reader preview, point at a callout box and click Edit to open the same panel.

How to color a callout box

  1. Click the pencil at the box’s foot.

  2. Open Styling and choose a Background, a Text Color, or both.

  3. For the border, open Border and choose its Color.

  4. Click Apply.

A Default border takes your book’s Border color in print. A color you choose stays the same on every page and in every e-reader, dark mode included.

How to float a callout box beside your text

  1. Click Float at the box’s foot.

  2. Choose Float Left or Float Right.

  3. Under Choose the max width, choose how wide it can be: 25% to 75% of the page (50% to start).

The text after the box runs beside it in your print-ready PDF and your e-book. The editor keeps showing the box full width; the previews show the float. To stop floating, open Float and click the lit button again.

Kindle and DOCX show a floated box across the page.

How to keep a callout box on one page

Every new callout box keeps together: when it doesn’t fit at the foot of a page, the whole box moves to the next one.

  1. Click the settings button at the box’s foot (Callout box settings).

  2. Untick Keep Lines Together to let a long box split across pages.

You set this box by box. How it reads in each place:

Where A kept box that doesn’t fit
Your print-ready PDF, Apple Books, NookMoves to the next page, whole.
Kindle, Kobo, Google PlayMay split across two pages.

The warning beside Keep Lines Together lists the same readers. Switch the device preview to see each one.

How to use presets for callout boxes

Every callout box uses the Default preset until you choose another, so styling one box styles them all. To give some boxes a look of their own, such as a tip box and a warning box, make a preset for them.

Make a preset for a callout box

  1. Click the box’s Preset box and choose Create New Preset….

  2. Give it a name and click Create Group and Preset. The box now uses it.

  3. Click the pencil to style it.

A new preset starts from Lacuna’s plain box (a 2 px solid border, square corners), not from your Default.

Choose a preset for a callout box

Choose it in the box’s Preset box. The box takes that preset’s look at once.

Questions

What is a callout box in a book?

A passage set apart in a box, with a border, a background or both, so a reader spots it at a glance: a tip, a sidebar, a definition or a warning.

Do callout boxes work in e-books and on Kindle?

Yes. They appear in your EPUB, your print-ready PDF and your DOCX. On Kindle a floated box sits across the page, and a long box may split across two pages.

How do I remove a callout box and keep its text?

Click the trash at the box’s foot (Remove callout box): the box goes and its text stays. To keep the box without its border, set Thickness to 0 on the Border tab.

Can a callout box have a dashed border?

Yes. On the Border tab, choose Dashed, Dotted or Double under Line Style.

Why did my callout box jump to the next page?

Keep Lines Together is on, so a box that doesn’t fit at the foot of a page moves to the next one whole. To let it split, click the settings button at the box’s foot and untick it.

How to Place Text and Pictures Side by Side with Grids

docs.lacuna.pub/book-design/grids/

A grid puts 2 to 4 cells side by side on one row, each holding its own text or pictures. For one passage that flows from column to column, use columns instead.

Add a grid from the editor toolbar, and style every grid in your book at once from its panel.

How to add a grid

  1. Click in the paragraph that goes in the first cell, or select every paragraph it should hold.

  2. In the editor toolbar, open Containers, point at Grid and choose how many cells. Or press Ctrl/Cmd+Shift+G for two.

What you selected moves into the first cell, and the other cells start empty. A cell holds paragraphs, subheadings, lists and pictures, but not a callout box, columns or another grid: those are greyed out inside a cell.

Every grid has a toolbar at its foot:

Click To
PresetChoose the grid’s preset.
The pencil (Edit grid style)Style the grid, and every grid on the same preset.
2, 3 or 4 cellsSet how many cells it has.
Copy (Copy grid)Copy the grid, to paste it somewhere else.
The trash (Remove grid (keeps content))Take the grid away. What it holds stays, in order.

How to put two paragraphs side by side

  1. Add a grid around the first paragraph.

  2. Select the paragraph that goes beside it, and cut it with Ctrl/Cmd+X.

  3. Click in the grid, press Tab to move to the empty cell, and paste with Ctrl/Cmd+V.

Tab moves to the next cell and Shift+Tab to the one before. In the last cell, Tab takes you below the grid.

For pictures side by side, click in a cell and add a picture there.

How to add or remove cells

Click To
+ at the grid’s right edge (Add cell)Add a cell at the end. A grid holds up to 4.
× at a cell’s top right (Remove cell)Remove that cell. What it holds moves into the cell before it (the first cell’s, into the next). It shows when you point at a cell of a grid with 3 or 4 cells.
2, 3 or 4 at the grid’s footSet the number of cells. With fewer, what the cells taken away held moves into the last cell kept.

Cells always share the row equally: two cells take half the width each, four take a quarter. Nothing you put in a cell is lost when you remove it.

How to style a grid

  1. Click the pencil at the grid’s foot (Edit grid style).

  2. Set it up on the panel’s tabs and click Apply. Every grid on the same preset changes with it.

Text tab Sets
FontThe font in the cells. Inherit from Body uses your text’s font.
Size5 to 72 pt.
Line SpacingThe space between lines, 1× to 3×. Kobo uses its own.
Justify TextProject Setting follows your book’s justification; On lines the text up on both edges of each cell; Off keeps a ragged right edge.
Colors tab Sets
BackgroundA color behind the whole grid. Transparent for none.
Text ColorThe color of the text in the cells. Inherit from Body keeps your text’s color.
Border tab Sets
ThicknessThe border around the grid, 0 to 30 px (0, no border, to start). One number sets all four sides; click Expand to set them in pairs or one by one.
Line StyleSolid, Dashed or Dotted, for the border and the line between cells.
RadiusRounds the corners, 0 to 24 px.
ColorThe color of the border and the line between cells. Default follows your book’s Border color in print, and black when none is set.
Between Columns › ThicknessThe line between cells, 0 to 30 px. 0 for none.
Spacing tab Sets
Around GridThe room outside the grid, 0 to 100 px. Left and right make the grid narrower than your text.
Inside CellsThe room inside the cells, 0 to 100 px. Left and right set the room at the grid’s outer edges.
Between Cells › GapThe space between cells, 0 to 100 px.
Trim Top Spacing at Page StartIn print, removes the space above the grid when it starts a new page.
Trim Top Spacing at Section StartRemoves the space above the grid when it is the first thing in a section, in print and in your e-book.
Keep Lines TogetherKeeps the whole grid on one page. Off to start.

In the e-reader preview, point at a grid and click Edit to open the same panel.

How to draw a line between cells

  1. Click the pencil at the grid’s foot and open Border.

  2. Under Between Columns, set Thickness, and click Apply.

The line takes the Line Style and Color above it, the same as the border around the grid. Set Thickness to 0 to take it away. The dashed lines between cells in the editor only show where each cell begins: they never print.

How to keep a grid on one page

At first, a grid that doesn’t fit at the foot of a page continues on the next one. To keep a short grid whole:

  1. Click the pencil at the grid’s foot and open Spacing.

  2. Under Rules, turn on Keep Lines Together and click Apply.

It is part of the preset: every grid on the same preset keeps together. How a kept grid that doesn’t fit reads in each place:

Where A kept grid that doesn’t fit
Your print-ready PDF, Apple Books, NookMoves to the next page, whole.
Kindle, Kobo, Google PlayMay split across two pages.
Your DOCXIts row stays on one page.

The warning beside Keep Lines Together lists the same readers. Switch the device preview to see each one.

How to use presets for grids

Every grid uses the Default preset until you choose another, so styling one grid styles them all. To give some grids a look of their own, such as a framed pair of photos, put them on another preset.

Make a preset for a grid

  1. Click the grid’s Preset box and choose Create New Preset….

  2. Give it a name and click Create Group and Preset. The grid now uses it.

  3. Click the pencil to style it.

A new preset starts from Lacuna’s plain grid (no border, no line between cells), not from your Default. Watch it on a blockquote in make a preset for an element.

Choose a preset for a grid

Choose it in the grid’s Preset box. The grid takes that preset’s look at once.

How grids look in print and on e-readers

Where Your reader sees
Your print-ready PDFThe cells side by side, each as wide as the others.
E-books, Kindle includedThe cells side by side across the screen. On a phone, four cells get narrow: check them in the e-reader preview.
Your DOCXA one-row Word table.

Text in a cell has no first-line indent and no drop cap.

Questions

Can I put several pictures on one page?

Yes. Put 2 to 4 pictures in a grid, one in each cell, and add another grid under it for the next row. Click in a cell to add a picture there.

Do grids work on Kindle and in e-books?

Yes. The cells stay side by side in your EPUB, Kindle included, in your print-ready PDF and in your DOCX.

Why can’t I remove a cell?

A grid always has at least two cells, so the × shows only on a grid of three or four. To take the whole grid away and keep what it holds, click the trash at its foot.

Why did my grid split across two pages?

Keep Lines Together is off to start, so a long grid continues on the next page. To keep it whole, turn it on in the grid’s panel, on the Spacing tab.

How to Format Text in Columns in Your Book

docs.lacuna.pub/book-design/columns/

Columns pour one passage into two or three columns, newspaper style: the text fills the first column, then carries on in the next. They suit glossaries, word lists and other dense reference text in your print book.

To set separate things side by side, each in its own box, use a grid instead.

How to put text in columns

  1. Select the paragraphs the columns should hold.

  2. In the editor toolbar, open Containers, point at Columns and choose two or three columns. Or press Ctrl/Cmd+Shift+O for two.

The editor keeps your text in one column inside a gray box; the print preview shows the columns. A columns block holds paragraphs, lists and subheadings. Every block has a toolbar at its foot:

Click To
PresetChoose the preset these columns use.
The pencil (Edit columns style)Style these columns, and every columns block on the same preset.
2 / 3Change the number of columns.
Copy (Copy columns)Copy the block, to paste it somewhere else.
The trash (Remove columns (keeps content))Take the columns away. Your text stays.

How to change the number of columns

  1. Click 2 or 3 at the foot of the block.

How columns look in print and on e-readers

Columns are made for print. E-readers that can’t show columns show the passage as one ordinary column, in the same order, so nothing is lost.

Where Your columns
Your print-ready PDFTwo or three columns, as you set them.
Apple Books, NookThe columns.
Kindle, Kobo, Google PlayOne column.
Your DOCX fileWord’s own columns.

Switch the device preview to see each one.

How to style columns

  1. Click the pencil at the block’s foot (Edit columns style).

  2. Set it up on the panel’s tabs and click Apply. Every columns block on the same preset changes with it.

Text tab Sets
FontThe font of the text in the columns. Inherit from Body keeps your body text’s font.
SizeIts size, 5 to 72 pt.
Line SpacingThe space between lines, 1× to 3×. Kobo uses its own.
Justify TextProject Setting follows your book’s justification. On or Off sets it for these columns.
Even Column HeightsIn print, ends the columns at about the same height. Off fills each column to the foot of the page before the next one starts.
Colors tab Sets
BackgroundA color behind the block. Transparent for none.
Text ColorThe color of the words. Inherit from Body keeps your text’s color.
Border tab Sets
ThicknessThe border around the block, 0 to 30 px. One number sets all four sides; click Expand to set them in pairs or one by one.
Line StyleSolid, Dashed or Dotted, for the border and the line between columns.
RadiusRounds the corners, 0 to 24 px.
ColorThe color of the border and the line between columns. Default follows your book’s Border color in print, and black when none is set.
Between Columns: ThicknessThe line between the columns, 0 to 30 px. 0 draws no line.
Spacing tab Sets
Around ColumnsThe room outside the block, 0 to 100 px: all four sides, in pairs, or one by one.
Inside ColumnsThe room between the border and the text, 0 to 100 px.
Between Columns: GapThe space between the columns, 0 to 100 px.
Trim Top Spacing at Page StartIn print, removes the space above the block when it starts a new page.
Trim Top Spacing at Section StartRemoves the space above the block when it is the first thing in a section, in print and in your e-book.
Keep Lines TogetherKeeps the whole block on one page.

In the e-reader preview, point at a columns block and click Edit to open the same panel.

How to add a line between columns

  1. Click the pencil at the block’s foot.

  2. Open Border and, under Between Columns, set Thickness above 0.

  3. Click Apply.

The line takes the Line Style and Color set above it, the same as the border.

How to keep columns on one page

Columns flow across pages: a long passage carries on onto the next page. To keep a whole block on one page:

  1. Click the pencil at the block’s foot and open Spacing.

  2. Turn on Keep Lines Together and click Apply.

A block that doesn’t fit then moves to the next page whole, in print, Apple Books and Nook. Kindle, Kobo and Google Play may still split it. The setting is part of the preset, so it applies to every columns block on the same preset.

How to use presets for columns

Every columns block uses the Default preset until you choose another, so styling one block styles them all. To give some passages a look of their own, make a preset for them.

Make a preset for columns

  1. Click the block’s Preset box and choose Create New Preset….

  2. Give it a name and click Create Group and Preset. The block now uses it.

  3. Click the pencil to style it.

A new preset starts from Lacuna’s plain columns (no border, no line between columns), not from your Default.

Choose a preset for columns

Choose it in the block’s Preset box. The block takes that preset’s look at once.

Questions

Why doesn’t the editor show my columns?

The editor keeps your text in one column on purpose: columns are laid out again on every printed page, so the editor can’t know where each line will break. Switch the preview to print to see them.

Why is Columns greyed out?

Columns can’t go inside a callout box, a grid or other columns. Point at the greyed item to see which. Put the columns outside the box.

How to Format Bulleted and Numbered Lists in Your Book

docs.lacuna.pub/use-the-editor/add-lists-to-book/

A list sets items out one per line, each with a bullet or a number. Turn lines into a list from the editor toolbar, nest items under each other, and style every list in your book at once.

How to add a bulleted or numbered list

  1. Select the lines the list should hold, or click in one.

  2. In the editor toolbar, open Lists and choose Bullet List or Ordered List. Or press Ctrl/Cmd+Shift+8 for bullets, Ctrl/Cmd+Shift+7 for numbers.

Each line becomes an item. Press Enter at the end of an item to add the next one. To switch a list between bullets and numbers, click in it and choose the other one.

Importing a Word document? Its bulleted and numbered lists come in with it, nested levels included. See what gets imported.

Click in a list, and its toolbar shows above it:

Click To
PresetChoose the list’s preset.
The pencil (Edit list style)Style the list, and every list on the same preset.
StartNumbered lists only: start at another number.
The settings buttonKeep Lines Together: keep the list on one page.

How to nest list items

  1. Click in the item. It can be any item but the first.

  2. Press Tab. The item moves in one level, under the item above it.

Press Shift+Tab to move it back out.

A nested list is a list of its own. It starts on its parent list’s preset, so its bullets match. To change them, give it its own preset.

How to start a numbered list at another number

Use it to carry numbering on after a paragraph: when a list stops at 2 and picks up again below a paragraph, start the second list at 3.

  1. Click in the numbered list. Start shows in its toolbar.

  2. Type a number, or click the box and choose one.

It works with every kind of numbering: a list in a, b, c that starts at 3 starts at c.

How to style your lists

  1. Click in a list, then click the pencil in its toolbar (Edit list style).

  2. Set it up on the Markers, Spacing and Text Styling tabs, and click Apply.

Every list on the same preset changes with it, bulleted and numbered alike: one preset styles both. In the e-reader preview, point at a list and click Edit to open the same panel.

Markers tab Sets
Bullet MarkerIts Style: Disc, Circle, Square, None, or Custom, a symbol you type in Symbol (up to four characters). Its Color: Inherit from Body keeps your text’s color.
Ordered MarkerIts Style: 1, 2, 3, a, b, c, A, B, C, i, ii, iii, I, II, III or None. Its Color, as for bullets.
Spacing tab Sets
IndentationHow far the list sits in from your text, up to 100 px: both sides together (Left / Right) or one by one.
Space Between ItemsThe Gap between one item and the next, up to 50 px.
Space Around ListThe space above and below the list, up to 100 px: together (Top / Bottom) or one by one.
Trim Top Spacing at Page StartRemoves the space above a list that starts a new page. Print only.
Trim Top Spacing at Section StartRemoves the space above a list that is the first thing in a section. Print and e-books.
Text Styling tab Sets
Enable Text StylingOff to start: list items look like your body text. Turn it on for the rows below.
FontThe items’ typeface. Inherit from Body uses your body text’s font.
Size5 to 72 pt.
Line SpacingThe space between lines in an item, 1× to 3×. Kobo uses its own.
Text JustificationLines the items’ text up on both sides.

How to change the bullets and numbers

  1. Click in a list and click the pencil.

  2. On Markers, choose a Style under Bullet Marker for bulleted lists, or under Ordered Marker for numbered ones.

  3. Click Apply.

Choose Custom to type your own symbol, such as ◆ or ★, in Symbol. Your print-ready PDF and DOCX show it; some e-readers show a plain round bullet instead. The warning beside Symbol names them.

How to keep a list on one page

A list splits across pages when it runs out of room. To keep a short list in one piece, click the settings button in its toolbar and tick Keep Lines Together: a list that would split moves to the next page, whole. You set it list by list.

Where A kept list that doesn’t fit
Your print-ready PDF, Apple Books, NookMoves to the next page, whole.
Kindle, Kobo, Google PlayMay split across two pages.

The warning beside Keep Lines Together lists the same readers.

How to use presets for lists

Every list uses the Default preset until you choose another, bulleted and numbered alike, so styling one list styles them all. To give some lists a look of their own, put them on another preset.

Make a preset for a list

  1. Click in the list, open the Preset box in its toolbar and choose Create New Preset….

  2. Give it a name and click Create Group and Preset. The list now uses it.

  3. Click the pencil to style it.

A new preset starts from Lacuna’s standard list look, not from your Default. More on preset groups: Presets.

Give a nested list its own bullets

  1. Click in a nested item. The toolbar is now the nested list’s.

  2. Choose another preset in its Preset box, or make one.

Every nested list on that preset changes with it. For a different bullet on each level, use a preset per level.

How lists look in print and on e-readers

Where Your reader sees
Print-ready PDFYour bullets, numbers and spacing as set. A long list carries on onto the next page, unless Keep Lines Together is on.
E-booksThe same, except that some e-readers show a Custom symbol as a plain round bullet, and Kobo uses its own line spacing.
DOCXA Word list, with your bullets and numbers.

Questions

Why do my nested items have the same bullets as the rest?

A nested list starts on the Default preset, like every new list. Put it on another preset to give it its own bullets: see Give a nested list its own bullets.

Why does my custom bullet show as a plain dot on Kindle?

Some e-readers, Kindle among them, can’t show a custom symbol and draw a plain round bullet instead. Your print-ready PDF and DOCX always show it. Switch the device preview to see each reader.

How do I turn a list back into normal paragraphs?

Select its items, open Lists and choose the same kind again (Bullet List for a bulleted list). Each item becomes a paragraph.

How to Add Tables to Your Book

docs.lacuna.pub/use-the-editor/add-tables-to-book/

A table sets information out in rows and columns, with a header row on top. Add one from the editor toolbar, then style every table in your book at once from its panel.

How to add a table

  1. Click in the paragraph the table should follow.

  2. In the editor toolbar, click Insert Table, point at the grid to choose rows and columns (up to 5 by 8), and click.

The table goes below that paragraph. A table of two rows or more starts with a header row. Click in a cell to type or paste.

Importing a Word document? Its tables come in with it, header row included. See what gets imported.

How to add rows and columns

Click in the table, and + buttons appear around it.

Click To
+ beside a rowAdd row above or Add row below it.
+ under the tableAdd a row at the end.
+ at the right of the tableAdd column before selection or Add column after selection (beside the column you clicked in), or Add column at the beginning or at the end.

How to delete a row, a column or a table

  • A row or a column: drag across every cell in it to select them, then press Backspace on Windows and Linux, Delete on a Mac.
  • A table: click Delete table (the bin) in the table’s toolbar.

Deleting a table’s only row or only column deletes the table. Changed your mind? Press Ctrl/Cmd+Z.

The table’s toolbar

Click in a table, and its toolbar shows above it.

Click To
PresetChoose this table’s preset.
Edit Table Style (the pencil)Open the Table panel and style your tables.
Merge cellsJoin the cells you selected into one.
Split cellSplit a merged cell back into its cells.
Toggle header rowMake the first row a header row, or a plain row again.
Toggle header columnMake the first column header cells, styled like the header row.
The settings buttonA menu: Avoid splitting across pages, Set column widths and Reset column widths.
Delete tableRemove the whole table.

How to set column widths

Drag the line between two columns: what one gains, the other loses. For exact widths, type them in.

  1. Click the table’s settings button and choose Set column widths. A percentage shows above each column.

  2. Type the width you want and press Enter. The other columns adjust so the table still fills the width.

Reset column widths in the same menu makes every column equal again.

How to keep a table on one page

A table splits across pages when it runs out of room. To keep a short table in one piece, click its settings button and tick Avoid splitting across pages: a table that would split moves whole to the next page, and the settings button turns blue. Leave it off for a long table.

Where A table kept in one piece
Print-ready PDFMoves whole to the next page.
Apple Books and NOOKMoves whole to the next page.
KindleSplits between rows, never inside one.
Kobo and Google Play BooksSplits like any other text.

How to style your tables

  1. Click in a table, then click the pencil in its toolbar (Edit Table Style).

  2. Set it up on the Table, Header Row and Data Cells tabs, and click Apply.

Every table on the same preset changes with it. In the e-reader preview, point at a table and click Edit to open the same panel.

Text in a cell lines up on the left. To center a cell, click in it and click Align Center in the editor toolbar.

Table tab Sets
Spacing Around TableThe space above and below the table, up to 100 px: together (Top / Bottom) or one by one.
BorderThe line around the whole table, up to 10 px: all four sides, in pairs, or one by one.
ColorThe outer line’s color. Default follows your book’s Border color in print, and black when none is set.
Trim Top Spacing at Page StartRemoves the space above a table that starts a new page. Print only.
Trim Top Spacing at Section StartRemoves the space above a table that is the first thing in a section. Print and e-books.
Header Row tab Sets
BackgroundThe header row’s band. Default is gray.
Text ColorThe header row’s text. Default is black.
FontThe header’s typeface. Inherit uses your body text’s font.
Size5 to 40 pt.
WeightHow heavy the letters are, with an italic button beside it.
TransformNone, or CAPS for capitals.
BottomThe line under the header row, up to 10 px.
ColumnThe lines between header cells, up to 10 px.
ColorThe color of both lines. Default works as it does for the outer border.
Inside CellsThe room inside each header cell, up to 50 px: all four sides, in pairs, or one by one.
Repeat HeaderOn to start: a table that continues onto another page shows its header row again at the top of it.
Data Cells tab Sets
FontThe cells’ typeface. Inherit uses your body text’s font.
Size5 to 40 pt.
RowThe lines between rows, up to 10 px.
ColumnThe lines between columns, up to 10 px.
ColorThe color of both lines. Default works as it does for the outer border.
Alternate Row ColorsShades every second row so a wide table is easier to read across. Row Color (light gray to start) shows once it is on.
Inside CellsThe room inside each cell, up to 50 px: all four sides, in pairs, or one by one.

How to use presets for tables

Every table uses the Default preset until you choose another, so styling one table styles them all. To give some tables a look of their own, put them on another preset.

Make a preset for a table

  1. Click in the table, open the toolbar’s Preset box and choose Create New Preset….

  2. Give it a name and click Create Group and Preset. The table now uses it.

A new preset starts from Lacuna’s standard table look, not from your Default. Click the pencil to style it. More on preset groups: Presets.

Choose a preset for a table

  1. Click in the table and open the Preset box in its toolbar.

  2. Choose a preset. Click the pencil beside it to style that preset.

How tables look in print and on e-readers

Where Your reader sees
Print-ready PDFA long table continues on the next page, with its header row repeated when Repeat Header is on.
E-booksThe table fills the screen’s width, each column keeps its share, and long words wrap inside their cells.
KindleA table with borders sits slightly in from the text, with a small zoom icon below it. The Kindle previews show it.
DOCXA Word table, its header row repeating on each page when Repeat Header is on.

Some e-readers show Alternate Row Colors without the color. Check your tables in the e-reader preview on each device.

Questions

Does Lacuna make clean tables in EPUB e-books?

Yes. Each table goes into your EPUB as a real table that fills the reader’s screen, keeps your column widths as shares of it, and wraps long words inside their cells.

Why did my table jump to the next page?

Avoid splitting across pages is on for it (tables made before Lacuna 2.7.0 started with it on). Click the table’s settings button and untick it.

Can I color the text in a table?

Not cell by cell. The Header Row tab’s Text Color colors the header row of every table on the preset.

How to Add Answer Lines to Your Book

docs.lacuna.pub/use-the-editor/add-line-rows-to-book/

Line Rows are blank ruled lines your readers write on: answer lines in a workbook, fill-in lines in a journal or planner. Add them from the editor toolbar, set how many and how wide, and style them all at once.

How to add answer lines

  1. Click at the end of the paragraph the lines should follow.

  2. In the editor toolbar, open Containers and choose Line Rows. Or press Ctrl/Cmd+Shift+R.

Three full-width lines appear, with their toolbar along the bottom.

To put lines beside a question, click in a table cell, a grid cell or a callout box first. A two-column table with the question on the left and the lines on the right makes a fill-in row.

How to change the number of lines and their width

  1. On the lines’ toolbar, click + or − in the line count (3 LINES to start), or type a number up to 500.

  2. Click the width (100 % to start) and choose how much of your text width the lines fill, from 10% to 100%.

  3. Narrower lines sit at the left. Click Align center or Align right to move them.

On the lines’ toolbar To
PresetChoose these lines’ preset.
Edit line rows style (the pencil)Open the Line Rows panel and style your lines.
The line countSet 1 to 500 lines.
The widthSet how much of your text width the lines fill, 10% to 100%.
Align left, Align center, Align rightPlace lines narrower than your text.
Keep lines togetherKeep the lines on one page.
Copy line rowsCopy the lines with their settings, to paste anywhere in your book.
Remove line rowsDelete the lines. Ctrl/Cmd+Z brings them back.

How to keep answer lines on one page

Lines split across two pages when they run out of room. To keep them whole, turn on Keep lines together on their toolbar: lines that don’t fit at the foot of a page move to the next one. It’s off for new lines, and you set it for each block of lines.

Where Lines kept together that don’t fit
Your print-ready PDF, Apple Books, NOOKMove to the next page, whole.
Kindle, Kobo, Google Play BooksMay split across two pages.

The warning beside Keep lines together lists the same readers.

How to style your answer lines

  1. Click the pencil on the lines’ toolbar (Edit line rows style).

  2. Set the lines on the Lines tab and click Apply.

Every block of lines on the same preset changes with it. The editor always draws plain gray lines: your style shows in the print preview, the e-reader preview and your exported files. In the e-reader preview, point at the lines and click Edit to open the same panel.

Lines tab Sets
Row heightThe room to write on each line, in em: 2 em is twice your text size. 2 em to start.
ThicknessHow heavy each line is, 0.25 to 3 pt. 1 pt to start.
Line colorThe lines’ color. Default follows your book’s Border color in print, and black when none is set.

How to use presets for answer lines

Every block of lines uses the Default preset until you choose another, so styling one styles them all. To give some lines a look of their own, such as closer, finer lines for a journal, put them on another preset.

Make a preset for answer lines

  1. Open the Preset box on the lines’ toolbar and choose Create New Preset….

  2. Give it a name and click Create Group and Preset. The lines now use it.

A new preset starts from Lacuna’s standard lines (2 em rows, 1 pt thick, Default color), not from your Default. Click the pencil to style it. More on preset groups: Presets.

Choose a preset for answer lines

  1. Open the Preset box on the lines’ toolbar.

  2. Choose a preset. The lines take its look in print and in the previews.

How answer lines look in print and on e-readers

Where Your reader sees
Print-ready PDFRuled lines at your preset’s row height, thickness and color, ready to write on.
E-booksThe same lines. Their rows grow with the reader’s text size.
DOCXReal ruled lines in Word, at your row height and thickness, so someone can type on them. They always fill the text width.

Readers can’t write on an e-reader. To keep answer lines out of your e-book, put them in a print-only device-specific block.

Questions

Can I make a printable workbook in Lacuna?

Yes. Import your Word document, add answer lines wherever your readers write, and generate a print-ready PDF for KDP, IngramSpark or any printer.

Why don’t my answer lines change in the editor?

The editor draws every block of lines the same plain way and shows only how many there are, their width and alignment. Your row height, thickness and color show in the previews and your exported files.

Can I open a book with answer lines in an older version of Lacuna?

No. Line rows need Lacuna 2.7.9 or newer. Lacuna 2.6.0 to 2.7.8 opens a section that has them blank, and saving it there loses that section’s text.

How to Add Footnotes

docs.lacuna.pub/use-the-editor/add-footnotes-to-book/

A footnote is a note your reader finds at the bottom of the page, marked by a small raised number in your text. You add footnotes in the editor, and style how they print in Print Settings.

What it does
Puts a note at the foot of the page its number is on, under a short line.
Where to find it
Add one with the notes button in the editor toolbar. Style them in Print Settings, then Footnotes.
Works in
Print-ready PDF, EPUB and DOCX.
Footnote or endnote?
A footnote sits under the text of its page. An endnote waits at the end of a section or the back of your book. You can switch a note at any time.

How to add a footnote

  1. Click in your text where the note’s number should go.
  2. Open the notes button in the editor toolbar and choose Footnote. You can also press Ctrl/Cmd+Shift+N.
  3. Type your note in the window that opens.
  4. Click Add.

The number appears in your text, in blue. Lacuna numbers your footnotes for you, starting at 1 in each section, and renumbers them when you add or remove one.

The window’s toolbar formats the note’s text (bold, italic, small caps and more) and adds a link. When you import your Word document, its footnotes come across as Lacuna footnotes.

How to change or remove a footnote

  1. Click the footnote’s number in your text. The same window opens.
  2. Make your change and click Update, or click Remove to delete the footnote.
In the window To
TypeNumbered, or Symbol to mark the note with a symbol you choose: †, ‡, §, *, ¶ or ◊.
The arrow beside Footnote:Turn the note into an endnote, or back.
UpdateSave your changes.
RemoveDelete the footnote. The others renumber.

Edit a footnote from the preview

In the e-reader previews, click a footnote’s number: a pop-up shows the note. Click the pencil in the pop-up, and the footnote’s window opens in the editor. Print preview has no pop-up.

How to style your footnotes in print

  1. Click Print Settings in the top bar.
  2. Choose Footnotes, under Notes.
  3. Change the settings, then click Apply.

The Footnotes panel opens beside your text, and the print preview shows each change. These settings style every footnote in your book.

Reset Numbering Per Section, at the top of the panel, starts your footnotes at 1 in each section. Turn it off to number them straight through your print book. It saves as soon as you click it.

Note Styling tab Sets
FontThe note's font. Inherit uses your body text font.
SizeThe note's text size, in points.
ColorThe note's color. Page Text Color follows your page colors.
Justify TextLines each note up on both edges. Also in e-books.
Paragraph BreaksStarts each paragraph of a note on a new line. Also in e-books, and for endnotes.
Line SpacingThe space between a note's lines.
Text IndentHow far each note's first line is indented.
Spacing Between NotesThe space between one note and the next.
Reference tab Sets
SizeThe size of the number in front of each note at the foot of the page. The raised number in your text sizes itself to the text around it.
SuffixWhat follows that number: . (Period), ) (Paren) or None. Also in e-books.
Area tab Sets
StyleThe line above your footnotes: Solid, Dashed or Dotted.
WidthThe line's thickness.
Above LineThe space between your text and the line.
Below LineThe space between the line and your first note.

How footnotes appear in print, e-books and Word

In your Your footnotes
Print-ready PDFSit at the foot of the page their number is on, under the line.
EPUBOpen in a pop-up when your reader taps the number, on e-readers that show pop-ups. Others list a section's footnotes at its end.
DOCXAre Word footnotes, at the foot of the page in Microsoft Word.

Questions

Should I use footnotes or endnotes?

Use footnotes for notes your reader should see on the same page, such as a source or a short aside. Use endnotes to keep the page clean and gather notes at the end of each section or the back of your book. You can switch any note later, with the arrow beside Footnote: in its window.

Can my footnote numbers run through the whole book?

Yes, in your print book. Turn off Reset Numbering Per Section in the Footnotes panel. The editor, your e-book and your Word document still start each section at 1.

Why do my footnotes show *, † or ‡ instead of numbers?

The section has endnotes too. Lacuna keeps them apart for your reader: endnotes keep the numbers, and footnotes take symbols in order (*, †, ‡, §, ‖, ¶). The footnote’s Type stays locked while the section has an endnote.

How to Add Endnotes

docs.lacuna.pub/use-the-editor/add-endnotes-to-book/

Endnotes are notes your reader finds at the end of a chapter or at the back of your book, instead of at the bottom of the page. Each note leaves a small raised number in your text, and the reader can jump from the number to the note and back again.

What it does
Gathers your notes at the end of each chapter, at the back of your book, or both.
Where to find it
Add a note with the notes button in the editor toolbar. Style notes in Edit Styles, then Endnote Settings.
Works in
EPUB, print-ready PDF and DOCX.
Before you start
Choose where your endnotes print. Until you do, they do not appear in your book.

Add an endnote

  1. Click in your text where the note’s raised number should go.
  2. Open the notes button in the editor toolbar and choose Endnote. You can also press Ctrl/Cmd+Shift+M.
  3. Type your note in the window that opens.
  4. Click Add.

The note’s number appears in your text. Lacuna numbers your notes for you and renumbers them whenever you add or remove one.

To change a note later, click its number in your text. The same window opens with your note in it.

Choose where your endnotes print

Your endnotes can print in two places. Use whichever suits your book, or both.

At the end of each chapterAt the back of your book
HowTurn on Add Endnotes At End Of SectionAdd an Endnotes section
Your reader seesEach chapter’s notes right after that chapterOne list, grouped under each volume, book part and chapter

At the end of each chapter

  1. Open Edit Styles, then Endnote Settings (see Style your endnotes).
  2. Turn on Add Endnotes At End Of Section at the top of the panel.
  3. Click the new End of Section tab to set the heading and the separator.

Every chapter that has endnotes now ends with them. The End of Section tab appears only while this switch is on, and it holds:

  • Title Text. The heading above each chapter’s notes. It starts as Notes.
  • Subheading Preset (H2). Which subheading style that heading uses. The pencil beside it opens the style so you can change it.
  • Separator Style. What sits between the chapter’s text and its notes: an Ornamental Break (the default) or a Page Break, which starts the notes on a fresh page.
  • Ornamental Break Preset. Which ornamental break style the separator uses. The pencil beside it opens the style so you can change it.

The separator can use any ornamental break preset, including one you made. Here it uses Floral, a preset with a built-in image:

At the back of your book

  1. Click Add New Section(s) at the bottom of the sidebar.
  2. Point to Back Matter.
  3. Choose Endnotes. The new section is added at the end of your book, and opens.

The new Endnotes section gathers every endnote that comes before it, in reading order. A heading for each volume, book part and chapter keeps the notes easy to find. The section’s page sets how those headings look:

  • Book Volume Title Headers (H1). The subheading style and alignment for each volume’s heading, in box sets and anthologies made of volumes. Turn on Hide book volumes to leave them out.
  • Book Part Title Headers (H1). The subheading style and alignment for your book part headings. Turn on Hide book parts to leave them out.
  • Section Title Headers (H2). The subheading style and alignment for each chapter’s heading.
  • Global Styling Settings. Opens the Endnotes panel, which styles the notes themselves: their text and spacing (see Style your endnotes).

If your book has no Endnotes section yet, the Endnotes panel offers to add one at the end of your book: click Yes.

You can add more than one Endnotes section, for example one at the end of each volume. Each one gathers the notes that come after the Endnotes section before it.

Style your endnotes

  1. Click Edit Styles in the top bar.
  2. Choose Endnote Settings, under Notes.

The Endnotes panel opens beside your text. Global Styling Settings on your Endnotes section’s page opens the same panel.

The panel controls how every note looks. As with the rest of your book, you can save your choices as a preset and watch them change in the preview as you work. The panel’s tabs:

  • Text. The font, size and line spacing of your notes, and Text Justification.
  • Spacing. The space around your notes and between one note and the next.
  • Backlinks. The small return arrow (↩) that takes your reader from a note back to where they were reading. EPUB only.
  • End of Section. The heading and separator for notes at the end of each chapter, described above.

Questions

I added endnotes, but they don’t appear in my book.

Your notes need a place to print. Turn on Add Endnotes At End Of Section, or add an Endnotes section at the back of your book. Until you do one of these, your endnotes are not printed anywhere.

Why does each note appear twice?

Both places are turned on: Add Endnotes At End Of Section, and an Endnotes section. Each one prints every note. Keep the one you want and remove the other.

Why does every chapter start its notes at 1?

Endnote numbers start again in each chapter, the way most printed books number them. In an Endnotes section at the back of your book, each chapter’s notes sit under that chapter’s name, so a reader always knows which 1 they are looking at.

Why do some of my notes use * or † instead of numbers?

When a chapter has both footnotes and endnotes, Lacuna keeps them apart for your reader. Endnotes keep their numbers (1, 2, 3), and footnotes switch to the traditional symbols: asterisk (*), dagger (†), double dagger (‡), section mark (§), and onward.

Can I edit an endnote from the preview?

Yes, in the e-reader previews. Click the note’s number in the preview, then the pencil in the popup, and Lacuna takes you to that note in the editor. This works the same way as footnotes. Print preview does not show the popup.

How to Show Content Only in Print or Only in Your E-Book

docs.lacuna.pub/use-the-editor/device-specific-blocks/

A device-specific block holds content that only one edition gets: your print book or your e-book. Use one when a few paragraphs differ inside a section, such as a buy link only your e-book readers can tap.

How to add a device-specific block

  1. Click in a paragraph, or select every paragraph the block should hold.

  2. In the editor toolbar, open Containers and choose Device-Specific Block. Or press Ctrl/Cmd+Shift+D.

The paragraphs move into a block marked PRINT ONLY: every new block starts as print only. A block can hold anything: paragraphs, subheadings, pictures, tables, callout boxes. It always takes whole pieces, so clicking inside a table or a callout box puts the whole table or box in the block.

The block’s toolbar sits along its foot:

At the block’s foot To
Device-specific blocks (the info icon)What a device-specific block does, with a link to this page.
DeviceChoose Print only or E-Book only.
Copy device-specific blockCopy the block with everything in it, to paste anywhere in your book.
Remove device-specific block (the trash)Take the block away. Everything in it stays, and shows in every edition.

How to switch a block between print and e-book

  1. Click the Device list at the block’s foot.

  2. Choose Print only or E-Book only.

Choose To show it in
Print onlyYour print-ready PDF and your Word document (DOCX). The block is purple.
E-Book onlyYour EPUB and your eBook PDF. The block is green.

To give each edition its own version of the same lines, put two blocks one after the other: one Print only, one E-Book only.

How to see device-specific blocks in the preview

The editor shows every block, so you can format them all. Your e-book preview and print preview show what each edition gets:

Where Shows
The editorEvery block, for both devices.
The e-reader previews and your EPUBE-Book only blocks.
eBook PDF Preview and your eBook PDFE-Book only blocks.
Print - Single Section (Fast), Print - Whole Book (Slower) and your print-ready PDFPrint only blocks.
Your Word document (DOCX)Print only blocks. Word follows print.

How to find device-specific blocks

  1. Click Elements at the top of the sidebar, then Select Element Types.

  2. Tick Device Specific Blocks. Every block in your book is listed by section, as Print-Only Block or Ebook-Only Block.

  3. Click one to go to it.

Tick other kinds as well, such as Subheadings or Images, and anything inside a block shows a mark beside it:

Mark Means
PhoneIt is inside an E-Book only block.
Open bookIt is inside a Print only block.

More on the Elements tab: how to find elements in your book.

How to remove a device-specific block

  1. Click Remove device-specific block (the trash) at the block’s foot.

The block goes and everything in it stays, now in every edition. Or click inside the block and choose Containers › Device-Specific Block again, or press Ctrl/Cmd+Shift+D.

Device-specific blocks or device-specific sections

You can use both in the same book.

Questions

Why is Device-Specific Block greyed out?

Either the section is set to Ebook, Print or Hidden, so all of it already goes to one device (or none), or your cursor is inside a table, list, callout box, grid or columns, where a block can’t go. Point at the greyed item to see which. For the section, right-click it in the sidebar and choose Set Device Type › Any.

Why is my device-specific block red?

It disagrees with its section: a Print only block in a section set to Ebook, or an E-Book only block in a section set to Print. It shows in neither edition. Switch the block’s device, remove the block (its content stays), or set the section to Any.

How to Add an Index to Your Book

docs.lacuna.pub/book-index/add-index-to-book/

An index lists the topics of your book and where each one appears. You mark the words in your text, and the Index section builds the list for you: page numbers in print, links in the e-book.

How the index works

You build your index in the Index panel, which opens on the right while you work in your text.

In the Index panel Means
TopicA heading in your index: a name, a place, a subject.
ReferenceA place in your text filed under a topic. It prints as a page number. In your text, its words get a green dashed underline.
MentionWords that match a topic but aren’t filed under it yet. They get an amber underline.

The underlines show only while the Index panel is open, so your text reads clean the rest of the time. To keep them on, open Index options (the settings button beside Add topics) and turn on Show index helpers at all times.

Topics and references belong to your whole book. How the index looks in print is set on the Index section’s settings page.

Where to find the Index panel

Open it from How
The side menuClick Open Index, the icon after the editor font settings in the strip down the right side.
The Edit menuChoose Index….
The keyboardPress Ctrl/Cmd+Shift+X with nothing selected.
The Command PalettePress Ctrl/Cmd+P and type Index.
Selected wordsOpen More actions and choose Add to Index. This also indexes the words.
The Index sectionClick Open Index panel at the top of its settings page.

How to mark words for your index

  1. Select the words: a name, a place, a term.

  2. Press Ctrl/Cmd+Shift+X, or open More actions above the words and choose Add to Index. While the Index panel is open, the menu over your words also has an Index button.

  3. In the box that opens, file a name under the surname, add every other place your book uses the words, or click Done.

In the box To
Indexed asShows the topic the words went under: one whose name or other spellings match, or a new topic named after them.
File asFile a name under the surname: Darby Graham becomes Graham, Darby. Your text’s words still match it.
Add all N moreFile every other place your book uses those words under the same topic.
ChangePick another topic, or type a name to make one.
DoneClose the box.

While the Index panel is open, click an indexed word to see its topics.

On an indexed word To
The starMake this reference the topic’s main discussion: its page number prints in bold.
The arrowOpen the topic’s page in the Index panel.
The ×Remove this reference. The words stay in your text.
Also file under…File the same words under a second topic too.

Words in a caption, a footnote or an endnote are indexed in their own window: select them there and click Index, or press Ctrl/Cmd+Shift+X.

How to index or skip a mention

A mention is a place where a topic’s words appear without a reference yet. Click one to decide.

  1. Click a word with an amber underline. A box names the topic it mentions.

  2. Click Index to file it under that topic, or Not a mention when the words mean something else there.

Not a mention sets the words aside for good: Lacuna never offers them again.

How to review every mention at once

  1. In the Index panel, find Needs attention at the top and click Review beside N mentions are not indexed yet.

  2. Look through the list: every mention, under its topic, checked. Click a row to see it in your text.

  3. Uncheck any you want to skip, or click Not a mention on one that means something else.

  4. Click Index all N.

Unchecked mentions are skipped until you reopen the book or change their paragraph.

How to add the Index section

Your index prints where your Index section is. Until you add one, Needs attention asks.

  1. Open the Index panel and find Needs attention at the top.

  2. Click Yes beside You do not have an index section. Or click Add New Section(s) at the bottom of the sidebar and choose Back Matter › Index.

The Index section goes at the end of your book and opens on its settings page.

The Index section has no text to type: Lacuna builds its list from your references every time you preview or export. An Index outside every volume lists your whole book. To give each volume of a box set its own, see index one volume.

How your index looks in print, e-books and Word

In your print-ready PDF, each topic prints with its page numbers. E-books have no fixed pages, so each reference is a numbered link (1, 2, 3) that jumps to its place. In Word, it is Word’s own index, which adds the page numbers when Word updates it. More on each, and every setting: Style Your Index.

Questions

How do I add an index to my book?

Add an Index section, then mark your topics: select the words and press Ctrl/Cmd+Shift+X. The list builds itself, with page numbers in your print-ready PDF and links in your EPUB.

Why are words in my text underlined in amber?

They match a topic in your index but aren’t filed under it yet. Click one to index it or set it aside, or review them all. Green dashed words are already indexed.

Why does my index have no page numbers in the preview?

You’re in Print - Single Section (Fast), which lays out one section at a time. Choose Print - Whole Book (Slower) to see them. Your print-ready PDF always has them.

Can I type my index by hand?

No. The Index section has no text of its own: it prints the list Lacuna builds from the words you mark.

How to Manage Index Topics

docs.lacuna.pub/book-index/manage-index-topics/

Every topic in your index has its own page in the Index panel. Open it to rename the topic, add the other words your text uses for it, indent it under another topic, send readers elsewhere, merge it or delete it.

Every change applies at once, as a step Ctrl/Cmd+Shift+Z undoes. There is no Apply. To open the panel, see where to find the Index panel.

How to find a topic

The panel lists every topic in the order your index prints them, under letter bars, with N topics · N references at the top.

In the list To
Search topics…Find a topic by its name or its other spellings.
Needs attentionWhat to fix, each with its button (see what Needs attention means).
The chips on a rowWhere the topic’s references are, one chip per section. Click one to go there; click again for the next.
N not indexedThe topic has that many mentions not filed yet.
The trash canDelete the topic (point at its row to see it).
A topic’s nameOpen its page.

How to edit an index topic

  1. Click the topic in the list. Its page opens.

  2. Change what you need. Each change applies as you make it.

On a topic’s page To
Back to topics, the arrowsGo back to the list, or to the topic before or after this one.
Topic nameRename it. The old name stays as another spelling, so its references still match.
Sort asFile it under another letter: The Hobbit sorted as Hobbit. Leave it empty to sort by the name.
Also matchesOther words your text uses for the topic: a nickname, a short form. Plurals ending in s or es are found without one.
Match case exactlyMatch only as capitalized: Turkey but not turkey.
See alsoSend readers to another topic.
Subentry ofIndent it under another topic.
ReferencesEvery place filed under the topic, by section. Click one to go there, star the main discussion, or × to remove one.
Merge intoFold this topic into another.
Delete topic and N referencesDelete the topic and its references at once (undo brings them back).

When you add another spelling, Lacuna counts where your book uses it and offers Index N mentions to file them all. Also list (“Abe Lincoln. See Lincoln, Abraham”) prints the spelling as its own entry that sends readers to this topic.

The star on a reference marks the topic’s main discussion: the place readers should turn to first. With Bold the main discussion on (it is to start), its page number prints in bold. Star it on the topic’s page, or click the indexed word in your text and click its star.

How to make a topic a subentry

A subentry sits indented under its main topic: wild under cats.

  1. Open the topic’s page.

  2. Under Subentry of, pick the main topic, or type a new name to make one.

Topics nest up to three levels. Click the × beside Subentry of to make it a main topic again. To file many at once, type cats > wild in Add topics.

How to add See and See also cross-references

  1. Open the topic’s page and click Add a See or See also. A new line appears, set to Automatic and your first topic.

  2. Choose the kind.

  3. Choose the topic to send readers to. Only topics already in your index are offered.

Kind Prints
AutomaticSee while this topic has no references of its own, See also once it has. New cross-references start here.
SeeSends readers to the topic that holds the page numbers: Honest Abe. See Lincoln, Abraham.
See alsoAdds a related topic after this one’s page numbers.
CustomYour own words in place of See, such as See under.

The Renders line under them shows how the entry reads, with sample page numbers. Click the × at the end of a line to remove it.

How to merge two index topics

Merge two topics that mean the same thing: Harris and Harris, Betty.

  1. Open the topic whose name should go.

  2. Under Merge into, pick the topic that keeps its name.

  3. Read what will happen and click Merge.

Its references move to the other topic, and its name stays there as another spelling. When Lacuna spots two topics that look alike, Needs attention offers Merge for them too.

How to delete index topics

Deleting a topic also removes its references from your text. The words themselves stay.

To delete Do this
One topic, from the listPoint at its row, click the trash can, then Delete topic.
One topic, from its pageClick Delete topic and N references at the bottom.
Every topicOpen Index options (the settings button beside Add topics), choose Delete all topics…, then Delete all topics.

Press Ctrl/Cmd+Shift+Z to bring a topic and its references back.

What Needs attention means

The box at the top of the topic list shows what to fix, each row with its button. It hides when there is nothing left.

When it says Then
You do not have an index section…Yes adds one at the end of your book (the Index section). No puts the question away.
N mentions are not indexed yetReview lists them all.
“A” looks like the same topic as “B”Merge folds the first into the second.
“X” has no referencesDelete topic, or find its mentions with another spelling first.
“X” is filed under “T”, but its words no longer name itYou changed the words. File them under the topic they name now, keep them as another spelling, make a topic of them, or remove the reference. Show where lists the places.

Questions

Why does Needs attention say my topic has no references?

The topic is in your index, but no place in your text is filed under it, so it would print with no page numbers. Its words may be spelled differently in your book: add that spelling under Also matches, then Index N mentions. Delete it only if your book never mentions it.

Can I undo deleting a topic?

Yes. Press Ctrl/Cmd+Shift+Z: the topic and every reference come back, in one step.

How to Add Index Topics in Bulk

docs.lacuna.pub/book-index/add-index-topics-in-bulk/

You don’t have to mark topics one by one. Paste a list of topics, pick up every term set in one style, or import a list from another book, and Lacuna files every mention in one step.

Each way shows you first how often your book mentions each topic, and nothing is indexed until you click. Ctrl/Cmd+Shift+Z undoes the whole step.

How to paste a list of index topics

  1. In the Index panel, click Add topics.

  2. Type or paste one topic per line. Lacuna counts each one’s mentions as you go.

  3. Check the topics to add. Topics your book mentions start checked. Click File as on a name to file it under the surname.

  4. Click Index N mentions.

A topic your book already has is marked (already a topic), and its new mentions are filed too.

Shortcuts in a topic list

Click a shortcut under the box to add its symbol where you are typing, or point at it to see what it does. Every one is optional.

Type To
cats > wildFile wild as a subentry of cats (Subentry). Up to three levels.
Lincoln, Abraham | Abe LincolnAlso find Abe Lincoln in your text (Also matches).
The Hobbit ~ HobbitSort it under H (Sort as).
Turkey !Find Turkey but not turkey (Match case).
Honest Abe -> Lincoln, AbrahamSend readers to the other topic (See).
copyright ->+ permissionsAdd a related topic (See also). One per line: repeat the topic on another line for more.
# PlacesA note to yourself. Lines that start with # are skipped, and so are blank lines.

How to index every word set in one style

For books whose important terms are already set apart: species names in italics, key terms in bold.

  1. Click Add topics, then Add by style… at the bottom.

  2. Under Style to look for, choose Italic, Bold, Small caps, Underline or Handwriting. Every word or phrase in that style is listed, with how many times it appears.

  3. Uncheck any that aren’t topics. To file them all as subentries of one topic, pick it under Under topic.

  4. Click Index N runs (a run is one place set in the style).

How to import a topic list

A topic list is a plain text file, one topic per line, with the same shortcuts. Export one from a book to use its topics in another, such as the next book in a series.

  1. In the Index panel, open Index options (the settings button beside Add topics) and choose Import topics….

  2. Pick the .txt file. Lacuna lists its topics and counts their mentions.

  3. Check the topics to keep, and add your book’s spelling to any that are not found.

  4. Click Index N mentions.

In the import review To
A checked topicFound in your text, or already in your book. Its count is how often your book mentions it.
Not found in the textTopics your book never mentions in those words. Unchecked to start.
Add a spellingType the words your book uses (a middle initial, a nickname) and click Add. The topic is counted again and kept as another spelling.
See …A topic that only sends readers elsewhere. It brings that topic with it.
Add without indexingAdd the checked topics and leave their mentions for Review.
Index N mentionsAdd the checked topics and file every mention, in one step you can undo.

Importing never removes a topic. Nothing is added until you click: closing the panel first asks whether to import or Discard import.

To export your topics, open Index options and choose Export topics…. Lacuna saves them as index-topics.txt. A topic list holds the topics, their other spellings and cross-references, not where they appear in your text.

Questions

Why are some of my topics unchecked?

Your book never mentions them in those words, so indexing them would add topics with no page numbers. Check one to add it anyway, or add the spelling your book uses.

What does “Not found in the text” mean?

Your book doesn’t use those words. A name in a book often carries a middle name or initial a list leaves out: click Add a spelling and type it the way your book does.

How to Style Your Book's Index

docs.lacuna.pub/book-index/style-your-index/

How your index looks is set on its Index section’s settings page. Every change applies at once, in your print-ready PDF, your e-book and your Word document.

The topics themselves are in the Index panel: see Add an Index.

How to open your index settings

  1. Click your Index section in the sidebar. No Index section yet? Add one.

  2. Change the settings you want. There is no Apply.

Open Index panel at the top takes you to your topics.

Columns

Setting Does
Print columns1, 2 or 3 columns in print. 2 to start. E-books always use one.
Columns PresetThe columns preset that sets the gap and any line between them.

Topics

Setting Does
Topic Preset (List)A list preset for the topics’ text, or None (plain list).
SubentriesOn own lines stacks each subentry under its topic. Run together strings them after it, to save space.
Subentry indent, Sub-subentry indentHow far each level sits in, in em. 1.5 em to start. Shown with On own lines.

Letter headings

Setting Does
Show letter headingsAn A, B, C heading over each letter’s topics. On to start.
Include empty lettersA heading for letters that have no topics too.
Heading Preset (H2)The subheading preset the letters use.
AlignmentLeft, center or right.

Page numbers

Setting Does
Bold the main discussionPrint the starred reference’s page number in bold. On to start.
Italic for figures and tablesPrint page numbers of words in a caption or a table in italics.
Key textThe line at the top of the index that explains bold and italics. Leave it empty for the wording shown in the box.
Link page numbers in the ebook PDFMake each page number in your eBook PDF a link to its page. Print never links.

The main discussion is the reference you star on the topic’s page or on the indexed word.

Page ranges

Setting Does
Join consecutive pagesPrint 46, 47, 48 as 46–48. On to start.
Shortest rangeThe fewest pages in a row that join. 3 to start.
Shorten rangesChicago prints 321–28. Full prints 321–328.

Only body text joins into ranges: page numbers of captions, tables and notes stay on their own, and a range never runs from roman to arabic numbers.

Sorting

Under Alphabetize, choose how topics that start with the same letters are ordered.

Choose To sort
Word by wordNew Deal before newborn. Used to start.
Letter by letternewborn before New Deal: spaces are ignored.

Punctuation

Leave a box empty for the usual mark, shown in it.

Box Holds
Before the first page numberA comma and a space to start.
Between page numbersA comma and a space to start. E-books keep their links a space apart unless you set one.
Before See and See alsoA period and a space to start.
Between run-in subentriesA semicolon and a space to start.

How your index looks in print and on e-readers

In Your index shows
Print-ready PDFEvery topic with its page numbers, in columns, under letter headings. Nothing is a link, so the file is ready for KDP, IngramSpark or any printer.
eBook PDFThe same page numbers, each a link to its page (unless you turn Link page numbers in the ebook PDF off).
E-books (EPUB)Numbered links (1, 2, 3) instead of page numbers, because e-books have no fixed pages. Each one jumps to its place. Always one column.
Word (DOCX)Word’s own index: the list without numbers until Word updates the field, which adds them.
Print - Single Section (Fast)The topics without page numbers. Choose Print - Whole Book (Slower) to see them.

To see the page numbers in the preview, choose Print - Whole Book (Slower) in the device list (Preview print).

How to index one volume

In a box set, an Index section inside a volume lists only the references in that volume. An Index outside every volume lists the whole book.

  1. Add an Index section.

  2. Drag it into the volume in the sidebar, after the volume’s last section.

Each volume can have its own Index, each with its own settings.

Questions

How do I format the index?

Click your Index section in the sidebar and change its settings: columns, letter headings, bold page numbers, ranges, sorting and punctuation. Your print-ready PDF, e-book and Word document all follow them (columns are for print only).

Is my index safe for KDP?

Yes. Your print-ready PDF never links its index’s page numbers, so it is ready for KDP, IngramSpark or any print-on-demand service. Only the eBook PDF has links.

Why is my e-book index in one column?

E-readers reflow their pages, and columns scroll poorly there. Print columns sets print only.

How to Change a Section’s Options

docs.lacuna.pub/book-design/section-options-menu/

Every section has an Options menu, at the top right above your text. To change just that section, start here. To change the whole book, use Edit Styles and Print Settings in the header bar.

What’s in the Options menu

The top of the editor on Chapter 1, with its Options button boxed in pink at the top right and its menu open: Section Actions (Customize Section Settings, Customize Print Settings, Convert Section Type), Edit Section's Styles (Add Heading Image, Section Heading Styles, Set Section's Background) and Table of Contents Options (Show in Table of Contents, Customize TOC Text)

Item What it changes in this section
Customize Section SettingsIndents, Drop Cap and First Line Style, and whether the title, subtitle and heading image show.
Customize Print SettingsIn print: Start Page Side, headers, footers and page numbers, hiding the title, widows and orphans, and its own body font.
Convert Section TypeWhat kind of section it is. See section types.
Add Heading ImageAn image with this section’s title. See heading images.
Section Heading StylesWhich preset styles its Heading Title, Heading Subtitle and Heading Spacing.
Set Section’s BackgroundA heading background image, and in print, page colors and page backgrounds.
Show in Table of ContentsWhether it is listed. Customize TOC Text changes the words it’s listed as. See table of contents.

A Table of Contents section also has Edit TOC Styles. Some items don’t show on some sections: a title page has no heading image, for example.

Heading styles use presets

Choosing a preset in Section Heading Styles changes only this section. Editing a preset changes every section that uses it. See presets.

How to turn off the drop cap in your section

  1. Open the section, then Options › Customize Section Settings.

  2. Set Drop Cap to Disabled and click Apply.

How to add or remove indentation in your section

Only chapters are indented by default. A prologue, epilogue or any other section starts with block paragraphs.

  1. Open the section, then Options › Customize Section Settings.

  2. Set Indent All Paragraphs to Enabled (or Disabled to remove indents) and click Apply.

How to start your section on the right-hand page in print

  1. Open the section, then Options › Customize Print Settings.

  2. On Page Start, set Start Page Side to Recto (Right-hand page) and click Apply.

How to copy your section’s changes to other sections

  1. In Customize Section Settings or Customize Print Settings, click Apply to Other Sections.

  2. Click Changed to pick what you changed, tick the sections, and click Apply.

How to go back to the book’s settings

Set an item back to Default, or click Reset to Defaults at the foot of the panel, then Apply. Images come off with Remove Image.

Questions

How do I start some chapters on the right-hand page but not all?

Open each chapter’s Options › Customize Print Settings and set Start Page Side, or set one and use Apply to Other Sections.

How do I remove the big first letter of a chapter?

For one section: Options › Customize Section Settings › Drop Cap › Disabled. For every section: drop caps in Edit Styles.

Why doesn’t my prologue have indents?

Only chapters are indented by default. Set the prologue’s Indent All Paragraphs to Enabled, as above.

Where do I edit headers and footers?

For the whole book, in Print Settings. For one section, in Options › Customize Print Settings › Headers & Footers.

How do I add a different picture to each chapter?

Open each chapter’s Options › Add Heading Image. See heading images.

I changed a chapter’s title style and every chapter changed. Why?

They share a preset. Make a new preset for that chapter instead. See presets.

How do I make a section e-book only or print only?

Right-click the section in the sidebar and choose Set Device Type. See device-specific sections.

How to Change One Section’s Style Settings

docs.lacuna.pub/book-design/section-style-settings/

Section Settings is the panel behind Customize Section Settings in a section’s Options menu. It changes one section’s indents, first paragraph, drop cap and heading parts, and leaves the rest of your book on the settings in Edit Styles.

Every setting starts on Default, which follows the section’s type. Change one and the section keeps it until you set it back.

What’s in Section Settings

The Text tab holds the indents and the first paragraph. Each setting overrides one book-wide setting for this section only:

Setting Choose Instead of
Indent All ParagraphsDefault (chapter types indent, other section types don’t), Enabled or Disabled. It also decides which paragraph spacing applies.Edit Styles › Indentation
Spacing From Left Edge0 to 100 px. Moves whole elements in from the left, every line and not just the first.Nothing: only a section has it. See how to indent a whole section’s elements.
Applies ToWhich kinds move: All elements, or tick the kinds, from paragraphs and images to each subheading level.Nothing: only a section has it.
Indent First ParagraphDefault, Enabled (indent it like the rest) or Disabled (start it at the margin).Remove Indentation of First Paragraph in Edit Styles › Indentation
Drop CapDefault (chapter types have one), Enabled or Disabled. Enabled needs Enable Drop Caps on in Edit Styles › Drop Caps.Enable Drop Caps in Edit Styles › Drop Caps
First Line StyleDefault (chapter types get it), Enabled (your book’s first-line look), Disabled or Small Caps.Edit Styles › First Line Styling

The Display tab says which parts of the section’s heading show:

Switch Shows
Show Title in HeaderThe section’s title at the top of its first page. On a numbered chapter type, its prefix and number.
Show Subtitle in HeaderIts subtitle.
Show Image in HeaderIts heading image.

Title Page, Full Page Image, Copyright, Dedication and Introduction start with the title and subtitle off, as in most printed books. Every other section type starts with all three on.

A blue asterisk marks each setting, and each tab, this section sets differently from your book. The Options button turns blue too, and Customize Section Settings gets a blue dot.

How to indent the first paragraph in one section

A section’s first paragraph starts at the margin, so a drop cap or small caps sit flush. To indent it like the rest in one section:

  1. Open the section, then Options › Customize Section Settings.

  2. Under First Paragraph, set Indent First Paragraph to Enabled and click Apply.

Choose Disabled to keep it at the margin in a section where your book indents it. For the whole book, turn off Remove Indentation of First Paragraph in Indentation.

How to go back to the book’s settings

To put one setting back, choose Default and click Apply. To put every setting in the panel back at once:

  1. At the foot of the panel, click Reset to Defaults.

  2. Click Reset settings, then Apply.

Reset to Defaults is greyed out until the section changes something. It clears both tabs, and leaves the section’s heading presets and heading image alone. Changed your mind? Use the history buttons at the foot of the panel.

How to copy a section’s settings to other sections

Click Apply to Other Sections at the foot of the panel, choose the settings, tick the sections and click Apply. Watch it in how to copy your section’s changes.

Three settings go by other names in that window:

In the panel In the window
Indent All ParagraphsParagraph Indentation
Indent First ParagraphFirst Paragraph Indentation
Spacing From Left Edge and Applies ToElement Indentation, both together

Section types with fewer settings

Section type In Section Settings
Title Page, Full Page ImageNo Customize Section Settings in the Options menu.
CopyrightThe Display tab only.
Table of ContentsThe Display tab only, without Show Image in Header.

Where each setting has its own page

Questions

Why aren’t my paragraphs indented?

Only chapter types indent by default. For a prologue, epilogue or any other section type, set Indent All Paragraphs to Enabled, and check that Disable All Indentation is off in Edit Styles › Indentation.

How do I indent the first line of the first paragraph?

For one section, set Indent First Paragraph to Enabled, as in how to indent the first paragraph in one section. For every section, turn off Remove Indentation of First Paragraph in Indentation.

How do I remove the big first letter of a chapter?

Set Drop Cap to Disabled and click Apply. For every section, turn off Enable Drop Caps in Edit Styles › Drop Caps.

Does Show Title in Header put the title in the running header?

No. It shows the title at the top of the section’s first page. The running header is set in Print Settings › Headers & Footers.

How to Change One Section’s Print Settings

docs.lacuna.pub/book-design/section-print-settings/

Every section can print differently from the rest of your book: start on a right-hand page, print without headers and footers, hide its title, or use its own font. Open the section, click Options at the top right and choose Customize Print Settings.

These settings change your print-ready PDF. Your EPUB keeps the book-wide look.

How to open a section’s print settings

  1. Open the section, click Options at the top right and choose Customize Print Settings.

  2. Open a tab, change a setting, and click Apply.

Tab What it changes
Page StartThe side it starts on, and white-on-black colors for its first page.
Headers & FootersIts header and footer presets, hiding them on its first page or every page, its page numbers and borders.
ContentHiding its title, subtitle or heading image in print, and its own widows and orphans.
TypographyIts own body font, weight, size and line spacing.

A blue asterisk on a tab or a row marks a setting this section sets differently from your book. Under the panel’s title, Section: names the section it belongs to.

How to start your section on the right-hand page in print

  1. Open Options › Customize Print Settings. The panel opens on Page Start.

  2. Set Start Page Side and click Apply.

Choose To
DefaultFollow your book: see how to start chapters on a right-hand page.
Recto (Right-hand page)Start on a right-hand page. Lacuna adds a blank page before it when it needs one.
Verso (Left-hand page)Start on a left-hand page, the same way.

To start every chapter type on a right-hand page, use Chapter Type Options instead. A section’s own Start Page Side comes first.

How to print your section’s first page in white on black

  1. On Page Start, turn on Invert First Page Colors.

  2. Click Apply.

Only the section’s first page changes. For other colors, or for every page of the section, use print page colors.

How to hide headers and footers on every page of your section

The first page of every section hides its headers and footers unless you change it. To hide them on the rest of its pages too:

  1. Open the Headers & Footers tab.

  2. Under All Headers & Footers, turn on Disable on All Pages and click Apply.

Page numbers and borders go with them, so their rows leave the tab.

Setting What it does
First PageUnder Page Layout Preset: the header and footer preset for its first page. That page shows it only when it shows headers, footers or page numbers.
Other PagesThe preset for the rest of its pages.
Disable on First PageUnder All Headers & Footers: hides them on its first page. On when you start.
Disable on All PagesHides them on every page of it, page numbers and borders included.
Show on First PageUnder Page Numbers: prints the page number on its first page while the rest of its header and footer stays hidden.
Show on All PagesPrints the page number on every page of it, even where headers and footers are hidden.
Disable on First Page / Disable on All PagesUnder Borders: hides the header and footer lines on its first page, or on every page.

To give the section a different header and footer layout, choose a preset for First Page or Other Pages: see how to give one section different headers and footers.

How to change page numbers for one section

  1. On Headers & Footers, under Page Numbers, turn on Show on First Page or Show on All Pages.

  2. Click Apply.

Show on First Page prints the number on the section’s first page while the rest of its header and footer stays hidden. Show on All Pages prints it on every page, even where headers and footers are hidden. Where page 1 falls, and Roman numerals, are set for the whole book in page numbering.

How to hide your section’s title in print

  1. Open the Content tab.

  2. Under Heading Suppression, turn on Hide Title, Hide Subtitle or Hide Image, and click Apply.

Setting What it does
Hide TitleUnder Heading Suppression: prints the section without its title.
Hide SubtitlePrints it without its subtitle.
Hide ImagePrints it without its heading image.
Override Widows & OrphansUnder Pagination: gives it its own Widows and Orphans, in lines (0 to 6).

To hide the title in your e-book as well, use Show Title in Header in Customize Section Settings: see how to show a hidden section title.

How to set widows and orphans for one section

  1. On Content, under Pagination, turn on Override Widows & Orphans.

  2. Set Widows and Orphans, in lines, and click Apply.

They start at your book’s values. Orphans is the fewest lines of a paragraph that may sit at the foot of a page, Widows the fewest that may carry over to the top of the next: see widows and orphans for the whole book.

How to give your section its own body font

  1. Open the Typography tab and turn on Enable Body Text Override.

  2. Set Font, Weight, Size and Line Spacing, and click Apply.

Setting What it does
Enable Body Text OverrideTurns the section’s own body text on. Off, it uses your book’s body text.
FontIts body font, from the same list as your book’s. Choosing a font sets Weight back to regular.
WeightHow heavy its paragraphs print.
SizeIts text size, 6 to 50 pt.
Line SpacingThe space between its lines, 1.0 to 2.5 times the text size.

The font reaches everything in the section that has no font of its own. The size and line spacing apply to its paragraphs.

How to copy your section’s print settings to other sections

  1. Click Apply to Other Sections at the foot of the panel.

  2. Click Changed to tick what you changed here, tick the sections, and click Apply.

It works the same way as in Section Settings: watch it in how to copy your section’s changes to other sections.

How to go back to the book’s settings

Click Reset to Defaults at the foot of the panel, click Reset settings, then click Apply. To put back one setting, set it to Default or turn its switch off. The history buttons at the bottom of the panel undo either.

Questions

Should my chapters start on a right-hand page?

Printed books open the first chapter on a right-hand page, and many open every chapter there. Lacuna starts only the first chapter on a right-hand page unless you turn on All chapters start on a right-hand page in Chapter Type Options. For one section, set its Start Page Side.

Why is there a blank page before my section?

Its Start Page Side is Recto or Verso, or your chapter types start on a right-hand page, and the section would have landed on the other side. Lacuna adds a blank page to get there. Set Start Page Side to Default to let it start on either side.

Why does my chapter’s first page still show its headers and footers?

Because Hide all headers and footers is off in Print Settings › Section Type Options, and that switch decides for every chapter type. A chapter’s own Disable on First Page can show its first page’s headers and footers, but not hide them. Turn the book-wide switch back on: see chapter openings and front matter.

Can one section use a different font?

Yes. Open its Options › Customize Print Settings › Typography, turn on Enable Body Text Override and choose the font. Your print-ready PDF changes; your e-book keeps your book’s font.

How do I remove orphan lines?

For your whole book, set Orphans and Widows in Print Settings › Widows & Orphans: see widows and orphans. For one section, turn on Override Widows & Orphans on its Content tab and set them there.

How to Use Presets

docs.lacuna.pub/book-design/presets/

A preset is a group of styles for a distinct list of elements: section titles, blockquotes, subheadings, text conversations, headers and footers and more. Put an element in a preset group, and it takes that group’s style. Change the group’s style once, and every element in the group updates.

What it does
Gives elements a style from a preset group, so you can change every element in the group at once.
Where to find it
The Preset box: in an element's bar in the editor, at the top of the section heading panels, and in Print Settings, then Page Layouts.
Works in
EPUB, print-ready PDF, ebook PDF and DOCX. Header and footer presets reach the print-ready PDF and DOCX.
Before you start
Your book's original styles are the Default preset group. Every element is in it until you choose another group.

How to use presets

Every book starts with one preset group, Default, which holds all of its original styles. Every element is in the Default group until you put it in another one.

To put an element in a group, choose the group in its Preset box. To make a new group, choose Create New Preset. The pencil beside the box, or the panel itself, styles that group’s preset.

You find the Preset box in three places:

  • In the editor: in an element’s bar, or in the toolbar above it.
  • On section headings: at the top of the Heading Title, Heading Subtitle and Heading Spacing panels.
  • For headers and footers: in Print Settings, then Page Layouts.

Why and when to use presets

A change to the Default group applies to every element of that type that is still in Default. Use more preset groups when you want a variety of styles: a second look for some blockquotes, a different title for your front matter, one conversation style per character.

A group holds one style for each kind of element, so an “Elegant” group can give your section titles, blockquotes and subheadings a matching look.

Change a preset once, update it everywhere

  1. Open the preset’s panel from any element in the group: the pencil beside its Preset box, or a section’s heading panel.
  2. Change what you like.
  3. Click Apply. Every element in the group updates, in every section.

Using presets in the editor

Blockquotes, subheadings, text conversations and the other elements in your text each have a Preset box and a pencil.

Make a preset for an element

  1. Click the Preset box in the element’s bar (for a blockquote, at its foot) to list its presets.
  2. Choose Create New Preset…. Choose a group for it, such as Elegant, or Create a new group, then click Create in Elegant (the button names the group).
  3. Click the pencil beside the box to style the preset.
  4. Click Apply in the panel. Every element using the preset changes.

The element you made the preset from uses it straight away. A new preset starts from Lacuna’s standard look for that element, not from your Default, so your blockquote may change at once (in the clip it turns to small caps). Type in the Preset box to search when you have many.

Where to find the Preset box

Some elements carry the Preset box on the element itself, in the editor. An ornamental break:

An ornamental break in the editor: ORNAMENTAL BREAK, then Preset with its box, then a pencil

A text conversation, at its foot:

A text conversation's foot in the editor: CONVERSATION, then Preset with its box, then a pencil

Others keep it in a menu that opens when you click the element, such as an image’s Caption menu (see Style your captions):

An image's Caption menu: Edit Caption, then Preset with its box and a pencil, then Remove Caption

Using presets on section headings

A section’s title, subtitle and heading spacing each use a preset, chosen in the Preset box at the top of their panel: open the section’s Options menu, then Section Heading Styles, then Heading Title, Heading Subtitle or Heading Spacing. A small green dot beside an item in that menu marks a section that uses a preset.

To make one, choose one, or copy one to other sections, see How to use presets for section titles.

Using presets for headers and footers Print only

Header and footer presets are made in Print Settings, then Page Layouts, which has the same Preset bar as the heading panels. Each section then chooses one for its first page and one for its other pages.

  1. Open the section’s Options menu and choose Customize Print Settings.
  2. Click the Headers & Footers tab.
  3. Turn off Disable on First Page, so the section’s first page can show a header or footer at all.
  4. Choose a preset under Page Layout Preset: First Page for the section’s opening page, Other Pages for the rest.
  5. Click Apply.

To give more sections the same first page, use Apply to Other Sections in the same panel and tick Page Layout Preset (First Page) or Page Layout Preset (Other Pages). See Per-section print settings for the rest of the tab.

See where a preset is used

  1. Open Edit Styles and choose Preset Manager, under Manage.
  2. Click a group to see its presets, with how many there are and how often they are used.
  3. Click a preset. Section Locations lists every section using it, with how many uses there are. A section title preset is listed as Section Title.

The Preset Manager is also where you Rename Group or Delete Group. To move one preset to another group, or delete it, use the … button beside its Preset box.

Deleting a preset sends everything that used it back to Default. The window that asks you to confirm lists where the preset is used, so you know what will change.

Questions

Can I find everything using a preset?

Yes. In the sidebar, click Elements and choose Custom Presets: it lists every element and section heading that uses a preset other than Default. The Preset Manager shows the sections using each preset.

Can I save my whole book’s look, not just one element?

Yes, as a style rather than a preset. A preset is the look of one kind of thing (a heading, a blockquote). A style saved in My Styles carries your book’s settings and can carry its presets too, ready to apply to any book: see My Styles.

How to Save and Reuse Your Own Book Styles

docs.lacuna.pub/book-design/my-styles/

A saved style is your own book’s look, kept as a file you can apply to any book. My Styles is where you save, apply, update, share and delete them.

Lacuna’s own premade styles are on Choose New Style. This page is about the styles you make yourself.

Where to find My Styles

Click New Style in the header bar, then My Styles, beside Premade Styles. The first time, click Set Folder… and choose a folder: every style you save or import is one .lacunastyles file in it, so you can back the folder up or keep it in sync between computers.

Click To
The folder button (Open in Finder)Show your styles folder in Explorer or Finder.
The folder pathWhere your styles are. Each is one .lacunastyles file.
RefreshRead the folder again, after you copy a style file into it.
Change…Keep your styles in another folder. No file is moved.
Search your stylesFind a style by its name, or by a font it uses.
Recent or A–ZSort by last updated, or by name.
NewSave Current Book as Style, Create from Another Book… (from a .lacuna file) or Import Style… (from a .lacunastyles file).

How to save your book’s look as a style

  1. Format a book the way you like it: its styles, its presets, its print settings.

  2. Click New Style, open My Styles, then New › Save Current Book as Style.

  3. Name it, such as Romance, choose what it carries, and click Save Style.

Watch it on how to save and use your own style. To save the look of a book that isn’t open, choose New › Create from Another Book… and pick its .lacuna file.

A style holds how things look, never your text. Heading images and ornamental break images travel with it; fonts travel by name only.

How to choose what a style carries

Style contents starts with everything ticked. Choose a quick set, then tick or untick anything:

Choose To
EverythingTick every setting and every preset.
Settings onlyTick the settings and no presets.
Presets onlyTick the presets and no settings.
NoneUntick everything, then tick what you want.
Column Holds
Settings › Project SettingsDrop Caps, First Paragraph, Heading Image Settings, Book-Wide Formatting, Book Part Settings, Book Volume Settings, Brand Colors.
Settings › Print SettingsTrim Size, Page Layout, Body Typography, Headers & Footers, Page Margins & Chapter Layout, Page Numbering, Footnotes, Page Colors.
PresetsEvery preset in your book, by group, Default first. A group’s box ticks the whole group.

Anything you untick stays out of the style, so a book you apply it to keeps its own. Leave Trim Size unticked, and the style fits books of any page size.

How to apply a saved style to a book

  1. Open the book, click New Style, and open My Styles.

  2. Click a style. Your preview shows your book in it; nothing is saved yet. Click it again to put your book back.

  3. Click Apply Style to Book.

Applied by mistake? Choose Edit › Undo. If the style uses a font you don’t have, Lacuna says so before applying:

Click To
Get Fonts FirstDownload the missing fonts, then apply.
Apply AnywayApply now. Those parts of the style use substitute fonts.
CancelApply nothing.

Everything in a saved style’s menu

Right-click a style, or point at it and click its … button (Style actions).

Choose To
RenameType a new name on the card and press Enter. Its file is renamed too.
Update from This Book…Replace what you tick with this book’s version. Your book doesn’t change.
Export…Save a copy of its .lacunastyles file, to send to someone.
Delete…Move its file to your Recycle Bin or Trash.

A style’s card also shows when it was last updated and how many presets and images it carries.

How to update a saved style from your book

  1. Right-click the style and choose Update from This Book….

  2. Tick what to replace with this book’s version, and click Update (the button names the style).

Updating is permanent for what you tick; unticked parts keep their saved version. Click Export a Copy First to keep the old version as a file. Your book doesn’t change, only the saved style.

The same window opens from New › Save Current Book as Style: choose Update an existing style at the top.

How to share a style with another author

  1. Right-click the style and choose Export….

  2. Choose where to save the .lacunastyles file, and send it.

To bring one in, open My Styles and choose New › Import Style…. A style you already have is noticed: Skip it, or Create Duplicate. A file copied straight into your styles folder shows up after Refresh.

How to rename or delete a saved style

Right-click the style and choose Rename, type the new name and press Enter. The file is renamed too, and no book changes.

To delete, right-click it, choose Delete…, then Delete Style. The file goes to your Recycle Bin on Windows, or the Trash on a Mac, so you can get it back.

Questions

Can I save a style in Lacuna as a new style?

Yes. Open My Styles and choose New › Save Current Book as Style. It then sits beside Lacuna’s premade styles under New Style.

Can I make a template for every book in a series?

Yes. A saved style is your template: save the first book’s look, then apply it to each new book from My Styles.

Why can’t I save a style?

My Styles needs a folder first. Click Set Folder…, choose where your styles should live, and New appears.

Will my style change another book’s page size?

Only if Trim Size was ticked when you saved it. Untick it, and the style keeps each book’s own page size.

Does a style include its fonts?

No. A style names its fonts but doesn’t carry them. If one isn’t installed, Lacuna offers Get Fonts First before applying.

Fonts

docs.lacuna.pub/book-design/fonts/

Every panel that styles text has a Font row: your body text, section titles, subheadings, headers and footers, captions and more. They all work the same way, so what you learn here applies everywhere you choose a font.

What it covers
Choosing a font, the check or warning beside it, its weights, and fonts missing from your computer.
Where you see it
The Font row of any style panel, such as Print Settings, then Body Text.
Matters most in
Your print-ready PDF, which never fakes a style the font does not have.
Before you start
Look for the green check before you settle on a font.

Choosing a font

Click the Font box to list your fonts, type to find one, and click it. Each name in the list is drawn in its own font, and a check mark beside a name marks the font you have now.

Once you choose, a green check or a warning triangle appears beside the Font box. It tells you whether the font can print every style your book may use.

What the check mark and the warning mean

Lacuna looks inside every font for five styles: Regular, Bold, Italic, Bold Italic and Small Caps. A font that has all five gets a green check. Hover over the check to see them.

A Font row with EB Garamond chosen, and the green check's tooltip open: All Styles Available, with Regular, Bold, Italic, Bold Italic and Small Caps

A font that is missing any of them gets a warning triangle instead. Its tooltip lists what is missing, then the styles the font does have.

A Font row with Crimson Text chosen, and the warning's tooltip open: Missing Font Styles lists Small Caps, and Available Styles lists Regular, Bold, Italic and Bold Italic

A print-ready PDF never fakes a style the font does not have. E-readers do their best to fake one, so your ebook may look fine while your printed book does not:

Missing styleIn printIn an ebook
BoldBold text prints at the font’s nearest weight, often Regular.The e-reader thickens the letters.
ItalicItalic text prints upright.The e-reader slants the letters.
Bold ItalicBold italic text prints in the font’s italic, not bold (or upright, if the font has no italic either).The e-reader thickens and slants the letters.
Small CapsSmall caps text prints as ordinary lowercase.The e-reader shrinks capital letters, which can look thin.

Small caps count only when they are real: the font has to carry its own small capital letters, not just claim to. Many good fonts have bold and italic but no small caps, like Crimson Text above, so check before you use small caps in your book.

To pick a font that prints every style, choose it and look for the green check before you click Apply. Serif fonts with every style include EB Garamond, Spectral, Literata, Source Serif 4, Charis SIL and Alegreya.

Weights

The Weight list beside a font offers only the weights that font has. Crimson Text has three:

The Weight list open under Crimson Text, offering Regular, SemiBold and Bold

Some fonts have one weight, others as many as nine.

Opening a book on another computer

If a book uses fonts you don’t have, Lacuna tells you as soon as it opens (A font is missing or Some fonts are missing) and lists them. Click Download fonts to fetch them, or Not now to carry on. Until the fonts are added, the text prints in a stand-in font and won’t match your layout.

Questions

How do I add fonts?

Click + Add beside any Font box and follow the steps. A new font joins every font list, with its own check or warning.

Can I use small caps?

Yes, with a font that has real small caps: the green check, or no Small Caps row in the warning’s tooltip. In print, small caps text set in a font without them prints as ordinary lowercase.

How to Design Chapter and Section Headings

docs.lacuna.pub/book-design/section-headings/

A section heading is everything at the top of a section, before its text: the space around it, the title, the chapter number on a numbered chapter type, the subtitle and a heading image. Each part has its own panel; this page shows what each one is and where to find it.

What it is
The spacing, title, chapter number, subtitle and heading image at the top of a section.
Where you style it
Edit Styles › Section Heading Settings and Chapter Type Settings.
One section different
Its Options › Section Heading Styles, or Add Heading Image.
Works in
EPUB, print-ready PDF and DOCX.

The parts of a section heading

Click a part to see what it is.

The pungent scent of citrus wood oil filled Amber’s nostrils as she wiped down another shelf.

TitleThe section’s name. On a numbered chapter type, Lacuna writes the title for you: the prefix, here “Chapter”, in the title’s style.

From the top, a heading stacks these parts:

Part What it is
Heading spacingThe space above and below the whole heading: Top and Bottom.
TitleThe section’s name, with its font, color, underline and alignment. On a numbered chapter type, Lacuna writes it: the prefix, such as Chapter. See Section Titles.
Chapter numberOn a numbered chapter type only: 1, One, I, or none (Hidden), kept in order. The prefix sits above, beside or below it. See Numbered Chapter Settings.
SubtitleA second line under the title: the name of a numbered chapter type, a narrator. See Section Subtitles.
Heading imageA picture with the heading: before the title, between the title and subtitle, after both, or beside them. See Chapter Heading Images.

A section can also put a picture behind its whole heading: Options › Set Section’s Background › Set Heading Background Image.

Where to style a section heading

Part Every section One section
Heading spacingEdit Styles › Heading SpacingOptions › Section Heading Styles › Heading Spacing
TitleEdit Styles › Heading TitleOptions › Section Heading Styles › Heading Title
Chapter numberEdit Styles › Numbered Chapter SettingsNo: one format for every numbered chapter type in the book. Its font follows the title.
SubtitleEdit Styles › Heading SubtitleOptions › Section Heading Styles › Heading Subtitle
Heading imageEdit Styles › Chapter Heading Images (chapter types only)Options › Add Heading Image

How presets work for section headings

A section’s title, subtitle and heading spacing each use a preset group: Default, until you give the section another. Change Default, and every section still in it changes. To make one section look different (your front matter, a prologue), choose another preset in the Preset box at the top of its panel.

The Edit Styles items open the preset the section you are on uses. A green dot beside an item in Section Heading Styles means that section uses a preset other than Default. To make, choose or copy one, see How to use presets for section titles.

Section types that hide their heading

Some front matter opens with no title, as in most printed books. These section types start with their title and subtitle hidden:

Section type Is its title shown?
Title PageNo. Lacuna builds the whole page; design it in the title page designer.
CopyrightNo, it’s hidden. Show it below.
DedicationNo, it’s hidden. Show it below.
IntroductionNo, it’s hidden. Show it below.
Full Page ImageNo. The page is the image.

Every other section type shows its title and subtitle. A section’s type decides this, not its name: a Default Section titled “Dedication” shows its title.

How to show a hidden section title

  1. Open the section, click Options and choose Customize Section Settings.

  2. On the Display tab, turn on Show Title in Header, then click Apply.

Turn on To show
Show Title in HeaderThe title. On a numbered chapter type, its prefix and number.
Show Subtitle in HeaderThe subtitle.
Show Image in HeaderThe heading image.

Turn one off to hide that part on any section. Apply to Others copies the switches to other sections. To hide a title in print only, use Customize Print Settings › Content › Hide Title (see per-section print settings).

Questions

How do I turn off chapter numbers?

Choose Hidden in Edit Styles › Numbered Chapter Settings › Format: each numbered chapter type opens on its subtitle. Or change them to the Unnumbered Chapter type.

How do I add a different name below each chapter, for several narrators?

Make it the subtitle: click Rename at the top of the section, type the name in the subtitle box and click Save. Style them all in Heading Subtitle.

Can an image separate the chapter number from its name?

Yes. Set the heading image’s Placement to Between Title & Subtitle.

How to Style Chapter and Section Titles

docs.lacuna.pub/book-design/style-section-titles/

A section title is the main line of a section’s heading. Style it in the Heading Title panel, give some sections a look of their own with a preset, and type {break} to start a new line in a title.

Where to find the Heading Title panel

Open When
Edit Styles › Heading TitleTo style the titles of your whole book. Edit Styles is in the bar above the editor.
Options › Section Heading Styles › Heading TitleTo give the open section a title of its own, with a preset.

Both open the same panel, on the preset the open section uses. Most sections use Default, so a change there reaches every section still in Default.

How to style section titles

  1. Open Edit Styles and choose Heading Title.

  2. Change what you like in its tabs. The print preview shows each change as you make it.

  3. Click Apply.

Change a section title’s font, size and case

In the Text tab:

Setting To
FontChoose the title’s typeface.
SizeSet its size, from 4 to 72 pt.
Letter SpacingSpread or tighten the letters, from -5 to 20 px.
WeightChoose how bold it is, and italic.
TransformNone, CAPS, lower or Capitalize, and Small Caps when the font has small caps.

On a numbered chapter type, the Text tab may open with Chapter number has its own text style. It means the chapter number is styled in Numbered Chapter Settings, so these settings leave the number alone. Click Open number text settings to style it there.

Color a section title

In the Colors tab, turn on Enable Colors, then set:

Setting To
Text ColorColor the title. Inherit from Body keeps your text color.
Background ColorPut a band of color behind it. Transparent means none.
WidthFull Width runs the band across the page. Around Text fits it to the title.
Spacing Around TextAdd room inside the band, around the title.

Underline a section title

  1. In the Underline tab, turn on Show Underline.

  2. Set its style, thickness and width, then click Apply.

Setting To
StyleSolid, Dashed, Dotted or Double.
ThicknessSet how thick the line is, from 1 to 10 px.
ColorColor the line. Default follows your book’s border color in print, and prints black when none is set.
Width ModeText Width matches the title. Custom sets a Width in percent.
Distance from TextSet the gap between the title and the line.

Align a section title and set its spacing

In the Position & Spacing tab:

Setting To
AlignmentPut the title at the left, center or right.
Spacing around TitleAdd space around the title. Click Expand to set the top and bottom apart from the sides, or each side on its own.

For the space around the whole heading (image, title and subtitle together), see section headings.

In Print Settings › Page Layouts, drag Section Title from Page Elements into a header or footer area. On a numbered chapter type it shows the number, such as Chapter 3. See How to choose what your headers and footers show.

How to use presets for section titles

Every section’s title uses Default, your book-wide title style, until you give it another. To style some titles differently, make a preset: a named title style that any section can use. Change the preset later, and every section using it changes with it.

Make a preset for a section title

  1. Open the section, then its Options menu. Choose Section Heading Styles, then Heading Title. The Preset box shows Default.
  2. Click the … button beside Preset and choose Create New Preset.
  3. Type a name for it, such as “Elegant”, and click Create Group and Preset. The panel now edits your new preset.
  4. Style it in the panel’s tabs.
  5. Click Apply. The section’s title now uses your preset.

A new preset starts from Lacuna’s standard title look, not from your Default, so check its size and spacing before you apply.

Choose a preset for a section title

  1. Open the section’s Options menu, then Section Heading Styles, then Heading Title.
  2. Choose a preset in the Preset box. A Switched from badge shows the change is not saved yet.
  3. Click Apply.

Copy a section title preset to other sections

  1. Open Heading Title for a section that uses the preset.
  2. Click Apply to Others.
  3. Leave Title Style ticked under Settings to Apply: it is ticked when the window opens.
  4. Tick the sections under Sections to Apply To, then click Apply.

Apply to Others stays grey while this section’s title is on the Default preset, or while a preset change is unsaved. Point at it to see why. The same window can copy Subtitle Style and Spacing too.

How to start a new line in a section title

Type {break} in a section, part or volume title where the new line should start. The heading breaks there in print, in the e-book and in the DOCX. Everywhere else the title reads as one line.

  1. Click Rename above the editor. Or right-click the section in the sidebar and choose Rename.

  2. Type {break} where the new line starts, such as Chapter 7{break}Don’t come down to the six.

  3. Click Save.

Hover the info icon beside Save (in a rename window, the Tokens label) to see the tokens you can type. It turns blue once your title holds one.

Lacuna sets the title of a numbered chapter type for you, so type {break} in its subtitle instead, or convert it to the Unnumbered Chapter chapter type.

Where The title
The heading in the print-ready PDF, the EPUB and the DOCXStarts a new line at each {break}.
The contents page, running heads, PDF bookmarks and the e-reader’s chapter menuReads as one line, with a space for each {break}.
The sidebar and the bar above the editorReads as one line. Rename shows the {break}.

How the editor shows a title with a line break

Above the editor, a title that uses {break} shows in blue, on one line. Hover it to see why. In the sidebar, its right-click menu says Rename (Uses Tokens), so a rename keeps the break.

Questions

Can I use small caps for chapter titles?

Yes, when the title’s font has small caps. Choose Small Caps under Transform in the Text tab.

How do I change the chapter title font?

Open Edit Styles › Heading Title and choose a Font in the Text tab.

Can I underline chapter titles?

Yes. Turn on Show Underline in the Underline tab, then choose a solid, dashed, dotted or double line.

How do I give a numbered chapter a name?

Type it in its subtitle: Lacuna sets the title of a numbered chapter type (“Chapter 1”) for you. See Section Subtitles.

How to Add and Style Section Subtitles

docs.lacuna.pub/book-design/style-section-subtitles/

A subtitle is the line under a section’s title, such as a numbered chapter type’s name under “Chapter 1”. Add one when you rename the section, style every subtitle in the Heading Subtitle panel, and give some sections their own look with a preset.

How to add or remove a subtitle on a section

  1. Click Rename at the top of the section.

  2. Type the subtitle in the subtitle box, then click Save.

To remove a subtitle, clear the subtitle box and click Save. Right-clicking the section in the sidebar and choosing Rename opens the same two boxes, Title and Subtitle.

To keep a subtitle but leave it off the page, open the section’s Options › Customize Section Settings › Display and turn off Show Subtitle in Header.

Chapter Types shows this on a numbered chapter type, where the subtitle carries the chapter’s name.

How to style section subtitles

Every subtitle is styled in the Heading Subtitle panel. Open it any of these ways:

From Choose
Options menuOptions › Section Heading Styles › Heading Subtitle
Edit StylesEdit Styles › Heading Subtitle, under Section Heading Settings
E-reader previewHover the section’s heading and click Subtitle

The panel edits the preset of the section you have open: Default, your book-wide subtitle look, until you give that section a preset of its own. Its settings are on four tabs; click Apply to save them. The Title Page and Full Page Image section types have no Section Heading Styles.

Text

Setting To
FontChoose the typeface.
SizeSet the size, in points.
Letter SpacingTighten or loosen the space between letters.
WeightSet how heavy the letters are. Italic beside it sets the subtitle in italics.
TransformNone, CAPS, lower or Capitalize, and small caps when the font has them.

Colors

Setting To
Enable ColorsTurn on the settings below.
Text ColorColor the subtitle. Inherit from Body keeps your text color.
Background ColorPut a colored band behind it. Transparent means no band.
WidthFull Width runs the band across the page; Around Text hugs the subtitle.
Spacing Around TextSet the room inside the band, around the subtitle.

Underline

Setting To
Show UnderlineDraw a line under the subtitle.
StyleSolid, Dashed, Dotted or Double.
ThicknessSet the line’s thickness.
ColorColor the line. Default follows your print Border color, and prints black when none is set.
Width ModeText Width matches the subtitle; Custom sets a Width in percent.
Distance from TextSet the gap between the subtitle and its line.

Position & Spacing

Setting To
AlignmentSet the subtitle left, centered or right.
Spacing around SubtitleSet the space outside the subtitle: all four sides together, in pairs (Top & Bottom, Left & Right), or each side alone.

How to use presets for section subtitles

Every section’s subtitle uses Default, your book-wide subtitle style, until you give it another. To style some subtitles differently, make a preset: a named subtitle style that any section can use. Change the preset later, and every section using it changes with it.

A preset lives in a group. Put your subtitle preset in the same group as your section title preset, such as Elegant, and the two make one look.

Make a preset for a section subtitle

  1. Open the section, then its Options menu. Choose Section Heading Styles, then Heading Subtitle. The Preset box shows Default.

  2. Click the … button beside Preset and choose Create New Preset.

  3. Choose a group for it, such as Elegant, and click Create in Elegant. Or click Create a new group, type a name, and click Create Group and Preset. The panel now edits your new preset.

  4. Style it in the panel’s tabs.

  5. Click Apply. The section’s subtitle now uses your preset.

A new preset starts from Lacuna’s standard subtitle look, not from your Default, so check its size and spacing before you apply.

Choose a preset for a section subtitle

  1. Open the section’s Options menu, then Section Heading Styles, then Heading Subtitle.

  2. Choose a preset in the Preset box. A Switched from badge shows the change is not saved yet.

  3. Click Apply.

A green dot beside Heading Subtitle in the menu means the section uses a preset of its own.

Copy a section subtitle preset to other sections

  1. Open Heading Subtitle for a section that uses the preset.

  2. Click Apply to Others.

  3. Leave Subtitle Style ticked under Settings to Apply: it is ticked when the window opens. Tick Title Style too to copy the section’s title preset with it.

  4. Tick the sections under Sections to Apply To, then click Apply.

Apply to Others stays grey while this section’s subtitle is on the Default preset, or while a preset change is unsaved. Point at it to see why.

How to start a new line in a section subtitle

{break} works in a subtitle the same way as in a title: type it in the subtitle box where the new line starts. See how to start a new line in a section title.

In Print Settings › Page Layouts, drag Section Subtitle from Page Elements into a header or footer area. A section with no subtitle leaves that spot empty, and a {break} reads as a space. See How to choose what your headers and footers show.

Questions

How do I add a subtitle to a chapter?

Click Rename at the top of the chapter, type the subtitle in the subtitle box, and click Save.

Why didn’t my change reach every subtitle?

Heading Subtitle changes the preset of the section you have open. Sections on another preset keep theirs: open one of them to change that preset, or copy your preset to them.

How to Format Chapter Numbers

docs.lacuna.pub/book-design/style-chapter-numbering/

Lacuna numbers every numbered chapter type for you. Numbered Chapter Settings decides how that number reads (Chapter 3, Three, III or a format of your own), the word before it, and how the number looks.

One setting for every numbered chapter type in your book. It works in your EPUB, print-ready PDF and Word document (DOCX).

How to choose a chapter number format

  1. Click Edit Styles and choose Numbered Chapter Settings.

  2. On Format, choose a format, then click Apply.

Format Chapter 3 printsChapter 24 prints
Chapter + Number Chapter 3Chapter 24
Chapter + Number (padded) Chapter 03Chapter 24
Chapter + Spelled Chapter ThreeChapter Twenty-four
Chapter + Spelled (capitalized) Chapter ThreeChapter Twenty-Four
Chapter + Roman Chapter IIIChapter XXIV
Number Only 324
Number Only (padded) 0324
Spelled Only ThreeTwenty-four
Spelled Only (capitalized) ThreeTwenty-Four
Roman Only IIIXXIV
Hidden No Chapter 1 line at all, prefix and number. The subtitle alone, or no heading when there is no subtitle.

In a book of 24 numbered chapter types.

  • Padded adds a zero only when your book has 10 or more numbered chapter types: Chapter 03 of 24, but Chapter 3 of 7. In a box set, each volume pads to its own count.
  • Spelled capitalizes the first word (Twenty-four); (capitalized) capitalizes every word (Twenty-Four). For one-word numbers they look the same.

The examples on the cards in the app show chapter 42.

How to show only the subtitle on numbered chapter types

Hidden removes the whole “Chapter 1” line, the prefix and the number, so each numbered chapter type opens on its subtitle alone. Choose it when you number chapter types to keep your book in order but want only each chapter’s name on the page.

  1. On Format, choose Hidden.

  2. Click Apply.

Where With Hidden
The chapter's headingNo “Chapter 1” line. The subtitle alone; with no subtitle, the chapter opens straight into its text.
Contents, sidebar, PDF bookmarksEach chapter is listed by its subtitle alone.
Running headsUse Section Subtitle in your headers and footers to show the chapter's name.

To take a chapter out of the count altogether, change it to the Unnumbered Chapter type instead.

How to write your own chapter number format

Turn on Custom Number Format to write the whole number line yourself: any words you like, with a token where the number goes.

  1. On Format, turn on Custom Number Format.

  2. In Number Format, type your words and click a token to add the number.

  3. Check the Preview, then click Apply.

Token Click Chapter 3 prints
{number}Number3
{paddedNumber}Padded Number03
{roman}RomanIII
{spelled}SpelledThree

To change a number’s case, type :upper, :lower or :title inside its braces: {roman:lower} prints iii.

You type Chapter 3 prints
No. {paddedNumber}No. 03
{spelled}Three
Chapter {spelled:lower}Chapter three
{spelled:upper}THREE
· {roman} ·· III ·
Book {roman:lower}Book iii

In a book of 10 or more numbered chapter types, for the padded number.

  • The Preview always shows chapter 42.
  • Nothing you type is refused. Text in braces that isn’t a token prints as you typed it. With no token at all, a warning shows beside Number Format and your numbered chapter types print a plain number.
  • Your words look like your section title; the number takes the Number Text style.
  • The custom format writes the whole line, so the Chapter Prefix tab does nothing while it is on. Turn it off to go back to the format you had.

How to change the chapter prefix

The prefix is the word before the number. Change the word, put it above, beside or below the number, and set the space between them.

  1. Open the Chapter Prefix tab.

  2. Change the Prefix, the Placement or the Spacing Between, then click Apply.

Setting To
PrefixChange the word: Ch., Lesson, Day. Leave it empty for your book's language's word for chapter.
PlacementPut the prefix Above the number, on the Same Line, or Below it.
AlignmentOn the same line, line up a small prefix with a big number at its Bottom, Center or Top.
Spacing BetweenAdd space between the prefix and the number, in pixels.

The Only formats (Number Only, Spelled Only, Roman Only) and Hidden print no prefix.

The prefix always looks like your section title: same font, size, weight, case and color. Change it in section titles.

How to style the chapter number on its own

The number looks like your section title until you turn on Custom Styling. Then it gets its own font, size and color, while the prefix keeps the title’s look.

  1. Open the Number Text tab and turn on Custom Styling.

  2. Change the settings, then click Apply.

Setting To
FontSet the number in another font, or Section Title Font.
SizeMake it bigger or smaller, from 6 to 72 points.
Letter SpacingSpace out its letters or digits.
WeightMake it lighter, bolder or italic.
TransformSet it in CAPS, lower or Capitalize, or None.
Text ColorColor the number, or Inherit from Title.
Background ColorPut the number on a colored block. Spacing Around Number then sets the room inside it.

With Custom Styling on, changing your section title no longer changes the number: the Heading Title panel says so, with a button back here.

Chapter number styles you can make

A few looks built only from these settings, with your section title’s font for the prefix.

Looks like Settings
Chapter3
Chapter + Number, Placement Above. Number Text: another font at 48 pt. Prefix in Small Caps from your section title.
Chapter 3
Chapter + Number, Same Line, Alignment Center. Number Text: 36 pt.
IIIChapter
Chapter + Roman, Placement Below, Spacing Between 6 px.
THREE
Spelled Only. Number Text: Transform CAPS, Letter Spacing 3 px.
3
Number Only. Number Text: Text Color white, Background Color dark, Spacing Around Number 6 px.
Chapter 3
Chapter + Number. Number Text: a Text Color.
· III ·
Custom Number Format · {roman} ·.
The Bilberry Weeks
Hidden, with each chapter's name as its subtitle.

Chapter numbers in other languages

Spelled numbers and the default prefix follow your book’s Language, set in book metadata: Chapitre Trois in French, Capítulo Tres in Spanish, Kapitel Drei in German. Digits and Roman numerals stay the same.

Type your own Prefix to use another word.

Questions

How do I turn off chapter numbers?

Choose Hidden on Format: the whole “Chapter 1” line goes, and each numbered chapter type shows only its subtitle, in your contents too. Or change your chapters to the Unnumbered Chapter type and name them yourself.

How do I put a name under each chapter number?

Make it the chapter’s subtitle: click Rename at the top of the chapter. Style it in section subtitles.

Why do Chapter + Spelled and Chapter + Spelled (capitalized) look the same?

They differ only for numbers of two words: Twenty-four or Twenty-Four. Chapter Three is the same in both.

Why doesn’t my chapter number change when I change my section title?

Custom Styling is on in Number Text. Turn it off, and the number follows your section title again.

Why does my custom format print a plain number?

It has no token. Click Number, Padded Number, Roman or Spelled to add one.

Why doesn’t my padded number show a zero?

Your book has fewer than 10 numbered chapter types, so no number needs one.

How to Add Chapter Heading Images

docs.lacuna.pub/book-design/chapter-heading-images/

A heading image is a picture that sits with a section’s title: above it, below it or beside it. Set one picture for every chapter type at once, or give one section a picture of its own.

How to add a heading image to every chapter type

  1. Click Edit Styles and choose Chapter Heading Images.

  2. Click Upload Chapter Header Image, or Browse Existing Images to use a picture already in your book.

  3. Click Apply.

The picture goes on every section whose type is a chapter type: Numbered Chapter or Unnumbered Chapter. Other section types, such as a Prologue or an Epilogue, don’t get it; give them one of their own (see below).

How to change a heading image’s size

The Image tab shows the picture with its dimensions and file size.

Setting To
Maximum WidthSet the widest the picture can be, as a percentage of the text’s width. A picture is never stretched past its own size.
Alt TextDescribe the picture for readers who use a screen reader.
Remove ImageTake the picture off.

How to move a heading image above or below the title

  1. Open the Position & Spacing tab.

  2. Choose a Placement, then click Apply.

Choose To
Before Section TitlePut the picture above the title.
Between Title & SubtitlePut it between the title and the subtitle.
After Title & SubtitlePut it under the whole heading, just above the text. Every heading image starts here.
AlignmentLine it up on the left, center or right.
Spacing Around ImageAdd space above and below it (Top / Bottom) or beside it (Left / Right).

The Position & Spacing tab opens once the heading has a picture.

How to put a heading image beside the title

  1. On Position & Spacing, turn on Side by Side.

  2. Choose an Image Side and what it sits Beside, then click Apply.

Choose To
Image SidePut the picture on the Left or Right of the text.
Beside: TitleSet the picture beside the title. The subtitle stays below it on its own.
Beside: Title & SubtitleSet the picture beside both.

A side-by-side picture lines up the same way as what it sits beside. Beside the title, it moves with the title’s alignment. Beside the title and subtitle, give your section title and section subtitle the same alignment: when they differ, the picture goes to its own edge of the page and the title and subtitle keep to theirs.

Publishing to Amazon? Choose Amazon (Kindle) or Multiple stores when you export your EPUB, so Kindle gets a side-by-side heading made for it.

How to add a heading image to one section

  1. Open the section, click Options and choose Add Heading Image.

  2. Click Upload Section Header Image, or Browse Existing Images.

The picture shows right away, and its panel has the same Image and Position & Spacing tabs. On a chapter type, a section’s own picture takes the place of the one in Chapter Heading Images.

To Do this
Give several sections one pictureSelect them in the sidebar (hold Ctrl/Cmd and click each), right-click one and choose Set Heading Image.
Copy a section’s picture to othersClick Apply to Others in its panel and choose the sections.
Show no pictureIn Options › Customize Section Settings › Display, turn off Show Image in Header.
Show no picture in printIn Options › Customize Print Settings › Content, turn on Hide Image.
Put a chapter type back on the book’s pictureIn Options › Edit Heading Image, click Remove Image.

A title page, a table of contents and a full-page image have no heading image.

Questions

How do I put an image before the chapter title?

On Position & Spacing, set Placement to Before Section Title.

Can the image go between the chapter heading and the text?

Yes. That is where it starts: After Title & Subtitle puts it under the heading, just above the text.

Do heading images show in the e-book?

Yes. They are in your EPUB, your print-ready PDF and your Word document.

Why doesn’t my Prologue or Epilogue show the heading image?

Chapter Heading Images go only on chapter types (Numbered Chapter and Unnumbered Chapter). Give any other section its own from Options › Add Heading Image.

How to Add and Style Drop Caps in Your Book

docs.lacuna.pub/book-design/style-drop-caps/

A drop cap is the large first letter that drops into the opening lines of a paragraph. Chapter types open with one: style it once for your whole book, move it, add more, or bring them in from your Word document.

Which section types get a drop cap

Both chapter types, numbered and unnumbered, open with a drop cap. Other section types, such as a Prologue or an Epilogue, have none until you give them one.

Where To
Edit Styles › Drop Caps › Enable Drop CapsTurn drop caps off, or back on, in your whole book.
Options › Customize Section Settings › Drop CapGive one section a drop cap, or take it away.
Paragraph menu › Set as First Paragraph (Drop Cap)Move a section’s drop cap to a different paragraph.
Paragraph menu › Force Drop CapAdd more than one drop cap to a section.

Drop caps show in the preview and in your exported book, not in the editor.

How to style your drop caps

One style for every drop cap in your book.

  1. Choose Edit Styles › Drop Caps, in the header bar.

  2. Change the Text and Spacing tabs, then click Apply.

Text Sets
FontThe letter’s font. Chapter Font uses the font of your text.
SizeHow big the letter is, in points.
WeightHow bold it is, and whether it is italic.
ColorIts color. Inherit Text Color matches your text.
Spacing Sets
Letter HeightHow tall the letter’s space is, so how many lines sit beside it.
Spacing around letterThe space between the letter and your text. Click Expand to set the top and bottom apart from the sides.

Enable Drop Caps, above the tabs, turns every drop cap in your book off or on. The letter is always a capital.

How to fit the drop cap to your text

Change Letter Height and the bottom of Spacing around letter together until the letter sits snug against your text. Check it in your print preview.

  1. In Edit Styles › Drop Caps, click Spacing.

  2. Change Letter Height, then click Apply.

How to turn the drop cap on or off in one section

  1. Open the section, then Options › Customize Section Settings.

  2. Set Drop Cap and click Apply.

Choose To
DefaultFollow the section type: chapter types have one, other section types don’t.
EnabledGive the section a drop cap, whatever its type.
DisabledTake its drop cap away.

How to move a drop cap to a different paragraph

Move a section’s drop cap down when its first paragraph is a photo credit, an epigraph or a date line.

  1. Click in the paragraph that should have the drop cap, and open its paragraph menu: the gear at its top right.

  2. Tick Set as First Paragraph (Drop Cap).

In a section type with no drop cap of its own, such as an Epilogue, this gives the section one. Untick it to move the drop cap back. Which paragraph counts as a section’s first is on first paragraph styling.

How to add more than one drop cap to a section

Give another paragraph a drop cap too, such as the first one after an ornamental break.

  1. Click in the paragraph and open its paragraph menu.

  2. Tick Force Drop Cap. Repeat on as many paragraphs as you like.

The section keeps its own drop cap, and the paragraph’s first-line indent goes. Untick it to remove the drop cap.

Drop caps from your Word document

Put drop caps in Microsoft Word on the paragraphs that should have them, and Lacuna puts them in the same places when you import. Their look comes from Edit Styles › Drop Caps.

How to add drop caps in your Word document

  1. In Microsoft Word, click in the paragraph.

  2. Choose Insert › Drop Cap › Dropped.

  3. Repeat for every paragraph that should open with a drop cap, each chapter’s first paragraph included.

Google Docs and LibreOffice don’t keep drop caps in a Word document. Add those in Lacuna after you import, from each paragraph’s paragraph menu.

Where your Word drop caps go in Lacuna

In your Word document In Lacuna
A section’s first drop capThe section’s drop cap, on that paragraph (Set as First Paragraph (Drop Cap)). A section type with none of its own, such as an Epilogue, gets one.
Every drop cap after it in the sectionAnother drop cap (Force Drop Cap).
No drop cap in a section of a chapter typeThe chapter type’s own drop cap, on its first paragraph.

So in a section of a chapter type whose only drop cap in Word is further down, the drop cap goes there, not at its start. Give its first paragraph one too.

Export your book as a Word document and import it again, and every drop cap stays where it was.

Questions

How do I remove the big first letter of a chapter?

That’s the drop cap. Turn off Enable Drop Caps in Edit Styles › Drop Caps for your whole book, or set that section’s Drop Cap to Disabled in Options › Customize Section Settings. A whole first line in capitals is first paragraph styling.

Why isn’t my drop cap showing?

Drop caps show in the preview and your exported book, not in the editor. Only chapter types have one on their own: for a section of another type, set its Drop Cap to Enabled. A paragraph inside a blockquote, list, table or callout box never gets one.

Can I change the drop cap’s font?

Yes. Choose it in Edit Styles › Drop Caps › Text › Font.

How do I change the space around a drop cap?

Set Spacing around letter on the Spacing tab. Click Expand to set the top and bottom apart from the sides.

How to Style Your First Paragraph and First Line

docs.lacuna.pub/book-design/style-first-paragraph/

The first paragraph of your chapter types can open with its first line in small caps or a larger size. You can choose which paragraph counts as the first, give the look to any section type, and repeat it after ornamental breaks and subheadings.

Where to find first paragraph settings

Open To change
Edit Styles › First Line StylingEvery chapter type: how the first line looks, and where the look repeats (Apply After).
A section’s Options › Customize Section SettingsOne section: its First Paragraph card holds First Line Style, Drop Cap and Indent First Paragraph.
A paragraph’s gear menuOne paragraph: Set as First Paragraph (Drop Cap) and Apply First Line Style.

How to style the first line of your chapter types

  1. Choose Edit Styles › First Line Styling.

  2. Set Text Style and Font Size, and click Apply.

Setting Choose
Text StyleNormal or Small Caps.
Font SizeXS or S for a smaller first line, L or XL for a larger one. M is your text’s size.
Apply After › Ornamental BreaksRepeat the look after each ornamental break. See below.
Apply After › Subheadings (H1-H6)Repeat the look after each subheading, at every level.

Both chapter types get it: Numbered Chapter and Unnumbered Chapter. A section named “Chapter 5” of another section type doesn’t. It shows in the preview and in your exported book, not in the editor.

How to choose which paragraph is the first

A section’s first paragraph is its first paragraph of text. When your section opens with something else, such as a date line or a photo credit, set the paragraph where your text really starts as the first.

  1. Click in the paragraph and open its paragraph menu (the gear).

  2. Tick Set as First Paragraph (Drop Cap).

The drop cap, the first-line style and the start at the margin all move to it. Paragraphs above it look like any other paragraph. If you tick it on several paragraphs, the first one counts.

Watch it in how to move or add a drop cap. Importing a Word document? A drop cap in it sets the first paragraph for you; see drop caps.

How to repeat the first-line style after breaks and subheadings

At first, only a section’s first paragraph gets the look. Apply After gives it to the paragraph right after each ornamental break or subheading too, so each new passage opens the same way.

  1. In Edit Styles › First Line Styling, under Apply After, turn on Ornamental Breaks, Subheadings (H1-H6), or both.

  2. Click Apply.

The paragraph after each one also starts at the margin, like a section’s first paragraph. For one paragraph anywhere else, tick Apply First Line Style in its paragraph menu. It is greyed out, with the reason, in a section whose first-line styling is off.

How to give any section type first-line styling

Only chapter types get first-line styling on their own. To give it to a Prologue, an Epilogue or any other section type:

  1. Open the section, then Options › Customize Section Settings.

  2. Under First Paragraph, set First Line Style to Enabled and click Apply.

Choose To
DefaultFollow your book: on in chapter types, off in other section types.
EnabledTurn it on in this section, in the look set in Edit Styles › First Line Styling.
DisabledTurn it off in this section, after breaks and subheadings too.
Small CapsTurn it on in this section, in small caps whatever your book’s Text Style, at your book’s Font Size.

To give other sections the same, click Apply to Other Sections. See how to copy your section’s changes.

How first paragraph styling works with drop caps and indentation

With What happens
Drop capsThe first paragraph gets both: the drop cap, and the first-line style beside it. Turn either off and the other stays. A paragraph with Force Drop Cap gets the first-line style too.
IndentationThe first paragraph starts at the margin while Remove Indentation of First Paragraph is on, as it is at first. With Apply After on, so does the paragraph after each break or subheading.

Questions

Does Set as First Paragraph (Drop Cap) move the small caps too?

Yes. The first-line style and the start at the margin move with the drop cap, to the paragraph you tick.

Why doesn’t my prologue have small caps?

Only chapter types get first-line styling on their own, and Prologue is a section type of its own. Set the prologue’s First Line Style to Enabled, as in how to give any section type first-line styling.

How do I indent the first line of a paragraph?

First Line Styling changes how the first line looks, not where it starts. Indents are in Edit Styles › Indentation; see indentation.

Can I use small caps for headings?

Yes, for section titles. In Edit Styles › Heading Title, set Transform to Small Caps (offered when the title’s font has small caps). See section titles.

How to Justify Text and Hyphenate Words

docs.lacuna.pub/book-design/justification-and-hyphenation/

Justified text ends every line at the same right edge, and hyphenation splits a word at a line end so the gaps between words stay even. Lacuna turns both on for every book.

Change them for your EPUB and print-ready PDF together, or one at a time, in Edit Styles › Justification & Hyphenation. To decide where one word breaks, teach it to the Hyphenation Dictionary.

Where to set justification and hyphenation

Open To set
Edit Styles › Justification & HyphenationYour whole book: justification and hyphenation, in your EPUB and print-ready PDF.
Print Settings › Justification & HyphenationThe same panel, opening on its Print tab when e-book and print are set apart.
Edit › Hyphenation Dictionary…Where one word may break, or that it never breaks, in your print-ready PDF.
Edit Book Metadata › LanguageThe language whose rules your words break by.
The pencil on a list, columns or gridThat element alone. Each follows your book until you change it.

How to turn justification on or off

  1. Choose Edit Styles › Justification & Hyphenation.

  2. Turn Justify body text on or off and click Apply.

Off, each line ends where its last word ends, so the right edge is ragged. The preview shows the change before you apply it, in the e-reader and in print.

It sets your paragraphs. Titles, captions and lists have their own alignment, and a paragraph you Align Center or Align Right in the editor toolbar keeps that.

How to turn hyphenation on or off

  1. Choose Edit Styles › Justification & Hyphenation.

  2. Turn Enable automatic hyphenation on or off and click Apply.

Off, no word is split at a line end, and the rules below disappear from the panel. Justified lines then stretch their word spaces further to fill the line, so most books keep it on.

How to set the hyphenation rules

With Enable automatic hyphenation on, the panel shows two more cards.

  1. In Edit Styles › Justification & Hyphenation, set the rules under Hyphenation Rules and Word Splitting.

  2. Click Apply.

Hyphenation Rules To Works in
Hyphenate capitalized wordsLet names and other capitalized words break. Off to start, so they stay whole.Print
Hyphenate last wordLet the last word of a paragraph break. Off to start, so a paragraph never ends on a piece of a word.Print and e-book
Keep hyphenated words on one pageMove a line that ends with a hyphen at the foot of a page to the next page, so no word is split across pages. Off to start.Print
Most hyphenated lines in a rowHow many lines in a row may end with a hyphen, 1 to 5. Starts at 2.Print and e-book
Word Splitting To Works in
Shortest word to hyphenateWords with fewer letters are never split, 4 to 10. Starts at 6.Print and e-book
Fewest letters before a breakHow many letters stay on the line before the hyphen, 1 to 5. Starts at 2.Print and e-book
Fewest letters after a breakHow many letters carry to the next line, 1 to 5. Starts at 3.Print and e-book

Your print-ready PDF follows every rule. Your EPUB carries the rules marked for e-books to the reader’s app, which breaks the lines itself: Apple Books, Kobo, Nook and Google Play read them, and Kindle splits words its own way. The amber triangle beside each card lists the same readers.

How to set e-book and print differently

The panel starts with Apply to both formats on, so one All Formats tab sets your EPUB and your print-ready PDF together.

  1. At the top of the panel, turn off Apply to both formats. The panel splits into an eBook tab and a Print tab.

  2. Set each tab and click Apply.

Turn Apply to both formats back on and print takes the e-book’s settings. The panel opens with it off whenever the two formats differ. Opened from Print Settings, it lands on the Print tab.

How to teach Lacuna where a word breaks

A name, an invented word or a technical term can break in the wrong place. The Hyphenation Dictionary holds the words you decide for.

  1. Choose Edit › Hyphenation Dictionary….

  2. Click Add words, choose the Language, and type one word per line with a hyphen wherever it may break, such as Han-ni-bal. A word with no hyphen, such as Lacuna, never breaks.

  3. Click Add words under the list.

Each word in the list has a Never break switch, a pencil to change its breaks and a trash to remove it. The dictionary is kept on your computer, by language, and every book you format on it uses the words. It changes your print-ready PDF only: e-readers break words themselves.

The Word lists button beside Add words imports or exports a plain text file with one word per line, so you can carry your words to another computer. To open the dictionary from the keyboard, give Open Hyphenation Dictionary a shortcut.

How your book’s language changes hyphenation

Words break by the rules of your book’s language, so English (U.S.) and English (GB) split the same word differently. Set it in Edit Book Metadata › Book Details › Language; see what your book’s language changes. Dictionary words belong to a language too: a word you add for English (U.S.) applies to every book in English (U.S.).

Questions

How do I justify text in Lacuna?

Your text is justified already. If it isn’t, choose Edit Styles › Justification & Hyphenation, turn on Justify body text and click Apply.

Can I left-align one paragraph?

No. Align Left in the editor toolbar changes nothing in your EPUB or print-ready PDF: justification is set for your whole book. Align Center and Align Right do work on one paragraph.

Why are there wide gaps between the words?

A justified line with no hyphen stretches its spaces to reach the edge. Keep Enable automatic hyphenation on, and for print turn on Adjust word spacing and the Paragraph Optimizer in Body Text.

How do I stop a name being split?

Hyphenate capitalized words is off to start, so names stay whole in print. For a word in lower case, add it to the Hyphenation Dictionary with no hyphen.

Why does Kindle split words differently from the preview?

Kindle breaks words with its own engine, so the hyphenation rules don’t reach it. Switch the device preview to a Kindle to see your pages as it shows them.

How to Indent Paragraphs and Quotations

docs.lacuna.pub/book-design/style-indentation/

Lacuna indents the first line of every paragraph in your chapters, except the first paragraph after the title. You can change how far it indents, indent the first paragraph too, turn indents off, and move quotations and whole sections in from the left edge.

Where to find indentation settings

Open To indent
Edit Styles › IndentationEvery chapter: how far first lines indent, and the first paragraph.
A section’s Options › Customize Section SettingsOne section: whether its paragraphs indent, its first paragraph, and whole elements from the left edge.
The pencil on a blockquoteQuotations, from the left and right.
A paragraph’s gear menuOne paragraph, including hanging indents.

How to indent a whole section’s elements

Element Indentation moves everything in a section in from the left edge, every line and not just the first: the nonfiction look where subheadings sit to the left of the text.

  1. Open the section, then Options › Customize Section Settings.

  2. Under Element Indentation, set Spacing From Left Edge.

  3. In Applies To, untick anything that should stay at the margin, such as a subheading level, and click Apply.

To give other sections the same indent, click Apply to Other Sections. See how to copy your section’s changes.

How to change the indent size

  1. Choose Edit Styles › Indentation.

  2. Set Indent Size and click Apply.

The preview shows each change before you apply it. The size is used in every section that has indents, not just chapters.

Choose To
Disable All IndentationTurn off first-line indents everywhere, in your EPUB and print-ready PDF.
Indent SizeSet how far the first line of each paragraph moves in, in px.
Remove Indentation of First ParagraphStart the first paragraph after a section’s title at the margin. On by default.

How to indent the first paragraph

The first paragraph after a section’s title starts at the margin. To indent it like the rest:

  1. In Edit Styles › Indentation, turn off Remove Indentation of First Paragraph.

  2. Click Apply.

For one section only, open its Options › Customize Section Settings and set Indent First Paragraph to Enabled or Disabled. To make a later paragraph the first, tick Set as First Paragraph (Drop Cap) in its paragraph menu.

How to turn off indentation in your whole book

  1. In Edit Styles › Indentation, turn on Disable All Indentation.

  2. Click Apply.

Your paragraphs then have space between them instead, set in Paragraph Spacing › Indentation Disabled.

How to indent one section

Only chapters are indented by default. To indent a prologue, epilogue or any other section, or to take a chapter’s indents away, see how to add or remove indentation in your section.

How to indent a quotation

Make the quotation a blockquote: it sits in from your text on the left and the right. You set how far in the blockquote’s own style; see how to style blockquotes.

Questions

How do I indent quotations?

Make it a blockquote, which sits in from both sides of your text. To change how far, see how to style blockquotes.

How do I indent the first line of a paragraph?

Chapters are indented already: set how far in Edit Styles › Indentation › Indent Size. For one paragraph, set First-Line Indent in its paragraph menu.

Why aren’t my paragraphs indented?

Only chapters are indented by default. For any other section, set Indent All Paragraphs to Enabled in its Options, and check that Disable All Indentation is off.

How do I make hanging indents?

In the paragraph menu, set a Left Indent and a First-Line Indent of the same amount below 0. See how to make a hanging indent.

Why is the paragraph after an ornamental break indented?

Only a section’s first paragraph starts at the margin. To start the paragraph after each break or subheading there too, turn on Apply After › Ornamental Breaks or Subheadings (H1-H6) in First Line Styling.

How to Set the Space Between Paragraphs

docs.lacuna.pub/book-design/paragraph-spacing/

Paragraph spacing is the gap below each paragraph, before the next one. Lacuna keeps two values for your whole book: one for sections whose paragraphs are indented, and one for sections with block paragraphs, which have no indent and a gap between them instead.

Set both in Edit Styles › Paragraph Spacing. The same values are used in the e-reader preview, your EPUB and your print-ready PDF.

Which spacing a section uses

Section Uses
A chapter typeIndentation Enabled, since its paragraphs are indented.
Every other section typeIndentation Disabled: block paragraphs, separated by the gap.
A section whose Indent All Paragraphs you setThe value that matches it: Enabled uses Indentation Enabled, Disabled uses Indentation Disabled.
Every section, once Disable All Indentation is onIndentation Disabled, because nothing is indented any more.

The panel marks the value your chapter types use with Active.

How to set the space between indented paragraphs

Chapter types are indented, so the indent already shows where each paragraph starts. Most books keep this at 0.

  1. Choose Edit Styles › Paragraph Spacing.

  2. Under Indentation Enabled, set Spacing and click Apply.

The preview shows each change before you apply it.

Choose To
Indentation Enabled › SpacingThe gap below each paragraph in indented sections, in px. A new book starts at 0.
Indentation Disabled › SpacingThe gap below each paragraph in block sections, in px. A new book starts at 16.
ActiveMarks the value your chapter types use right now. It moves to Indentation Disabled when Disable All Indentation is on.

How to set the space between block paragraphs

Block paragraphs have no indent, so this gap is what separates one from the next. A new book starts at 16 px.

  1. Choose Edit Styles › Paragraph Spacing.

  2. Under Indentation Disabled, set Spacing and click Apply.

A section that has no indent for any reason uses this value: every section type but chapter types, a section whose Indent All Paragraphs is Disabled, and every section once Disable All Indentation is on in Indentation.

How to give one section the other spacing

The spacing follows the section’s indent, so switch its indent. Open the section, then Options › Customize Section Settings, set Indent All Paragraphs to Enabled or Disabled, and click Apply. See how to add or remove indentation in your section.

There is no spacing value for one section alone: a section is either indented, with the Indentation Enabled spacing, or block, with the Indentation Disabled spacing.

Questions

How do I remove the space between paragraphs?

Set Indentation Disabled › Spacing to 0 and click Apply. If a chapter type shows gaps, check that Indentation Enabled › Spacing is 0 and that Disable All Indentation is off in Indentation.

How do I change the line spacing?

Line spacing is the distance between the lines inside a paragraph, not between paragraphs. Set it in Print Settings › Body Text › Line Spacing; see set the size and line spacing.

Where do I change the spacing in my book?

Between paragraphs, here in Paragraph Spacing. Between lines, in Body Text. Above and below section titles, in Edit Styles › Heading Spacing; see section headings.

Should my Word document be single or double spaced?

Either. Lacuna sets the space between paragraphs and the line spacing from its own settings, so the spacing in your Word document does not carry over.

How to Export Your Book as an EPUB

docs.lacuna.pub/publish-book/export-book-epub-file/

Click Generate and choose Generate E-Book to save your book as an EPUB, ready to upload to a store. The same window checks your book first, makes a file for one store or one for each, and exports an e-book PDF.

How to export an EPUB

  1. Click Generate at the top right and choose Generate E-Book.

  2. Under Store, choose the store you will upload to (see How to make an EPUB for one store).

  3. Click Generate E-Book and choose where to save it.

When it’s done, click Open Folder to find your file, or Open File to open it.

With Store on Any, keep Format on EPUB 3.0: it’s the right choice for every store. EPUB 2.0 is only for very old e-readers.

How to use the Pre-Flight Check

The Pre-Flight Check on the right checks your book every time the window opens. A failed check has a Fix button (a wrench) that takes you where to fix it.

Check What it means
Cover ImageRequired. Your book needs a cover (Book Metadata, Cover Image tab).
ISBNA suggestion. Add your eBook ISBN in Book Metadata if you have one.
Image Alt TextA suggestion. Every picture should have a description for screen readers.

Suggestions never block generating. If the section where your body matter begins was deleted or hidden, it shows under Required too.

How to make an EPUB for one store

Every store reads e-books its own way, and some books only look right in a file built for that store. Choose a store and Lacuna builds the file just for it, with your store links pointing at it.

Choose What Lacuna builds
AnyOne file for anywhere, in the Format you pick.
Amazon (Kindle)Pictures beside a section title laid out the way Kindle shows them, columns kept to one column (Kindle’s converter breaks them), and see-through pictures set on white.
Apple BooksThe standard file, with store links to Apple Books.
Barnes & NobleA paragraph that starts with a drop cap never ends a page, so the big letter can’t move to the next page alone on Nook.
KoboA .kepub.epub file, Kobo’s own format, which Kobo’s e-readers open in Kobo’s own reader instead of the Adobe one they use for plain EPUBs.
Google PlayNo styling that Google Play removes and warns you about, so your upload comes back clean, and title and part pages centered on Android screens.

A store’s file is always EPUB 3.0, named for its store: My Book (Amazon).epub.

How to export one EPUB for each store

  1. Under Output, click Multiple stores.

  2. Click a store to leave it out or put it back. Link found means your book has a store link for it.

  3. Click Choose folder and pick where the files go.

  4. Click Generate 6 E-Books (the button counts your files).

Each store gets its own file in that folder, named for it: My Book (Apple Books).epub. Generic is a file for anywhere that isn’t one of these stores. Lacuna remembers the folder for next time.

How to export an e-book PDF

An e-book PDF is your e-book as fixed pages, for advance copies and selling directly. For a printed book, export a print-ready PDF instead.

  1. Under Store, choose Any, then click PDF under Format.

  2. Set the page, then click Generate E-Book.

Setting To
Trim SizeChoose the page size.
Margin SizeSet the space between the page edge and your text, on every side.
Full-Bleed CoverMake your cover fill its whole page, edge to edge. Turn it off to keep the cover inside the margins.

Questions

Why doesn’t my e-book look right on Kindle, Kobo or Nook?

Some features need the file built for that store. Choose the store under Store, generate its file, and upload that one.

I get warnings when I upload to Google Play. What do I do?

Generate the Google Play file: choose Google Play under Store. It leaves out the styling Google Play’s checks remove, so those warnings don’t come back.

How do I download my finished e-book?

Lacuna saves it straight to your computer, wherever you choose when you click Generate E-Book. Click Open Folder in the message that follows to find it.

Can I export an EPUB on the free trial?

No. Everything else works on the trial, but Generate needs a license.

Do I need an ISBN?

No. The ISBN is a suggestion and never stops you from exporting.

Why can’t I click Generate E-Book?

A required check failed, usually a missing cover. Click Fix beside it. To export without fixing it, click Generate Anyway at the bottom left.

How to Export Your Book as a Print-Ready PDF

docs.lacuna.pub/publish-book/export-print-ready-pdf/

Click Generate and choose Generate Print PDF to save your book’s pages as a print-ready PDF, ready to upload to a print-on-demand service such as Amazon KDP, IngramSpark or Lulu. The same window shows your final page size and adds bleed when your printer asks for it.

How to export a print-ready PDF

  1. Click Generate at the top right and choose Generate Print PDF.

  2. Click Generate Print-Ready PDF and choose where to save it.

When it’s done, click Open Folder to find your file, or Open File to open it. The PDF has your book’s pages, not its cover.

Under Interior Color, you can choose Black & White or Full Color. They make essentially the same PDF, in your book’s own colors: the only difference is the tint on the little page in the window. To see how your pages look in gray, turn on Grayscale Mode in the print preview settings.

If the section where your body matter begins was deleted or hidden from print, the window lists it under Pre-Flight Check: click Fix to choose another. To export without fixing it, click Generate Anyway at the bottom left.

How to check your page size

Your PDF takes two things from your print settings. Every page is your trim size, the size of the printed book. Your margins decide where your text and your headers and footers sit on each page. Set them in Trim Sizes and Page Margins.

The card at the top of the window shows the size of every page in your PDF.

The card says It means
No bleed in this PDFEvery page is your trim size.
Bleed margins are included in this PDFEvery page is larger than your trim size by the bleed. Your trim size shows beside the final size.

Click Change trim size to choose another size: the window closes and the Trim Size panel opens.

How bleed works

Bleed is extra paper around each page that the printer trims away, so a picture that runs to the edge has no white line. Lacuna adds it to your PDF on its own when something in your book reaches the page edge:

Your book has Bleed
A full-page image set to Full BleedAdded on its own
A page background or heading background set to Full BleedAdded on its own
Printed edgesAdded on its own
None of theseNone, unless you turn on Force Bleed

Bleed only adds paper around each page. Your margins are measured from the trim, so your text and page count stay the same. How much bleed, and on which edges, is one setting for your whole book: Amount and Edges, on the Margins panel’s safe zone (see bleed), or in this window once Force Bleed is on.

How to use Force Bleed

Some printers ask for bleed on every page, even when nothing in your book reaches the edge. Lulu, for example, wants 0.125 in of bleed on all four edges of every interior file (see Lulu’s guide to full bleed). Without it, Lulu adds white space around your pages. Force Bleed adds that bleed.

  1. Turn on Force Bleed.

  2. Edges switches to All four edges, which Lulu wants. Set Amount to what your printer asks for.

Choose To
AmountSet how far each page grows past the trim. Amazon KDP, IngramSpark and Lulu want 0.125 in. If you're not sure, use 0.125 in.
Three outer edgesAdd bleed to the top, bottom and outside edge. Amazon KDP and IngramSpark ask for this.
All four edgesAdd bleed to the binding edge too. Lulu and BookVault ask for this.

Lacuna saves Force Bleed with your book. It shows only when nothing in your book bleeds on its own.

How to fix a warning after you export

Your PDF is saved either way. A warning in the window means something may not print the way you expect.

Warning What to do
Font Coverage Issues DetectedSome characters aren't in your font and may print as blank squares. Click View Font Report to see each one, its font and its pages.
Check Your Printed EdgesYour printed edges template doesn't match your book's page count or page size. Click Review Template to open PrintedEdges.

Questions

Why does my PDF not match the one in the previewer?

Make sure you generated a print-ready PDF (Generate Print PDF), not an e-book PDF. The print preview uses your print trim size and margins; the e-book PDF comes from Generate E-Book, with its own page size and margins.

Can I make a printed book with Lacuna?

Yes. Lacuna makes the print-ready PDF of your book’s pages, which you upload to a print-on-demand service such as Amazon KDP, IngramSpark or Lulu. The PDF doesn’t include your cover.

How do I download my print-ready PDF?

Lacuna saves it straight to your computer, wherever you choose when you click Generate Print-Ready PDF. Click Open Folder in the message that follows to find it.

Is my PDF ready for Amazon KDP?

Yes, once your trim size and margins meet KDP’s. The Margins panel checks your margins against Amazon KDP, IngramSpark or Lulu for your page count: see check your safe zone against your printer.

Can I export a print-ready PDF on the free trial?

No. The print preview works on the trial (with a DEMO watermark), but Generate needs a license.

How to Export Your Book as a Word Document (DOCX)

docs.lacuna.pub/publish-book/export-docx-file/

Click Generate and choose Generate DOCX to save your formatted book as a Word document (.docx). It keeps your sections, headings, notes, pictures and styling, on the same page as your print book unless you choose another.

How to export a Word document

  1. Click Generate at the top right and choose Generate DOCX.

  2. Click Generate DOCX and choose where to save it.

When it’s done, click Open File to open it, or Open Folder to find it. The file is named after your book’s title.

How to set the page size and margins

Your Word document starts on your print book’s page: the same size and margins, with facing pages mirrored as in print. Change either one to give the Word document a page of its own.

Setting To
Page SizeChoose any print trim size, or a paper size: A3 or US Legal.
Top, BottomSet the margins above and below your text.
Inside, OutsideThe side margins while the page follows print: inside by the spine, outside by the page’s edge.
Left, RightThe side margins once you change the page, the same on every page.
Use the print pageGo back to your print book’s page.

While your Word document follows print, a new trim size or new margins for your print book change it too. Your page is saved with your book and changes only the Word document, never your print book.

Margins show in inches or millimeters, as you choose under Page measurements in Lacuna Settings.

What your Word document keeps

In your book In your Word document
SectionsEach one starts a new page. Hidden sections are left out.
Section titles and subtitlesWord’s Heading 1 and Heading 2, in your title’s style.
SubheadingsWord headings below them, Heading 3 and down.
Body textWord’s own font, size and spacing, so it stays easy to edit, with your indents and drop caps.
Quotes, callouts, lists, tables, grids, captions, text conversations, ornamental breaksThe look your book gives them, in the fonts you chose. Lacuna puts those fonts in the file.
Footnotes and endnotesWord’s own footnotes and endnotes, where your book puts them.
PicturesIn place, with their captions and alt text.
LinksWorking links to websites and to other sections.
Running heads and page numbersWord headers and footers, as on your printed pages.
Table of contents and indexWord’s own. Right-click one in Word and choose Update Field to fill it in.
Blocks inside table and grid cellsLists, blockquotes, callout boxes, tables and pictures stay inside their cell.
Your book’s detailsWord’s File › Info: your title, author and the rest of your book metadata.

Questions

Can I turn my Lacuna book into a Word document?

Yes. Click Generate, choose Generate DOCX, and save it. You can export it as often as you like.

Can I make a 6 x 9 Word document?

Yes. Under Page Size, choose 6 x 9 in. If your print book is 6 x 9, the Word document already is.

Why does my table of contents say “Right-click and select ‘Update Field’”?

Word builds its own table of contents. Right-click it in Word and choose Update Field, and Word lists your sections with their page numbers.

Why isn’t my body text in my book’s font?

Lacuna leaves body text in Word’s own font and size, so your Word document stays easy to edit. Everything you styled, such as titles, quotes and callouts, keeps its look.

Can I export a Word document on the free trial?

No. Everything else works on the trial, but Generate needs a license.

Lacuna's Trial and the Full Version

docs.lacuna.pub/account-licensing/lacuna-trial-vs-full-version/

Format your whole book in the trial, with every feature and no time limit. You pay once, $149, when you are ready to generate your final files.

What you can do in each

Feature TrialFree, no time limit Full version$149 once
Format your book
Import your Word document ✓ ✓
Arrange sections, front and back matter ✓ ✓
All 32 pre-made styles, presets and fonts ✓ ✓
Images, footnotes, endnotes, tables and every other element ✓ ✓
As many books and pen names as you want ✓ ✓
Preview your book
E-reader previews, such as Kindle, Kobo and Apple Books ✓ ✓
Print preview The trial’s pages carry a DEMO watermark. It goes away when you activate your license. DEMO watermark Clean pages
Generate your final files
Generate E-Book An EPUB for e-book stores, or a PDF e-book ✕ ✓
Generate Print-Ready PDF A print-ready PDF for your paperback or hardcover ✕ ✓
Generate DOCX A Word document of your formatted book ✕ ✓

Buy when your book is ready: activate your license in the app and Generate turns on, with your book just as you left it.

Questions

Do I lose my work when I buy?

No. You keep working in the same app. Open Help, choose Activate License, and paste your license key: Generate turns on, with your book just as you left it. See manage your license.

Is there a time limit on the trial?

No. Take as long as you need, and format as many books as you like.

Why are all sales final?

Because the trial lets you try every feature on your own book first, for as long as you like. You only buy once you know Lacuna works for you.

Is Lacuna a subscription?

No. You pay once and keep every update. See pricing and plans.

Can I format books for other authors?

Yes. You can use your license to format books for clients. We can only give technical support to the license owner, not to the authors you format for.

Format your book with Lacuna

See pricing Download Lacuna

Manage Your Lacuna License

docs.lacuna.pub/account-licensing/manage-lacuna-license/

Your license turns on Generate in Lacuna. Activate it on each computer you use, and move it to a new computer whenever you need to.

What it does
Activating turns on Generate: your EPUB, print-ready PDF and DOCX.
Where to find it
The key near the bottom of the side menu on the right, or the Help menu.
How many computers
As many at once as your license covers: one, two or three.
Before you start
Have your license key ready. It comes by email when you buy.

How to activate your license

  1. Click the red key near the bottom of the side menu on the right, then Activate with license key. Or open the Help menu and choose Activate License.
  2. Paste your license key from your purchase email.
  3. Click Activate Now!
The Activate License window, with a box for your license key and an Activate Now! button

Generate turns on right away, with your book just as you left it. The key in the side menu turns gray, and its tooltip now says Manage License.

How to see your license

Click the key near the bottom of the side menu, or open the Help menu and choose License Manager. The License Manager shows that your license is active, what it lets you generate, and who it is registered to.

The License Manager: the license is active, can generate e-books and print, and has a Deactivate license for this computer button

How to move your license to another computer

Your license is active on as many computers at once as you bought: one, two or three. To use it on a different computer, deactivate it on one you no longer need, then activate it on the new one.

  1. Open the License Manager on the computer you are leaving.
  2. Click Deactivate license for this computer.
  3. Activate your license on the new computer with the same key.

Do this before you sell, replace or reset a computer. If you can no longer open Lacuna on the old one, email support@lacuna.pub and we’ll move your license for you.

Questions

Where is my license key?

It comes by email when you buy. If you can’t find it after a few minutes, check your spam or junk folder, then email support@lacuna.pub.

My license says it is already active on too many computers

Your license is active on every computer it covers. Deactivate it in the License Manager on a computer you no longer use, then activate it again. If you can’t reach that computer, email support@lacuna.pub.

Can I use my license on Windows and on a Mac?

Yes. Your license key works in Lacuna on Windows, Mac and Linux, and each computer counts once, whatever it runs.

Do I need to pay for updates?

No. Every license includes every update. See Lacuna software updates.

I want to use Lacuna on more computers

Licenses cover one, two or three computers. See pricing and plans, or email support@lacuna.pub and we’ll help.

How to Update Lacuna to the Latest Version

docs.lacuna.pub/account-licensing/lacuna-software-updates/

Lacuna looks for a new version each time you open it and shows a notice on the home screen when one is ready. Nothing downloads until you click, and every update is free with your license.

How to check for updates

On Windows and Linux, open a book, then choose Help › Check for Updates from the menu bar. On a Mac, choose Lacuna › Check for Updates… from the menu bar, on the home screen or in a book.

If you have the latest version, a message says No updates available. You have the latest version! If a newer one is out, the Software Update Available window opens with what is new in it. Click Update Now to install it, or Skip This Version to close the window.

How to install an update

  1. Save and close your book. Lacuna restarts as soon as the download finishes.

  2. On the home screen, click the update is ready notice at the foot of the left column, then click Start download.

  3. Keep Lacuna open while the bar fills. Lacuna restarts on the new version.

The notice says What to do
Lacuna v… update is readyClick it to see what is new in that version.
New in v…Read the highlights, then click Start download. All updates on lacuna.pub opens the full list.
Downloading v…Keep Lacuna open. It restarts on the new version when the bar fills.
Oops! There was an error.Click the link under it to download the new version from lacuna.pub, then run the installer.

The trial updates the same way as the full version, and your license stays active.

What is new in each version

The notice lists the highlights of the version it offers. For every version, click All updates on lacuna.pub in the notice, or open lacuna.pub/updates.

Questions

Are updates free?

Yes. Every license includes every update, and the trial updates the same way. See pricing and plans.

Where can I see what changed in each version?

At lacuna.pub/updates. The update notice in Lacuna lists the highlights of the version it offers.

How do I upgrade my license to two or three computers?

That is a license change, not a software update. See pricing and plans for the two and three computer licenses, or email support@lacuna.pub.

The update failed. What do I do?

Click the download link in the notice, or go to lacuna.pub and download the new version for your computer, then run the installer.

Create Your First Book in 5 Minutes

docs.lacuna.pub/getting-started/create-first-book-fast/

Coming soon.

How Lacuna Can Make You More Money

docs.lacuna.pub/publish-book/make-more-money/

Coming soon.